This article was co-authored by Jessica Banh. Jessica Banh is a Pastry Chef and the Owner of Fancy Flavors in San Jose, California. With over 12 years of technical experience, Jessica has expertise in a wide variety of pastry techniques and has a focus on macarons. Her work has been featured in The SF Chronicle, The Mercury News, and Good Morning America. She received her training from The Professional Culinary Institute.
This article has been viewed 25,929 times.
Drip cakes are beautiful, delicious confections you can create in the comfort of your own kitchen. Make a traditional layer cake in a flavor of your choice. After making and icing the cake, refrigerate it for at least an hour. Then decorate the drip cake with a ganache glaze created from heavy cream and white, dark, or milk chocolate.
Ingredients
- 1 12-inch layer cake, preferably round
- 7 cups (1656 mL) icing for the cake
- 12 ounces (340 grams) white, dark, or milk chocolate
- 12 ounces (340 grams) heavy cream
- Food coloring
- Candy for decoration
- Serves about 25 people
Steps
Making the Cake
-
1Bake a layer cake. The best drip cakes are created from layer cakes. Try baking a triple layer cake with three round cake pans. You can choose any flavor you want. Strawberry, vanilla, and chocolate are all great choices for a drip cake with ganache glaze.[1]
- You can also use a boxed cake mix to make your cake.
-
2Ice the cake. Once you bake the cake of your choice, let it cool completely. Make sure you let the cake cool at room temperature until it is cool to the touch. You should not feel any warmth coming from the cake. This should take about 20-30 minutes. Once the cake is cool, ice it.
- You can use any type of icing, like buttercream or fondant.
- You can also used store-bought icing.
Advertisement -
3Refrigerate the iced cake. You will need to refrigerate the cake before you can cover it in dripping ganache glaze. Place the iced cake in the refrigerator and allow it to cool for at least 60 minutes.


Creating the Ganache Glaze
-
1Decide on a color. You can turn the ganache glaze for your drip cake into any color of the rainbow by adding food coloring to white chocolate. You can also go for a more traditional ganache glaze by sticking with milk or dark chocolate.[2]
- If you want to create a black ganache, just start with dark chocolate. This way, you'll need to add less food coloring.
-
2Place the chocolate and heavy cream in a microwave-safe bowl. Locate a medium sized bowl that is safe to use in the microwave, like a glass bowl. Place the chocolate in the bottom of the bowl. Pour the heavy cream over the chocolate.[3]
-
3Microwave the chocolate and cream for 60 seconds. Place the bowl in the microwave. Microwave the ingredients for around 60 seconds. Remove the bowl from the microwave and stir the ingredients with a wooden spoon.
-
4Microwave for additional 30-second segments. After stirring the chocolate and cream, return the bowl of ganache to the microwave. Microwave for another 30 seconds, remove the bowl from the microwave, and stir. If the chocolate is not completely melted, heat for a second 30-second segment.[4]
- The finished glaze should be silky and free from lumps.
- If your cake is really cold, then your drip can be a little bit warmer. If your drip is a little too cold, then your cake should be a little bit warm. It might take some tries to figure out that sweet spot.
-
5Add food coloring. If you want to make a colorful ganache glaze, now is the time to add food coloring to the chocolate and cream. Try using a gel or paste in the color of your choice. Add the food coloring to the glaze by slowly squeezing the tube or by small spoonfuls. Keep adding the coloring bit by bit until you get the color you desire.[5]
- You should only add food coloring to a white chocolate ganache glaze.
- Do not use liquid food coloring as this will make the glaze too runny.


Decorating the Drip Cake
-
1Take the chilled cake out of the refrigerator. It is important that your cake is quite cold when you glaze it. A cold cake will slow down the dripping process, helping to create a controlled drip environment. A warm or room temperature cake will allow the glaze to run over the cake too quickly, making a runny mess of your culinary creation.
-
2Use a spoon or better yet, a piping bag with a snipped end, if you have one, to drip the glaze on the sides of the cake. Start at the top of the cake, near the edge. Take a spoonful of glaze and slowly let it drip down the side of the cake from the top. You can also use a piping bag to create the drips. Create drips around the entire cake, spacing them about half an inch or 1.25 centimeters apart.[6]
- Avoid dumping too much glaze on top of the cake as this can create a mass of unwanted drips.
-
3Fill in the top of the cake with the remaining glaze. Once you have created the desired amount of drips along the sides of your cake, use the rest of the glaze to cover the top of the cake. Gently spoon the glaze on the top of the cake. Spread the glaze out after you apply each spoonful. Make sure the top is entirely covered with an even layer of the glaze.[7]
- It's okay if extra drips form while you glaze the top of the cake.
-
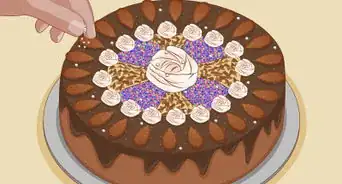
4Decorate the cake. Add character to the cake by placing edible decorations on the top, or scattered around the base of the cake. For example, you can add colorful lollipops and candies to the top of a cake dripped in pink chocolate. Or try decorating a cake glazed in milk chocolate with peanut butter cups broken in half, chopped peanuts, and chocolate candies.[8]


Expert Q&A
-
QuestionHow to make black drip icing?
 Maria ShortMaria Short is a Baker and the Owner of Short N Sweet Bakery & Cafe in Hilo, Hawaii. With over 24 years of experience, she specializes in specialty desserts and wedding cakes. She graduated from L’Academie de Cuisine’s Pastry Arts Program with honors and studied at Baltimore International Culinary College. In 2019, Maria competed in the 6th season of the Food Network’s Holiday Baking Championship. In 2010, she had a cake named one of “America’s Most Beautiful Cakes” by Brides magazine.
BakerStart off with dark chocolate and color the cream with black food coloring. Then, either heat up your cream to boiling and add it to the melted chocolate or melt the two ingredients together.
Warnings
- When using candy melts, you need to add heavy cream and make a false ganache to reach a good dripping consistency. Never thin it down with water or milk, since the water content will end up ruining your chocolate.⧼thumbs_response⧽
Things You'll Need
- Spatula
- Microwave-safe bowl
- Microwave
- Oven
- Spoon
Expert Interview
Thanks for reading our article! If you'd like to learn more about making a drip cake, check out our in-depth interview with Maria Short.
References
- ↑ https://www.realsimple.com/food-recipes/cooking-tips-techniques/baking/how-to-frost-a-cake
- ↑ https://www.craftsy.com/blog/2016/04/drip-cake/
- ↑ https://www.mycakeschool.com/recipes/ganache-drip-recipe/
- ↑ https://www.craftsy.com/blog/2016/04/drip-cake/
- ↑ https://www.craftsy.com/blog/2016/04/drip-cake/
- ↑ https://www.craftsy.com/blog/2016/04/drip-cake/
- ↑ https://www.craftsy.com/blog/2016/04/drip-cake/
- ↑ http://halifaxbloggers.ca/isaynomato/chocolate-and-peanut-butter-drip-cake/
About This Article

To make a drip cake, start by baking and icing a cake and then chilling it in the fridge for at least 60 minutes. Then, microwave chocolate and heavy cream for 60 seconds to make the ganache. Afterwards, stir the ingredients, microwave for another 30 seconds, and stir until the chocolate is completely melted. Next, take the cake out of the fridge and use a spoon to drip the glaze on the sides of it. Finally, cover the top with the remaining glaze, making sure to spread out the glaze in an even layer after each spoonful. For more tips, like how to make colored chocolate ganache for your drip cake, read on.