This article was co-authored by wikiHow Staff. Our trained team of editors and researchers validate articles for accuracy and comprehensiveness. wikiHow's Content Management Team carefully monitors the work from our editorial staff to ensure that each article is backed by trusted research and meets our high quality standards.
This article has been viewed 161,312 times.
Learn more...
Cutoff t-shirts are fantastic for showing off your muscles at the gym or while exercising outside. They are easy to make as well. All you need is a t-shirt you want to cut up, an old pair of scissors, and something to mark the t-shirt with, like some chalk or a pen. Try transforming one of your old shirts into a cutoff t-shirt to help showcase your muscles during your next workout.
Things You Should Know
- Fold your shirt in half so that the sleeves overlap so that your cuts are symmetrical.
- Cut your sleeves off using scissors; mark your cut ahead of time if you aren’t using the seam as a guideline.
- The wider your armholes are, the more of your body will be visible from the side.
Steps
Making a Basic Cutoff Shirt
-
1Gather your materials. Making a cutoff shirt is easy, and no sewing is required. To make a cutoff t-shirt, you will need:[1]
- T-shirt
- Scissors
- Chalk or pen
-
2Fold the shirt in half. It is important for your cutoff t-shirt’s sleeves to be even, or you may end up looking lopsided. To ensure that your armholes are even when you cut them, start by folding the shirt in half lengthwise.
- Make sure that the sleeves are matching up.
Advertisement -
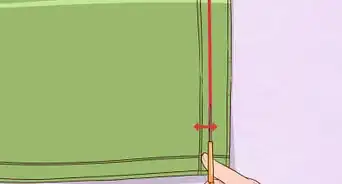
3Mark where you want the new armholes to end. Next, locate the place on the shirt where you want the new armholes to begin and end, then mark the shirt in these places. You can also mark how far in you want the sleeves to go. However, keep in mind that the deep into the shirt you cut, the more of your chest will be visible.
- Try marking just above, beside, and below the current sleeve to guide you as you cut the sleeves off.[2] Remember that you can always make the armholes larger if desired, but you cannot make them smaller after you cut them.
-
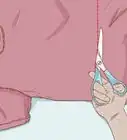
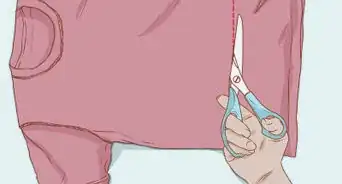
4Cut the sleeves off. Once you are happy with the placement of your sleeves, you can cut off the old sleeves. Cut along the points you marked in a slightly curving line.[3] Try to avoid making any jagged edges as you cut.
- If you do end up with a jagged edge, you can always cut in a little more.
-
5Tug the armholes gently to curl the fabric. After you have cut off the sleeves, give the new armholes a gentle tug.[4] This will curl the t-shirt fabric around the new edges you have created and soften the look a little bit. After this, your cutoff t-shirt is ready to wear.


Customizing Your Cutoff
-
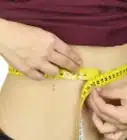
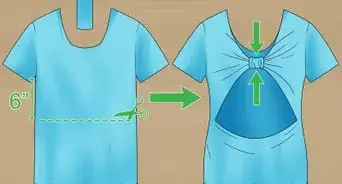
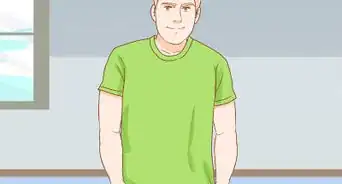
1Make larger armholes. The wider you make the armholes, the more of your body will be visible from the side.[5] Therefore, it is important to carefully consider how large you want to make your armholes. Try a small cut and see how it looks on you before cutting too far down. You can always cut more, but you cannot put the fabric back after you cut it.
- For example, if you cut your armholes down to the middle of the shirt, then your ribs and the side of your abs will be visible. Don’t cut down too far if you are not comfortable showing off these muscles.
-
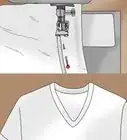
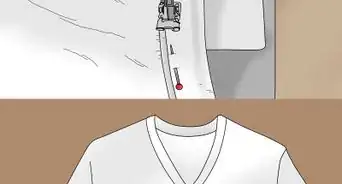
2Cut out the neckline. You can simply cut around the neckline to widen it a little, or cut way outside of the neckline to widen it a lot. If you prefer a deep v-neck shirt, then you can also cut a V shape out of the front of the shirt.[6] [7]
- Try cutting close to the neckline and see how that looks first. The more of the neckline you cut, the more of your chest, back, and shoulders will be visible.
-
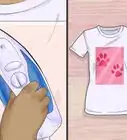
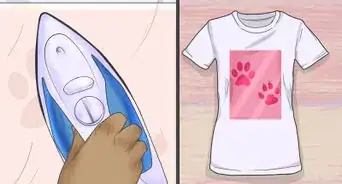
3Trim off the hem. Trimming off the hem is more for a uniform appearance than anything else, but cutting off the hem can shorten the length of the shirt by a little or a lot. Try cutting off the hem close to the seam at first to give the bottom of the shirt the same curved appearance as the arm holes. Then, give the hem a gentle tug to curl it up like the sleeves.[8]
- If desired, you can trim the hem more to make it shorter.


References
- ↑ http://www.theblondielocks.com/how-to-turn-a-t-shirt-into-a-muscle-shirt/
- ↑ http://www.theblondielocks.com/how-to-turn-a-t-shirt-into-a-muscle-shirt/
- ↑ http://www.theblondielocks.com/how-to-turn-a-t-shirt-into-a-muscle-shirt/
- ↑ http://www.theblondielocks.com/how-to-turn-a-t-shirt-into-a-muscle-shirt/
- ↑ https://www.autostraddle.com/cut-up-your-t-shirt-59606/
- ↑ http://www.theleangreenbean.com/diy-workout-tank-top/
- ↑ https://www.autostraddle.com/cut-up-your-t-shirt-59606/
- ↑ http://www.theblondielocks.com/how-to-turn-a-t-shirt-into-a-muscle-shirt/
About This Article

To make a cutoff shirt, take a T-shirt and fold it in half lengthwise. Make sure the sleeves line up. Use a fabric marker or a piece of chalk to mark where you want the new armholes to be. Carefully cut the sleeves off along the lines you marked with a pair of sharp fabric scissors. Gently tug on the edges of the new armholes to make the fabric curl up a little. Your new cutoff shirt is ready to wear. Keep reading to learn ways you can customize your shirt, like cutting off the neckline or the hem!