This article was co-authored by Mia Danilowicz. Mia Danilowicz is a Master Tailor who works onset and on the red carpet in Los Angeles, California. With over a decade of experience, Mia specializes in bridal and gown couturier fittings, garment reconstruction, and custom design. Mia has worked at the Oscars, Grammys, SAG Awards, and Golden Globes. Her clients include a long list of entertainment and fashion industry headliners, major fashion magazines, luxury consumer brands, and popular media. Mia was trained at the Fashion Institute of Design and Merchandising and received her AA in Fashion Design and BS in Business Management.
There are 31 references cited in this article, which can be found at the bottom of the page.
This article has been viewed 30,925 times.
Harem pants are billowy, flowing pants that are popular among belly dancers. However, anyone can try this unique and comfortable fashion trend. To make easy DIY harem pants, choose a lightweight, flowing fabric, use a pair of your own shorts to get the right fit, and then start cutting and sewing to create your harem pants.
Steps
Choosing Materials for the Pants
-
1Measure from your belt-line to the floor, double it, and add 20 cm (7.9 in). If you prefer to wear your pants higher in the back and lower in the front, then start measuring from the highest point where you will wear the pants. This measurement will help you to determine how many yards of fabric to purchase. You will also need this measurement when it is time to cut the fabric for the pant length, so be sure to write it down.[1]
- For example, if your measurement is 75 cm (30 in), then double it for a total of 150 cm (59 in). Then, add 20 cm (7.9 in) for a final total of 170 cm (67 in). This is equal to about 1.85 yd (1.69 m), so you would need to round up and plan to purchase 2 yd (1.8 m) of fabric.
-
2Purchase your required amount of a fabric that is loose and gauzy. Harem pants should feel loose and move well when you walk and dance in them. Opt for a fabric that is lightweight and flexible.[2] Gauzy cotton, silk, satin, chiffon, georgette, and jersey are all great options.[3]
- You can choose any color of fabric you like. Go with a solid color, a print, or a fabric that has been embellished, such as with sequins.
Advertisement -
3Choose wide elastic for the waist and narrow elastic for the ankles. The waist elastic should be about 2 to 2.5 cm (0.79 to 0.98 in) wide and the ankle elastic should be about 5 mm (0.20 in) wide. Purchase enough of the wide elastic to fit around your waist with a 2 cm (0.79 in) allowance and enough of the narrow elastic to fit around each of your ankles plus an extra 4 cm (1.6 in).[4]
- For example, if your waist is 60 cm (24 in), then opt for a piece of elastic that is 62 cm (24 in). If the circumference of each of your ankles is 17 cm (6.7 in), then double that for a total of 34 cm (13 in) and add 4 cm (1.6 in) for a total of 38 cm (15 in).
-
4Get a pair of shorts that fit you loosely. The shorts will provide a guideline for creating the crotch and inseam of your harem pants. Make sure that the shorts are loose on you and that you can fit a hand in between your leg and the shorts while you are wearing them. If you don’t have a pair of shorts, then pants will also work as long as they are loose.[5]
Tip: You may also purchase a pattern for making harem pants. This may be a better option if you want to ensure the perfect fit or if you are making the pants for someone else.
Marking and Cutting the Fabric
-
1Lay your fabric out on a flat, clean surface and fold it in half. Fold the fabric so that the shortest edges are lined up and the wrong (back or inside) of the fabric is facing out. Smooth out the fabric to ensure that there are no lumps or bumps.[6]
- If your fabric is wrinkled or has creases in it, then you may want to iron it first to ensure that it will lay flat. This is optional, but it will make cutting and sewing the fabric much easier.
-
2Turn your shorts inside out and fold them in half. The inseam of the shorts needs to be exposed since it will be your guide for marking the fabric. Invert the shorts and fold them so that the legs are lined up.[7]
- You may also tuck 1 leg into the other leg if needed to make the inseam easier to see.
-
3Position the shorts waistband 4 cm (1.6 in) from the fold. Measure to ensure that the waistband is the correct distance from the fold. Then, position the crotch of the shorts about 1 cm (0.39 in) from the raw edge of your fabric. Adjust the shorts as needed to get the positioning right and ensure that the waistband is parallel to the fold.[8]
- Leaving space will provide fabric for the waistband casing and pantleg inseam.
-
4Trace the inseam 1 cm (0.39 in) from the curve. Use a fabric marker or chalk to create this line. Make sure that the line goes all the way from the edge of the fabric next to the crotch up to the top of the fold above the waistband.[9]
- The 1 cm (0.39 in) will provide the seam allowance when you sew the crotch.
-
5Measure from the fold to the bottom of the curve, then mark the edge. It is important to make both sides of the pantleg match up perfectly or your pants may look sloppy. Use this measurement to mark the fabric on the opposite side.[10]
- This mark will serve as a guideline for where to position the crotch of the shorts when you repeat the markings.
-
6Place the shorts 1 cm (0.39 in) from the mark and trace the curve. Repeat the same process on the opposite side of the fabric to create an identical curve. Use the mark you made to help you position the shorts. Then, trace along the curve the same way that you did for the other side.[11]
- Keep in mind that the second curve will be going in the opposite direction of the first curve, but the 2 curves will match up perfectly when you fold the edges of the fabric together.
-
7Measure from the fold to find your desired pant length plus 6 cm (2.4 in). Use the waist to floor pant length measurement that you found earlier. Then, add 6 cm (2.4 in) to it for seam allowance. Measure from the fold and mark the fabric with the measurement in a few places. Use the marks to draw a line across the fabric with a fabric marker or a piece of chalk.[12]
- For example, if your pant length is 75 cm (30 in), then add 6 cm (2.4 in) for a total of 81 cm (32 in). Mark the fabric 81 cm (32 in) from the fold.
-
8Cut along the line and down through the fold. Use a sharp pair of fabric scissors to cut across the line you have drawn across the fabric. Then, cut straight across the fold to divide the fabric in half.[13]
Tip: If you are using a slippery fabric, then make sure to hold it with 1 hand as you cut along the fold. You may even want to ask a friend to help you with this part.
Securing the Pants Together
-
1Separate the layers and fold each 1 in half lengthwise. Match up the 2 sides of the fabric piece so that the curved edges are even and all of the straight edges are aligned. Make sure that the fabric is folded so that the wrong (inner or back) side of the fabric is facing out.[14]
- Repeat this for the second layer of fabric.
-
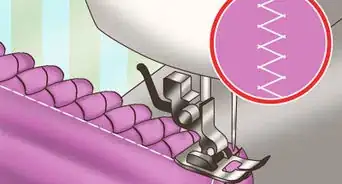
2Sew a straight stitch along the inseam or straight edge. Set your sewing machine to the straight stitch setting, which is #1 on most sewing machines. Then, raise the presser foot and place the edge of your fabric under it. Lower the presser foot and apply gentle pressure to the pedal to start it. Hold the fabric taut in front of and behind the presser foot to help feed the fabric through as you sew.[15]
- Do not sew along the curved edge or along the top or bottom of the pantlegs. Only sew the straight edge extending down from the end of the curved edge.
-
3Repeat this for the other piece. After you finish sewing 1 inseam, repeat the stitch to sew the second inseam. Sew the second seam exactly the same way as you sewed the first seam.[16]
- Remember, only sew along the straight edge!
-
4Turn 1 leg right side out and place it into the other leg. Keep the other leg facing wrong side out. Line up the inseam and the curved edges of the 2 legs as you do so.[17]
- This will make it easy to ensure that the seam is hidden as you sew the crotch.
-
5Insert pins into the fabric pieces along the curved edges. Place a pin every 4 to 6 cm (1.6 to 2.4 in) to secure the curved edges together. Insert each pin so that it is going perpendicular to the raw edge of the fabric. This will make it easier to remove the pins as you sew.[18]
Tip: Make sure to use pins that have ball or flat end so that they will not go all the way through the fabric.[19]
-
6Sew a straight stitch along the pinned edges. Set your sewing machine to the straight stitch setting and sew a straight stitch about 1 cm (0.39 in) from the raw edges of the curve. Sew from the beginning to the end of the curve.[20]
- Cut the excess thread when you reach the end of the curve.
Creating the Elastic Casings
-
1Fold over the top edge of the waistband by 1 cm (0.39 in). Separate the 2 legs and make sure that both legs are turned wrong side out. Then, fold over a small section of the top edge of the pants (where the waistband will be) by 1 cm (0.39 in). Hold the fold with your fingers.[21]
- This first fold is simply meant to create a hem and hide the raw edge of your fabric.[22]
- If desired, you may also iron the folds as you go. This is more work, but it will result in a crisper edge to your harem pants
-
2Make a 3 cm (1.2 in) fold and pin it. Repeat the fold in the same section, but this time make the fold 3 cm (1.2 in) wide. Hold this fold with your fingers and then insert a pin through both layers of folded fabric to hold them in place.[23]
- Iron this fold as well if you want to iron the folds as you go.
-
3Repeat the folds all the way around the waistband. Continue to fold and pin the fabric in this way going all the way around the waistband. Place a pin going perpendicular to the edge of the fabric every 4 to 6 cm (1.6 to 2.4 in).[24]
Tip: If you are using a delicate fabric, then opt for ballpoint pins to secure these folds. The fabric along the waistband will be visible after you finish sewing, and ballpoint pins will not poke holes into the fabric or damage it.[25]
-
4Sew along the fold leaving a 5 cm (2.0 in) opening. Begin sewing near the center seam in the front or back of the pants. Sew all the way around the edges of the folded fabric until you are 5 cm (2.0 in) from where you started sewing. Stop sewing here to leave an opening that you can insert the elastic into.[26]
- Make sure to remove the pins as you sew. Do not sew over the pins or you may damage your sewing machine.
-
5Repeat this for the bottom of each of the pantlegs. Follow the same process for creating casings in the bottom of your pantlegs. However, make the second fold 1.5 cm (0.59 in) wide instead since the elastic is much narrower than the waistband elastic.[27]
- Remember to remove the pins as you sew!
Inserting the Elastic Into the Casing
-
1Measure the elastic around your waist and ankles and cut. Use a pair of sharp fabric scissors to cut the elastic. Leave a 2 cm (0.79 in) allowance on each of the pieces for sewing the ends together.[28]
- If desired, you may take measurements of your waist and ankles and use these to determine how much of each type of elastic you need to cut. However, remember to add 2 cm (0.79 in) to each of the measurements.
-
2Attach safety pins to the elastic and insert 1 through the opening. Secure 1 of the safety pins to the seam near the opening you left in the casing. Close the other safety pin at the end of the elastic. Insert this closed safety pin through the opening in the casing and use your fingers to work the safety pin through the casing until it comes out the other side.[29]
Tip: Be careful not to let the safety pin come open as you work it through. If it does open, you may be able to get it closed again through the casing, or you might need to pull the pin out with the elastic and start over.
-
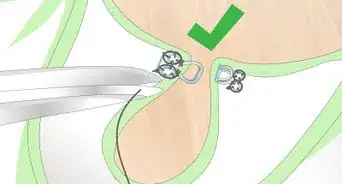
3Remove the safety pins and sew the ends of the elastic band together. Once you have worked the end of the elastic all the way through the casing, hold the ends of the elastic so that they overlap and remove each of the safety pins. Sew a straight stitch across both pieces of elastic about 1 cm (0.39 in) from the ends of the elastic.[30]
- Do not sew over the pins! This may damage your sewing machine.
-
4Sew the opening closed with a straight stitch. Next, stretch the elastic slightly to bring the ends into the casing. Then, sew a straight stitch along the open edge of the casing to close it.[31]
- Make sure to refold the fabric in the open area if it has come undone.
-
5Repeat this for each of the pantlegs. Once you have finished sewing the waistband, repeat the process to add the elastic to the casing for each of the pantlegs. Then, cut your excess threads.[32]
- Your harem pants are complete! Try them on and see how they look.
Expert Q&A
-
QuestionWhat kind of fabric should I use?
 Mia DanilowiczMia Danilowicz is a Master Tailor who works onset and on the red carpet in Los Angeles, California. With over a decade of experience, Mia specializes in bridal and gown couturier fittings, garment reconstruction, and custom design. Mia has worked at the Oscars, Grammys, SAG Awards, and Golden Globes. Her clients include a long list of entertainment and fashion industry headliners, major fashion magazines, luxury consumer brands, and popular media. Mia was trained at the Fashion Institute of Design and Merchandising and received her AA in Fashion Design and BS in Business Management.
Master Tailor Harem pants can be made in a variety of fabrics. Traditionally harem pants were made with various silks, lightweight chiffons, or linens. Today you can make harem pants using any sort of lightweight fabric, with and without stretch. If you choose to use thicker fabric, it might be harder to gather the material around the waistband.
Things You’ll Need
- Fabric
- Elastic
- Loose-fitting pants
- Fabric marker or chalk
- Scissors
- Soft measuring tape
- Sewing machine
- Matching color thread
References
- ↑ https://www.youtube.com/watch?v=n-ceMyXSLTs&feature=youtu.be&t=132
- ↑ Mia Danilowicz. Master Tailor. Expert Interview. 8 January 2021.
- ↑ https://sewguide.com/harem-pants-diy-pattern/
- ↑ https://www.youtube.com/watch?v=n-ceMyXSLTs&feature=youtu.be&t=90
- ↑ https://www.youtube.com/watch?v=n-ceMyXSLTs&feature=youtu.be&t=110
- ↑ https://www.youtube.com/watch?v=n-ceMyXSLTs&feature=youtu.be&t=147
- ↑ https://www.youtube.com/watch?v=n-ceMyXSLTs&feature=youtu.be&t=153
- ↑ https://www.youtube.com/watch?v=n-ceMyXSLTs&feature=youtu.be&t=176
- ↑ https://www.youtube.com/watch?v=n-ceMyXSLTs&feature=youtu.be&t=191
- ↑ https://www.youtube.com/watch?v=n-ceMyXSLTs&feature=youtu.be&t=201
- ↑ https://www.youtube.com/watch?v=n-ceMyXSLTs&feature=youtu.be&t=219
- ↑ https://www.youtube.com/watch?v=n-ceMyXSLTs&feature=youtu.be&t=243
- ↑ https://www.youtube.com/watch?v=n-ceMyXSLTs&feature=youtu.be&t=250
- ↑ https://www.youtube.com/watch?v=n-ceMyXSLTs&feature=youtu.be&t=258
- ↑ https://www.youtube.com/watch?v=n-ceMyXSLTs&feature=youtu.be&t=266
- ↑ https://www.youtube.com/watch?v=n-ceMyXSLTs&feature=youtu.be&t=271
- ↑ https://www.youtube.com/watch?v=n-ceMyXSLTs&feature=youtu.be&t=298
- ↑ https://www.youtube.com/watch?v=n-ceMyXSLTs&feature=youtu.be&t=305
- ↑ https://www.threadsmagazine.com/2008/11/11/a-pin-for-every-purpose
- ↑ https://www.youtube.com/watch?v=n-ceMyXSLTs&feature=youtu.be&t=315
- ↑ https://www.youtube.com/watch?v=n-ceMyXSLTs&feature=youtu.be&t=330
- ↑ https://www.sewing.org/files/guidelines/11_130_simple_hems.pdf
- ↑ https://www.youtube.com/watch?v=n-ceMyXSLTs&feature=youtu.be&t=352
- ↑ https://www.youtube.com/watch?v=n-ceMyXSLTs&feature=youtu.be&t=367
- ↑ https://www.threadsmagazine.com/2008/11/11/a-pin-for-every-purpose
- ↑ https://www.youtube.com/watch?v=n-ceMyXSLTs&feature=youtu.be&t=373
- ↑ https://www.youtube.com/watch?v=n-ceMyXSLTs&feature=youtu.be&t=380
- ↑ https://www.youtube.com/watch?v=n-ceMyXSLTs&feature=youtu.be&t=420
- ↑ https://www.youtube.com/watch?v=n-ceMyXSLTs&feature=youtu.be&t=440
- ↑ https://www.youtube.com/watch?v=n-ceMyXSLTs&feature=youtu.be&t=460
- ↑ https://www.youtube.com/watch?v=n-ceMyXSLTs&feature=youtu.be&t=465
- ↑ https://www.youtube.com/watch?v=n-ceMyXSLTs&feature=youtu.be&t=466

