This article was co-authored by wikiHow staff writer, Hannah Madden. Hannah Madden is a writer, editor, and artist currently living in Portland, Oregon. In 2018, she graduated from Portland State University with a B.S. in Environmental Studies. Hannah enjoys writing articles about conservation, sustainability, and eco-friendly products. When she isn’t writing, you can find Hannah working on hand embroidery projects and listening to music.
There are 15 references cited in this article, which can be found at the bottom of the page.
This article has been viewed 34,366 times.
Learn more...
Polished aluminum looks shiny and chrome-like, but it doesn’t always stay that way after some wear and tear. It can be frustrating to spend an entire afternoon polishing your aluminum only to have it look dingy and dusty again within a few weeks. To keep your aluminum looking nice, you can use a sealant, a wax, or an anodizing process to protect the shine of your metal.
Steps
Applying a Sealant
-
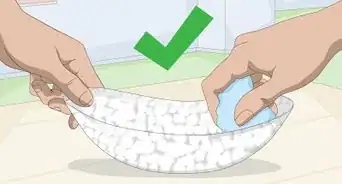
1Clean your aluminum piece with warm water. Wet your aluminum piece with warm water and use a towel to clean off any dirt or debris that is stuck on the aluminum. Try to handle the aluminum as little as possible so that you don’t leave fingerprints. Make sure you clean your aluminum well so that the sealant works properly.[1]
- You can also use a detailer spray for a more in-depth clean on wheels and boats.
-
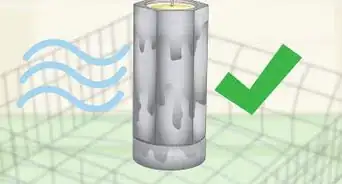
2Dry off your aluminum with a clean microfiber towel. Make sure there is no water left on the aluminum so that the sealant works well. If you can, let your aluminum sit outside for a few minutes to make sure it is really dry.[2]
- Microfiber towels won’t scratch the surface of your aluminum.
Advertisement -
3Spray aluminum sealant onto the aluminum. Use your spray bottle of sealant to coat your aluminum in a thin layer of spray. Make sure to coat the entirety of the aluminum that you are working on.[3]
-
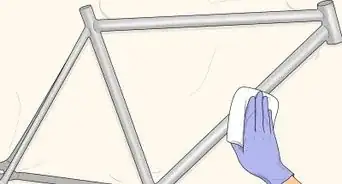
4Wipe the sealant on with a sponge. Use a soft sponge to wipe the sealant over the entire surface area of the aluminum. Pay special attention to any cracks or crevices in the aluminum.[4]
- You can find aluminum sealant at most automotive stores.
Tip: If your aluminum piece is large, like on the side of a boat, wipe the sealant in the direction of the grain.
-
5Wait 1 minute to allow the sealant to activate. Let the sealant dry slightly so that it locks in the polish of your aluminum. Do not touch the aluminum piece as you wait to give it time to work.[5]
-
6Wipe off any excess sealant with a microfiber towel. Make sure to wipe off all of the excess sealant so that your aluminum looks shiny. Leaving any sealant on could result in streaks.[6]
- The sealant will protect your aluminum piece for 4 to 6 months.


Using Wax
-
1Clean off your aluminum with warm water. Wipe down your aluminum with warm water to remove any dirt, debris, or grease. Avoid touching the aluminum as much as possible so that you don’t leave any fingerprints or oil marks. Make sure you clean your aluminum well so that the wax adheres properly.[7]
Tip: You can also use an aluminum or metal cleaning spray if you want a more detailed clean.
-
2Dry your aluminum with a microfiber towel. It is important to remove all moisture from your aluminum. Use a clean microfiber towel to wipe off the area that you washed. Make sure that it is fully dry.[8]
- You can find microfiber towels at most automotive or home goods stores.
-
3Buff the metal wax into the aluminum in a circular motion. Dip a clean cloth into the pot of wax and pick up a pea-sized amount. Apply it to your aluminum piece in a circular motion. Keep picking up more wax to cover the entire surface of your aluminum.[9]
- You can purchase aluminum or metal polishing wax at most automotive stores.
- Wax protects your aluminum from dust and debris.
-
4Reapply the wax every 3 to 4 months. Aluminum wax sits on top of the surface of your aluminum piece. It will eventually rub off and become less effective. To keep your aluminum protected, reapply the wax a few times a year to keep your aluminum looking shiny.[10]
- Always clean your aluminum before applying a new coat of wax.


Anodizing Aluminum
-
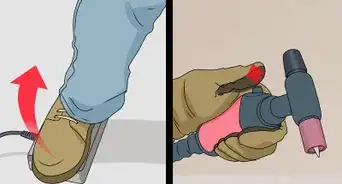
1Put on safety glasses and gloves. It is important to protect yourself throughout the entire process of anodizing your aluminum. Put on some safety glasses and some latex or nitrile gloves to keep your eyes and skin free from harm.[11]
- You can buy gloves and safety glasses at most hardware stores.
-
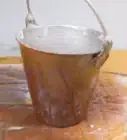
2Make a 1:3 ratio of battery acid and distilled water in a bucket. Fill a 5 gallons (19 L) bucket ¾ of the way full with 1 part battery acid and 2 parts distilled water. Set your bucket on a flat surface so that you don’t have to worry about spills.[12]
- You can purchase battery acid at most hardware stores.
Warning: Do not ingest battery acid or get it in your eyes. Always wear your safety goggles and gloves when handling battery acid.
-
3Set a piece of lead into the bucket sticking out of the acid mixture. Find a large piece of lead that can sit in your bucket during this process that is at least as tall as your bucket. Set it into the battery acid mixture so that the top parts sticks out just slightly. This will be your cathode, or the negatively charged part of your electrical current.[13]
- If you don’t have a piece of lead, you can also use a large piece of aluminum. However, you will not be able to reuse the aluminum piece since it will react to the anodizing process as well.
- You can find scrap metal at most reuse stores.
-
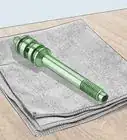
4Hang your aluminum piece on aluminum or titanium wire. Wrap your aluminum or titanium wire around your aluminum piece tightly so that there are multiple contact points between the wire and your aluminum piece. Make sure that the wire will not come off during the anodization process.[14]
- If you use aluminum wire, you will not be able to reuse it for another anodization process. Titanium wire is reusable.
- The wire will act as your positive charge during the electrical current.
- You can anodize 2 pieces of small aluminum at a time if they can fit on either side of the wire.
-
5Hook the negative side of a battery charger to the lead and the positive side to the wire. Grab the clamps on a car battery charger and place the negative on the lead piece. Clamp the positive side to the titanium or aluminum wire. Make sure the clamps are not in the battery acid mixture.[15]
- You can find a car battery charger at most hardware stores.
-
6Set your amps to 0.3 amps per square inch of your aluminum piece. The amount of electrical current you need depends on how large your aluminum piece is. Measure your piece in square inches and then multiply it by 0.3 to determine how many amps you need to set your battery to.[16]
- For example, if your aluminum piece is 5 square inches, use 1.5 amps.
-
7Leave your aluminum hooked up for 1 hour. The electrical current needs time to work and anodize your aluminum piece. Leave it hooked up for at least 1 hour.[17]
-
8Turn off the battery charger and take out the aluminum. Unhook the clamps from the 2 places that they are hooked to. Pull the wire out of the battery acid so that your aluminum piece is out of the mixture.[18]
- Always turn off your battery charger before you unhook the clamps.
-
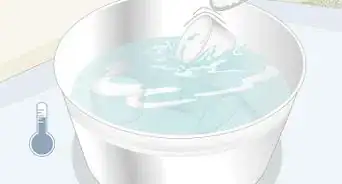
9Spray down your aluminum with water. Fill a spray bottle with distilled water. Hold your aluminum piece up by the wire and spray it down to wash off all of the acid and stop the reaction.[19]
- You can also wash your aluminum in a baking soda wash by combining 1 tablespoon (14.8 ml) (15 g) of baking soda with 1 cup (240 mL) of water, but this is not totally necessary.


Things You’ll Need
Applying a Sealant
- Microfiber towel
- Aluminum sealant
Using Wax
- Microfiber towel
- Aluminum polishing wax
Anodizing Aluminum
- Gloves
- Safety glasses
- Bucket
- Battery acid
- Distilled water
- Lead or aluminum piece
- Aluminum rod
- Titanium or aluminum wire
- Car battery charger
- Tea kettles
- Anodizing dye or coating
- Spray bottle


References
- ↑ https://www.youtube.com/watch?v=ekl6wLN4grE&feature=youtu.be&t=126
- ↑ https://www.youtube.com/watch?v=ekl6wLN4grE&feature=youtu.be&t=132
- ↑ https://www.youtube.com/watch?v=HzqTJmJ6n8U&feature=youtu.be&t=64
- ↑ https://www.youtube.com/watch?v=HzqTJmJ6n8U&feature=youtu.be&t=64
- ↑ https://www.youtube.com/watch?v=ekl6wLN4grE&feature=youtu.be&t=227
- ↑ https://www.youtube.com/watch?v=ekl6wLN4grE&feature=youtu.be&t=234
- ↑ https://www.youtube.com/watch?v=00t3qEE6oBE&feature=youtu.be&t=52
- ↑ https://www.youtube.com/watch?v=00t3qEE6oBE&feature=youtu.be&t=98
- ↑ https://www.youtube.com/watch?v=9sPoo4e3l_8&feature=youtu.be&t=247
- ↑ https://www.youtube.com/watch?v=9sPoo4e3l_8&feature=youtu.be&t=263
- ↑ https://www.youtube.com/watch?v=P8oesBi7_II&feature=youtu.be&t=46
- ↑ https://www.youtube.com/watch?v=P8oesBi7_II&feature=youtu.be&t=71
- ↑ https://www.anodizing.org/page/anodizing-definitions-methods
- ↑ https://www.anodizing.org/page/what-is-anodizing
- ↑ https://www.youtube.com/watch?v=P8oesBi7_II&feature=youtu.be&t=436
- ↑ https://www.youtube.com/watch?v=P8oesBi7_II&feature=youtu.be&t=392
- ↑ https://www.anodizing.org/page/anodizing-definitions-methods
- ↑ https://www.anodizing.org/page/anodizing-definitions-methods
- ↑ https://www.anodizing.org/page/anodizing-definitions-methods
About This Article