This article was written by Matt Ham and by wikiHow staff writer, Jack Lloyd. Matt Ham is a Computer Repair Specialist and the CEO and President of Computer Repair Doctor. With over a decade of experience, Matt specializes in Mac, PC, iPhone, iPad, and Smartphone repairs and upgrades. Matt holds a BS in Mechanical Engineering from North Carolina State University and an MS in Mechanical Engineering from Columbia University. Matt has expanded Computer Repair Doctor to seven different locations. He is also a Co-Owner of Repair Life, a full-scale marketing agency specializing in driving both online and offline leads to cell phone and computer repair shops and device retailers.
The wikiHow Tech Team also followed the article's instructions and verified that they work.
This article has been viewed 325,440 times.
This wikiHow teaches you how to erase and reinstall Windows on a Dell computer's hard drive. If you just want to erase everything on the hard drive to clean-install Windows or remove a virus, you can use the Windows 10 "Reset" option; otherwise, most Dell computers have a hidden repair drive that you can use to reformat the main hard drive. If your Dell has neither of these options, you can use a Windows installation disc instead. Before reformatting your Dell, consider backing up your data to an external hard drive, as everything on your computer's hard drive will be erased when you format it.
Things You Should Know
- Before reformatting your Dell, be sure to back up any important data.
- When using Windows Reset, you can reformat your device in the Recovery tab.
- When using Repair Drive, you'll need to use "Advanced Boot Options", then "Repair".
Steps
Using Windows Reset
-
1
-
2Advertisement
-
3
-
4Click the Recovery tab. It's on the left side of the window.
-
5Click Get started. This is below the "Reset this PC" heading at the top of the page.
-
6Click Remove everything when prompted. It's at the top of the pop-up window.
-
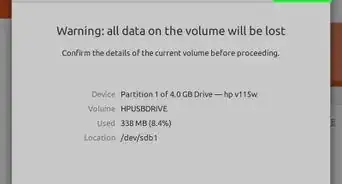
7Click Remove files and clean the drive. This option deletes everything from your hard drive and then reinstalls Windows for you.
- You may see a warning about not being able to roll back to a previous version of Windows here. If so, click Next before continuing.
-
8Click Reset when prompted. Your computer will begin resetting itself.
-
9Click Continue when prompted. Once your computer finishes resetting, you'll see this at the top of the page. Clicking it will take you to the setup page.
-
10Follow the on-screen prompts. You'll select a language, connect to a Wi-Fi network, and perform other setup tasks to complete the Windows 10 reinstallation.


Using the Dell Computer Repair Drive
-
1
-
2Open the "Advanced Boot Options" menu. As soon as you see the Dell logo appear, begin repeatedly tapping the F8 key. If you time this correctly, you should see the Advanced Boot Options screen appear.
- If you see the Windows logo appear before you press the F8 key, you'll have to restart the computer and try again.
-
3Select Repair Your Computer and press ↵ Enter. Use your computer's ↓ arrow key to select this option.
-
4Select a language. Click the "Language" drop-down box, click the language that you want to use, and then click Next.[1]
-
5Log into your account. Select your account, then enter your password. Your account must have administrator privileges for you to continue.
-
6Click Dell Factory Image Restore when prompted. This will open the Factory Image Restore window.
-
7Click Next. It's in the bottom-right corner of the window.
-
8Confirm your decision to format the computer. Check the "Yes, reformat hard drive and restore system software to factory condition" box if it isn't already checked.
-
9Click Next. It's in the bottom-right corner of the window. Doing so will prompt your Dell's hard drive to begin erasing and reformatting.
- This process can take several hours, so just make sure that your Dell is plugged into an electrical outlet.
-
10Click Finish when prompted. Doing so will restart your computer. Your Dell should now be back to its original, clean settings.


Using a Windows Installation Disc
-
1Make sure that you have a Windows installation disc. With a few tweaks to your computer's settings, you can prompt your computer to boot from the CD rather than from the main hard drive, allowing you to erase the hard drive and then reformat it.
- If you don't have a Windows installation disc, you can make one by downloading the Windows 10 installation tool ISO from the Windows 10 installation page and then burning the ISO onto a DVD.
-
2Insert your Windows disc into the computer. Place the disc logo side-up in the DVD tray, then close the tray.
-
3
-
4Wait for the "Press any key to boot from disc" prompt to appear. On most Dell computers, inserting a Windows installation disc will prompt the computer to select the disc as the boot option.
- If your computer completely restarts without this prompt appearing, you'll need to change your BIOS boot order.
-
5Press any key on your keyboard. Doing so will start the disc booting sequence.
-
6Select a language. Click the "Language" drop-down box, click the language that you want to use, and click Next in the bottom-right corner of the window.
-
7Accept the terms of use. Check the "I accept the license terms" box, then click Next.
-
8Click Custom. It's in the middle of the window. This will prompt a list of your computer's connected hard drives to appear.
-
9Select your Dell's hard drive. Click the hard drive with (C:) on it to select it.
- If you don't see a (C:) option, look for a drive with the largest amount of space on it.
-
10Click Format. It should be near the bottom of the page. Doing so will erase your hard drive and reformat it according to Windows defaults.
- You may be prompted to select a file system. If so, select NTFS and click OK.
- The reformatting process can take several hours, so just make sure that your computer is plugged into a power source.
-
11Click Next or Continue when prompted. Doing so completes the formatting process.
-
12Follow the on-screen instructions. There should be a "Reinstall Windows" option here; clicking it will begin the Windows reinstallation process, at which point you can follow the on-screen prompts to finish reinstalling Windows.


Community Q&A
-
QuestionHow do I change the display to widescreen?
 Community AnswerControl Panel>Hardware and Sound>Display>Change Screen Resolution. Click Detect. It will know how big your monitor is, and do it all for you.
 -
QuestionHow do I get "progress dialog" to stop running when I want to shut down my computer?Community AnswerThere should be a force shutdown option on screen. If not, pressing and holding the power button will force the computer to shut down even if it is frozen.
-
QuestionHow do I fix a blank screen?
 Community AnswerIf the screen is on but doesn't emit any colors, you could have damaged video wires. If the screen doesn't turn on at all you could have either damaged power wires or a damaged screen that would have to be replaced.


About This Article