This article was co-authored by Gino Colucci. Gino Colucci is a Home Improvement Specialist and the Owner of Crackerjacks Handyman Services (not a licensed contractor) in Chandler, Arizona. Crackerjacks Handyman Services offers an effective cost-saving solution for commercial and residential repair and maintenance needs, specializing in smaller projects. Crackerjacks Handyman Services carries liability insurance and all technicians go through a background check.
There are 13 references cited in this article, which can be found at the bottom of the page.
This article has been viewed 398,362 times.
A stripped screw hole renders the screw useless and can actually be dangerous in certain situations. Luckily, there are ways that you can fix a stripped screw hole with the right tools. If you have limited time and resources, you can do a quick fix with toothpicks or wall plugs. If the hole is bigger, as would be the case for a lag screw or bolt, you may need to use auto body filler to create new threads in the hole.
Steps
Doing a Quick Fix with Toothpicks
-
1Insert as many toothpicks as you can into the stripped screw hole. Get regular wooden toothpicks from a department store or online. You’ll usually be able to fit 2 or 3 toothpicks into the hole.[1] >
- The toothpicks should fit snugly in the hole.
-
2Squeeze 2-3 drops of wood glue on the ends of the toothpicks. After you apply the glue, spread the glue with your finger or a cotton swab so that the toothpicks are completely covered in glue.[2] You can purchase wood glue online or from a hardware store.[3]Advertisement
-
3Stick the toothpicks into the hole and snap off the excess. Stick the toothpicks into the hole and lightly tap on the ends with a hammer to push them as deep as they can go into the hole. Then, snap off the exposed ends of the toothpicks or break them off with the hammer.[4]
- The toothpicks should now run flush with the top of the screw hole.
-
4Let the glue dry for at least 1 hour. The glue will fuse the toothpicks to the inside of the stripped screw hole. The wooden toothpicks will create the resistance that the screw’s threads need to stay securely in the hole.[5]
- Read the instructions on your wood glue to see if drying times differ with the brand of glue that you purchased.
-
5Re-insert the screw back into the hole. Turn the screw clockwise into the screw hole with a screwdriver or drill. Continue turning the screw until the top of the screw runs flush with the hole. The new toothpicks should fill in the spaces in the screw hole and give your screw something to catch on.[6]


Using Plastic Wall Plugs
-
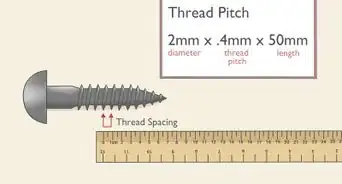
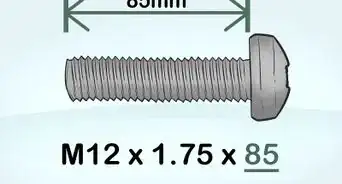
1Purchase plastic wall plugs online or at a hardware store. Get wall plugs that match the size of your screw. If you’re unsure, use a tape measure or ruler to measure the length of the screw before you purchase the plugs.[7]
- If you’re buying the plugs at a hardware store, you can bring the screw with you and ask someone for correctly sized plugs.
-
2Bore a new hole equal to the size of the plugs if necessary. If the plugs are too big for the holes, you’ll need to bore new ones so that they can fit. The new holes should be 1–2 centimetres (0.39–0.79 in) longer than the length of your plugs. Then, press the drill against the stripped hole and pull the trigger while pressing down on the drill to bore a new hole.
- If the wall plugs fit into the existing holes, you don’t need to drill new ones.
- Hold a plug next to the tip of the drill bit and mark the length with a piece of tape so that you know how deep to drill.
-
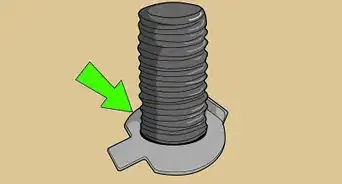
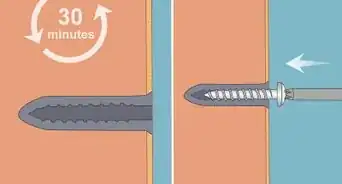
3Insert the plug into the hole. If the plug isn’t fitting, tap on the top of the plug with a hammer until it runs flush with the hole. The plug should fit snugly in the hole and should stay in place.[8]
-
4Re-insert the screw into the plastic wall plug. Press the tip of the screw into the plug and use a screwdriver or drill to screw it back into the hole. The screw will now screw into the threads in the plug.


Fixing Large Holes with Automotive Filler
-
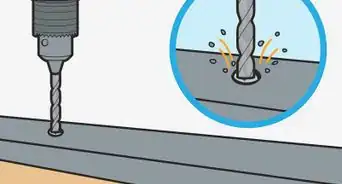
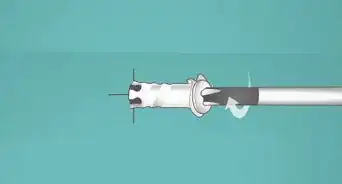
1Bore a new hole into the stripped screw hole. Use a drill bit that’s the next size up from the screw. The hole must be bigger than the screw itself so that the automotive filler can fill the hole and cast new threads for your screw.[9]
- For instance, if you had a 1⁄4 inch (0.64 cm) screw, you’d bore a hole with a 3⁄8 inch (0.95 cm) drill bit.
- Automotive filler is best used on larger screw holes like ones for bolts and lag screws.
-
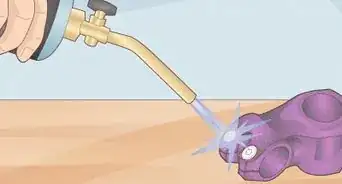
2Mix the automotive filler according to the directions. You can purchase automotive filler at an auto body store or online. Read the packaging and instructions that came with the filler first. Then, mix the compounds together on a piece of cardboard with a putty knife to activate the ingredients in the filler.[10]
- Most automotive filler is made up of 2 putty-like compounds that harden when mixed together.
-
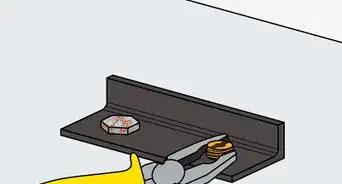
3Fill the hole with the filler. Scoop the filler up with the putty knife and run it over the hole. Completely fill up the hole with the filler before flattening out the top with the putty knife.[11]
- It may take several scoops until the hole is completely filled.
-
4Spray lubricant onto the end of the screw. The lubricant will help you smoothly remove the screw from the new threads once the automotive filler has hardened. Use a spray-on lubricant like WD-40 to fully saturate the threads on the screw.[12]
-
5Insert the screw into the wet putty. Do not let the filler dry or it will be impossible to insert the screw. Position the screw in the center of the new hole and carefully press down on the top of the screw. The screw will leave an imprint of its threads as it dries.[13]
- If the filler spills out of the sides, push it back into the holes on the side of the screw with your putty knife.
-
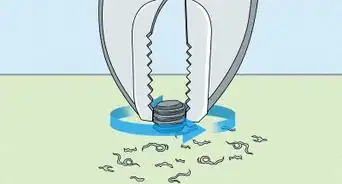
6Let the filler dry for 5 minutes and unscrew the screw. After 5 minutes, carefully turn the screw or bolt counterclockwise to remove it from the filler. When you look down into the hole, you should see new threads formed by the filler.[14]
- Don’t let the filler fully set or you won’t be able to remove the screw.
-
7Let the automotive filler dry overnight. The filler will set overnight and harden in the shape of the threads on your screw or bolt. This will allow you to secure the screw into the new hole that you created.[15]


Expert Q&A
Did you know you can get premium answers for this article?
Unlock premium answers by supporting wikiHow
-
QuestionWhat do you do when a screw hole is stripped?
 Gino ColucciGino Colucci is a Home Improvement Specialist and the Owner of Crackerjacks Handyman Services (not a licensed contractor) in Chandler, Arizona. Crackerjacks Handyman Services offers an effective cost-saving solution for commercial and residential repair and maintenance needs, specializing in smaller projects. Crackerjacks Handyman Services carries liability insurance and all technicians go through a background check.
Home Improvement SpecialistAn old-school trick is to use wood glue and toothpicks to fill the hole. Now, you can get a strong wood epoxy or use threaded inserts. You can also buy repair kits to fix stripped screw holes. All of these methods will work well.
Support wikiHow by unlocking this expert answer.
Things You’ll Need
Doing a Quick Fix with Toothpicks
- Toothpicks
- Wood glue
- Hammer
Using Plastic Wall Plugs
- Wall plugs
- Hammer
- Drill (optional)
- Drill bit (optional)
Fixing Large Holes with Automotive Filler
- Drill
- Drill bit
- Automotive filler
- Putty knife
- Spray-on lubricant


References
- ↑ Gino Colucci. Home Improvement Specialist. Expert Interview. 7 January 2021.
- ↑ Gino Colucci. Home Improvement Specialist. Expert Interview. 7 January 2021.
- ↑ https://sawdustgirl.com/how-to-fix-a-stripped-screw-hole-with-household-items/
- ↑ https://sawdustgirl.com/how-to-fix-a-stripped-screw-hole-with-household-items/
- ↑ https://youtu.be/WfX_hAgFf3Y?t=211
- ↑ https://youtu.be/q_qCods-DdY?t=61
- ↑ https://youtu.be/q_qCods-DdY?t=110
- ↑ https://youtu.be/dIanKfKyiVY?t=223
- ↑ https://youtu.be/q_qCods-DdY?t=213
About This Article

To fix a stripped screw hole, start by inserting as many toothpicks as you can into the hole. Once you know how many toothpicks will fit snugly, pull the toothpicks out and squeeze 2-3 drops of wood glue on the ends. Then, use a cotton swab to spread the glue down the length of each toothpick. Next, insert the toothpicks into the hole and tap the ends with a hammer to push them as deep as they'll go. If the ends are still exposed, use your fingers or the hammer to snap off the excess. Finally, give the wood glue 1 hour to dry before reinserting the screw back into the hole with a screwdriver or drill. For tips on fixing a larger hole with automotive filler, read on!