This article was co-authored by Patrick Johns and by wikiHow staff writer, Jennifer Mueller, JD. Patrick Johns is a Home Improvement Specialist and the Owner of CatchAll Handyman Services. With more than 28 years of experience, he has worked on a variety of home improvement projects, such as carpentry, plumbing, and door and window installations in both commercial and residential properties.
There are 11 references cited in this article, which can be found at the bottom of the page.
This article has been viewed 7,301 times.
Is that incessant drip, drip, drip of a leaky faucet driving you up the wall? Don't worry, this is usually something you can fix yourself in under an hour, even if you don't have a lot of home improvement experience. Even better, you can usually replace the worn-out part and stop the leak for under $50—much cheaper than calling out a professional plumber. Taking the handle apart is pretty much the same regardless of the type of faucet you have, but then the fix will differ somewhat depending on whether you have a cartridge, ceramic disk, or compression handle.
Steps
Disassembling a Bathroom Sink Faucet
-
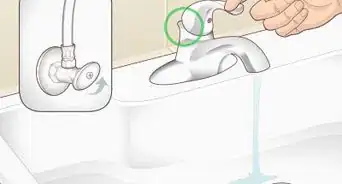
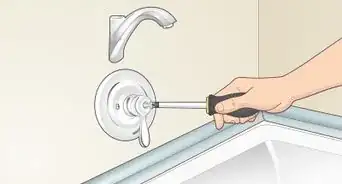
1Turn off the water that runs to the sink.[1] Open the cabinet under the sink and you'll see the shutoff valves. Since you have 2 handles, you'll likely also have 2 shutoff valves—left for hot and right for cold. Shut them off one at a time, then see if your leak stops. That'll tell you which handle is the culprit.[2]
- Even if only one handle is leaky, it might be worth your time to go ahead and replace the parts in both of them. If they're both the same age and one of them is leaking, it's only a matter of time before the other one starts leaking as well.[3]
-
2With the water shut off, open the tap completely. This clears any of the water that was already in the pipes before you turned the water off (there shouldn't be much). You might still have a drip or two, but it'll be fine.[4]Advertisement
-
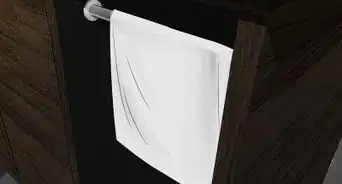
3Plug the sink drain or cover it with a towel. This keeps any screws or small parts from accidentally falling down the drain. A towel also protects the finish of your sink if you happen to drop a tool you're using.[5]
-
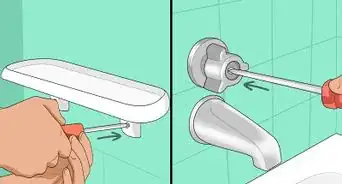
4Remove the decorative caps from each of the handles. Some of these caps simply twist off, while others have a plastic cap you need to pop out first. Use the tip of a nail file or other slender object to get under the cap and pop it off.[6]


Fixing a Leaky Cartridge Faucet
A cartridge faucet has a slender plastic or metal cylinder that sits just inside the faucet handle and controls the water flow.[9]
-
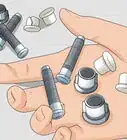
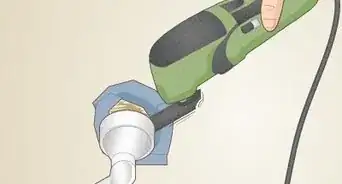
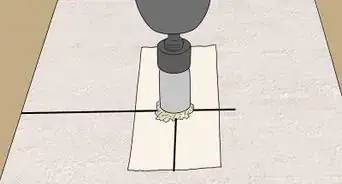
1Unscrew the retainer nuts to get to the cartridges. Use a set of pliers to loosen the nut first if it's tight. Then, unscrew it the rest of the way with your fingers and set it out of the way.[10]
-
2Pull out the cartridges with long-nose pliers. Grip the sides of the cartridge securely and slide it upward. If you feel resistance when you pull upward, twist it a quarter-turn in either direction to loosen it, then try again.[11]
- Some cartridges require a special cartridge-removal tool. If you're trying to get it out with pliers and having a hard time, search your faucet brand on the internet to find an instruction guide. If a special tool is needed, it'll tell you.
-
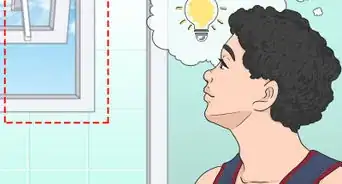
3Take the old cartridges to a hardware store to buy replacements. Expect each cartridge to cost between $10 and $80 depending on the brand.[12] If you have the instruction manual for your faucet, copy down the part number for the cartridge as well.
-
4


Repairing a Leaky Ceramic Disk Faucet
Ceramic disk faucets have metal stems under the handle with ceramic disks inside them. These disks rotate to control the water flow.[15]
-
1Remove the handle "bonnets." These decorative covers typically just pull off. If it's stuck on there, give it a twist and see if it screws on instead.[16]
-
2Pull out the ceramic stems and seals on the underside. Use a knife-point or pliers to pry out the seals. The replacement stem comes with new seals, so you can throw the old ones away.[17]
- If you notice dirt build-up or debris in the faucet, clean it out with some basic bathroom cleaner or a damp rag dipped in white vinegar.
-
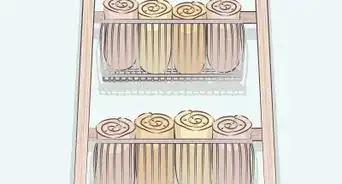
3Take the ceramic stems to a hardware store to buy replacements. Ceramic stems typically cost between $15 and $50 to replace. If you take the old one with you, it'll be easier to match it up with a replacement. You can also check your faucet's user manual for a specific part number.[18]
-
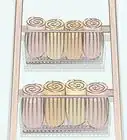
4Drop the neoprene seal in place, then set the stem on top. The correct stem will slot right into place. You might have to twist the stem a quarter-turn one way or the other to seat it properly.[19]
-
5Put the handles back together. Add on each of the parts in the reverse order that you removed them. Then turn the water back on and test your handles—you should be drip-free.[20]


Stopping a Leak in a Compression Faucet
Compression faucets control water flow with a rubber washer. This is an older design that isn't common in the 21st century, but you still see them in older homes.[21]
-
1Remove the handles and packing nuts. You might need pliers to loosen the nut, although you should be able to unscrew it with just your fingers. Hold on to the valve stem while you turn the nut to keep it steady.[22]
-
2Turn the valve stems counter-clockwise to unscrew them. Use pliers to hold the valve stem if you can't get a good grip on it with your fingers. After a few turns, you should be able to pull the entire thing completely out.[23]
-
3Unscrew the screw holding the washer on the bottom of the valve stem. Turn this screw slowly and carefully, as it's likely to break apart if it's worn or corroded. With the screw off, the washer will just fall off on your hand. Hang onto it so you can match it up with a replacement at the hardware store.[24]
-
4Take the washer and screw to your local hardware store. Get replacements that are the exact same size, shape, and thickness as the old one. They shouldn't cost you more than a few dollars.[25]
-
5
-
6Put the stem back into the faucet housing and reassemble the handle. Make sure the stem is straight as you set it back into the housing, then screw it back in. Set the packing nut on top and screw it on tight.[28]
- You might want to lubricate the stem with a little plumber's grease before you put it back into the housing. This isn't strictly necessary, so if you don't have any, don't worry.[29]


Expert Q&A
-
QuestionHow can you tell which side of a faucet is leaking?
 Patrick JohnsPatrick Johns is a Home Improvement Specialist and the Owner of CatchAll Handyman Services. With more than 28 years of experience, he has worked on a variety of home improvement projects, such as carpentry, plumbing, and door and window installations in both commercial and residential properties.
Home Improvement SpecialistStick your finger under the faucet and see what temperature the water is. If it's a little warm, the leak is coming from the hot side of the faucet. If it's cool, you can assume that the leak is on the cold side of the faucet. Just keep in mind that once one handle starts leaking, the other will likely start leaking soon, too.
Warnings
- Always shut off the water to your sink before taking off the faucet handles or starting any kind of sink repair.[32]⧼thumbs_response⧽


References
- ↑ Patrick Johns. Home Improvement Specialist. Expert Interview. 5 April 2022.
- ↑ https://www.cityofjal.us/water_conservation/the_facts_on_leaks___household_water_usage/fix_faucet_leaks.php
- ↑ Patrick Johns. Home Improvement Specialist. Expert Interview. 5 April 2022.
- ↑ https://www.bobvila.com/articles/leaky-faucet/
- ↑ https://www.cityofjal.us/water_conservation/the_facts_on_leaks___household_water_usage/fix_faucet_leaks.php
- ↑ https://www.bobvila.com/articles/leaky-faucet/
- ↑ https://www.cityofjal.us/water_conservation/the_facts_on_leaks___household_water_usage/fix_faucet_leaks.php
- ↑ https://www.cityofjal.us/water_conservation/the_facts_on_leaks___household_water_usage/fix_faucet_leaks.php
- ↑ https://environmental.marionfl.org/home/showpublisheddocument/7077/635672832339930000
- ↑ https://environmental.marionfl.org/home/showpublisheddocument/7077/635672832339930000
- ↑ https://environmental.marionfl.org/home/showpublisheddocument/7077/635672832339930000
- ↑ https://homeguide.com/costs/shower-cartridge-replacement-cost
- ↑ Patrick Johns. Home Improvement Specialist. Expert Interview. 5 April 2022.
- ↑ https://www.bobvila.com/articles/leaky-faucet/
- ↑ https://www.bobvila.com/articles/leaky-faucet/
- ↑ https://environmental.marionfl.org/home/showpublisheddocument/7077/635672832339930000
- ↑ https://www.bobvila.com/articles/leaky-faucet/
- ↑ https://youtu.be/HpYfBCvK4Bg?t=71
- ↑ https://www.bobvila.com/articles/leaky-faucet/
- ↑ https://environmental.marionfl.org/home/showpublisheddocument/7077/635672832339930000
- ↑ https://www.thisoldhouse.com/bathrooms/21015039/the-facts-on-faucets
- ↑ https://environmental.marionfl.org/home/showpublisheddocument/7077/635672832339930000
- ↑ https://youtu.be/aGAUkiGfOq4?t=76
- ↑ https://youtu.be/aGAUkiGfOq4?t=86
- ↑ https://environmental.marionfl.org/home/showpublisheddocument/7077/635672832339930000
- ↑ Patrick Johns. Home Improvement Specialist. Expert Interview. 5 April 2022.
- ↑ https://youtu.be/aGAUkiGfOq4?t=117
- ↑ https://youtu.be/aGAUkiGfOq4?t=131
- ↑ https://environmental.marionfl.org/home/showpublisheddocument/7077/635672832339930000
- ↑ https://www.cityofjal.us/water_conservation/the_facts_on_leaks___household_water_usage/fix_faucet_leaks.php
- ↑ https://environmental.marionfl.org/home/showpublisheddocument/7077/635672832339930000
- ↑ https://www.cityofjal.us/water_conservation/the_facts_on_leaks___household_water_usage/fix_faucet_leaks.php
About This Article