This article was co-authored by Alberto DeJesus. Alberto DeJesus is a Construction Specialist and the CEO of DeJesus Industries. With more than four years of experience, he specializes in high-end real estate development and construction. Alberto and DeJesus Industries have been featured on NBC News and have worked with numerous well-known companies, including Mazda, Amazon, and CVS. Alberto holds a Bachelor’s degree from Boston University.
This article has been viewed 22,877 times.
If your crawlspace isn't encapsulated, moisture could result in wood rot, mold growth, and other problems. This is especially true in older homes that may not have been built using modern construction materials. While it seems like a lot, encapsulating a crawlspace is a relatively simple project that you can do over a long weekend. By assessing your crawlspace, cleaning it out, and laying down a vapor barrier and insulation, you’ll protect your home for years to come.
Steps
Cleaning and Preparing Your Crawlspace
-
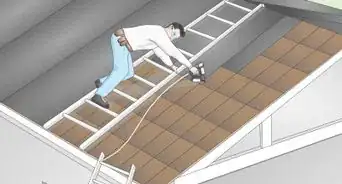
1Provide lighting throughout your crawlspace. Natural light is best, and many crawlspaces have vents that can be opened or removed to let light in. Alternatively, you can place several crawlspace lights, battery-powered lanterns, or other light sources under your home so you’ll have plenty of light when you start your work.[1]
- Without light, you won’t be able to properly fit a vapor barrier and do other work you’ll need to complete.
-
2Remove old vapor barriers or foundation insulation. If your home has an older vapor barrier or other encapsulation material, you need to completely remove it before encapsulating your crawlspace.[2] To do this, start on one end of your home and roll the material up systematically. If it is torn into small pieces, take a contractors’ garbage bag with you and place the pieces of the barrier into it.[3]
- Wear a face mask in addition to eye protection when removing these items to prevent dirt, dust, and other debris from getting in your eyes, nose, or mouth.
Advertisement -
3Clean debris from your crawlspace. Using a contractors’ garbage bag or a small wheelbarrow, move through your crawlspace from left to right. Pick up everything you see. When you’re done, there should only be dirt left on the bottom of the crawlspace. Some items you may need to remove include:[4]
- Old construction debris like concrete, nails, and pieces of metal.
- Rocks.
- Leaves, sticks, and anything else that may have washed into your crawlspace from outside.
-
4Fill in holes and level areas that aren’t completely flat. Use a short-handled shovel to fill in any holes with sand or gravel. Focus on holes that are more than 1–2 inches (2.5–5.1 cm) deep. If you don’t fill in holes, water could pool there and increase the moisture level in your crawlspace.
- It is okay if your crawlspace is on a slant. This is good for drainage.
-
5Secure any holes in your foundation. If they're damaged, repair entranceway doors to your crawlspace. Replace rotten wood that could allow animals or the elements to enter your crawlspace. Place wire mesh on small areas where animals could enter your crawlspace. This way, you'll make sure that your crawlspace remains free of animals that damage your vapor barrier in the future.[5]


Measuring and Mapping the Area
-
1Use a 100 ft (30 m) tape to measure your crawlspace. Bring a clipboard or electronic device with you to record your data. Start by measuring the width of your crawlspace. Then, measure the length of your crawlspace. Record any other features (like pylons or support pillars) that may impact the encapsulation process.[6]
- If your home is an L shape, be sure to get proper measurements for all sides of your foundation.
- Avoid measuring outside. This may give you an inaccurate account of the space you’ll need to encapsulate.
- Measure the length and height of your entire foundation. Height is important, as you’ll need to purchase vapor barrier and insulation for the foundation walls, too.
-
2Map out your crawlspace. When you have complete measurements, sit down with your data and sketch your crawlspace. Include the length, width, height, and other features of your foundation. Label each portion of the foundation with its length. Be as specific as possible.[7]
-
3Calculate the total area of your crawlspace and add 10%. Using your measurements, figure out the area of your crawlspace. You can do this by multiplying the length times width (if it is a rectangle or a square). If your foundation is in a L shape, calculate the area of each part of the L and add the values together. If you have another shape, calculate each rectangular or square portion of the crawlspace and add it to the other portions. Finally, add 10% to the total area. This will account for measurement errors and waste.
- In addition to the ground area of your crawlspace, determine the area of the bottom 6 inches (15 cm) of your foundation walls. For example, if you have a 10 ft (3.0 m) section of foundation, you'll need to include another 5.5 feet (1.7 m) in your total.


Installing a Vapor Barrier
-
1Purchase a vapor barrier that is at least 12 mil thick. While thinner barriers are available, you should use a 12-mil barrier at the minimum. This thickness of vapor barrier will provide good insulation and will be durable enough to last decades. If you choose a thinner barrier, it may degrade and allow moisture into your crawlspace.
-
2Roll out your vapor barrier one line at a time. Start widthwise on one end of the crawlspace. Unroll your roll of vapor barrier slowly so you move straight across the crawlspace. When you reach the far end of the crawlspace, use a box cutter to cut the vapor wrap.
- Reserve about 6 inches (15 cm) of vapor barrier to cover the bottom portion of the foundation.[8]
-
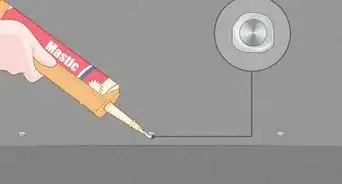
3Cover the bottom 6 inches (15 cm) of other structures with vapor barrier. To cover these other structures (like pylons and support columns) cut the vapor barrier around the structures as you roll your barrier across the ground. Then, tailor cut pieces of vapor barrier to fit around the structure. Tape your tailor-cut pieces of barrier to the piece on the ground to create a seamless barrier against moisture.[9]
-
4Secure your vapor barrier into the ground with landscaping fabric stakes. As you unroll your vapor barrier roll, stake the sides of the line every 4 feet (1.2 m). This will secure the barrier to the ground if someone needs to work under the house in the future.[10]
- Make sure the barrier is as flat as possible before securing it. You may need to make additional cuts, but this will provide better encapsulation.
-
5Overlap lines of vapor wrap by 2 inches (5.1 cm). As you’re starting a new line of vapor barrier, you’ll need to overlap the existing line and the new line by about 2 inches (5.1 cm). This will make sure that moisture does not move between the lines and into the crawlspace.[11]
-
6Tape the seams of your vapor barrier. Use vapor barrier or seaming tape to tape the seams of your lines of vapor barrier. By taping the lines of vapor barrier, you’ll create a seamless barrier between the ground and the crawlspace. This will limit the humidity and moisture that is present under your home.[12]
-
7Fasten the vapor barrier to your foundation. Purchase foundation pins at a home improvement store. You should be able to buy 100 for about $20. Then pin the vapor barrier to the cinder block or brick foundation. Use one pin every 2–3 feet (0.61–0.91 m).[13]
-
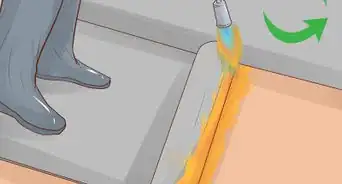
8Place 1.5 in (3.8 cm) moisture-proof insulation on the exposed parts of your foundation. Cut the insulation to fit the cinder block, brick, or whatever your foundation is made of. Then, use foundation pins to fasten the insulation to your foundation. This will limit the moisture that enters your crawlspace through brick or concrete cinderblocks.[14]
- It is okay to overlap insulation over the 6 inches (15 cm) of vapor barrier by 1–2 inches (2.5–5.1 cm).


Expert Q&A
-
QuestionHow do I keep my attic crawl space from sweating?
 Alberto DeJesusAlberto DeJesus is a Construction Specialist and the CEO of DeJesus Industries. With more than four years of experience, he specializes in high-end real estate development and construction. Alberto and DeJesus Industries have been featured on NBC News and have worked with numerous well-known companies, including Mazda, Amazon, and CVS. Alberto holds a Bachelor’s degree from Boston University.
Construction SpecialistMake sure that the moisture has somewhere to escape through the roof, like a vent. -
QuestionWhat do I do if my concrete crawl space is damp?Alberto DeJesusAlberto DeJesus is a Construction Specialist and the CEO of DeJesus Industries. With more than four years of experience, he specializes in high-end real estate development and construction. Alberto and DeJesus Industries have been featured on NBC News and have worked with numerous well-known companies, including Mazda, Amazon, and CVS. Alberto holds a Bachelor’s degree from Boston University.
Construction SpecialistTake some time to apply a waterproof coating to the concrete walls in your crawl space.
Things You’ll Need
- A short-handled shovel
- A crawlspace pickaxe
- A box cutter
- a 100-foot measuring tape
- Sand or gravel
- Foundation pins
- Landscaping spikes
- Garbage bags
- A pen and a clipboard
Warnings
- Older homes may have asbestos insulation in place as a vapor barrier. If your home was built before the 1980s and you aren't sure what the insulation is made out of, get a home asbestos test. You don't want to be in a closed area breathing asbestos fibers.⧼thumbs_response⧽
References
- ↑ https://crawlspacerepair.com/blog/how-to-install-a-crawl-space-liner
- ↑ Alberto DeJesus. Construction Specialist. Expert Interview. 15 December 2021.
- ↑ https://crawlspacerepair.com/blog/how-to-install-a-crawl-space-liner
- ↑ https://crawlspacerepair.com/blog/how-to-install-a-crawl-space-liner
- ↑ Alberto DeJesus. Construction Specialist. Expert Interview. 15 December 2021.
- ↑ http://cabindiy.com/how-to/crawl-space-vapor-barrier/
- ↑ http://cabindiy.com/how-to/crawl-space-vapor-barrier/
- ↑ https://www.familyhandyman.com/smart-homeowner/how-to-install-a-vapor-barrier-in-the-crawlspace/view-all/
- ↑ https://www.familyhandyman.com/smart-homeowner/how-to-install-a-vapor-barrier-in-the-crawlspace/view-all/
- ↑ https://www.familyhandyman.com/smart-homeowner/how-to-install-a-vapor-barrier-in-the-crawlspace/view-all/
- ↑ https://www.familyhandyman.com/smart-homeowner/how-to-install-a-vapor-barrier-in-the-crawlspace/view-all/
- ↑ https://www.familyhandyman.com/smart-homeowner/how-to-install-a-vapor-barrier-in-the-crawlspace/view-all/
- ↑ http://cabindiy.com/how-to/crawl-space-vapor-barrier/
- ↑ https://www.familyhandyman.com/smart-homeowner/how-to-install-a-vapor-barrier-in-the-crawlspace/view-all/
About This Article