This article was co-authored by wikiHow staff writer, Nicole Levine, MFA. Nicole Levine is a Technology Writer and Editor for wikiHow. She has more than 20 years of experience creating technical documentation and leading support teams at major web hosting and software companies. Nicole also holds an MFA in Creative Writing from Portland State University and teaches composition, fiction-writing, and zine-making at various institutions.
This article has been viewed 27,354 times.
Learn more...
When you're new to Figma, seemingly-simple tasks like changing font size, fixing typos, and moving text can be a little tricky to figure out. This wikiHow article will teach you how to add, select, and modify text in Figma, as well as how to create and edit Text Styles that you can apply to your entire project.
Steps
Changing Font Size, Color, and Alignment
-
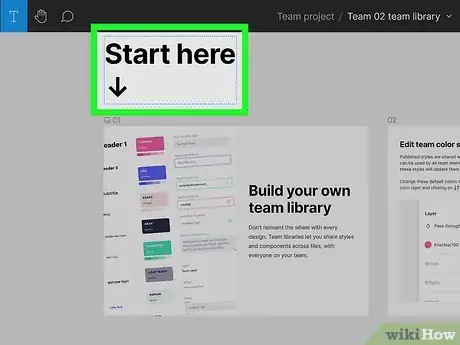
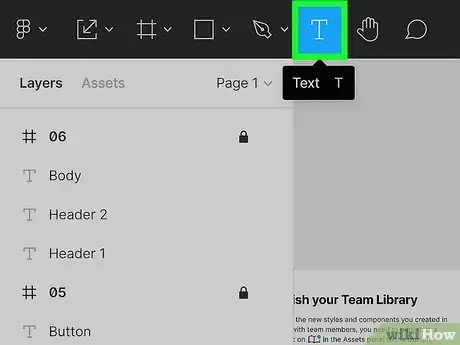
1Click the Text tool. This is the T icon at the top of Figma. Any time you want to change something about the text you're working with, you'll start by selecting this tool.[1]
- Another quick way to open the Text tool is to press the T key on your keyboard.
- All text in Figma, like other objects, is created on layers. You'll see all text layers in the Layers panel on the left side of Figma prefaced with a "T" icon.
-
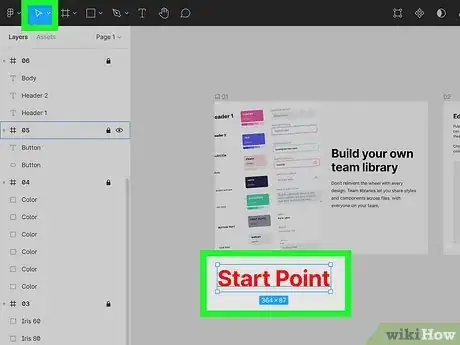
2Hover your mouse cursor over the text you want to edit. If the text is editable, you'll see a blue dotted line appear around it—this is the text box. While your mouse is over the text, the pointer will turn into a vertical cursor.Advertisement
-
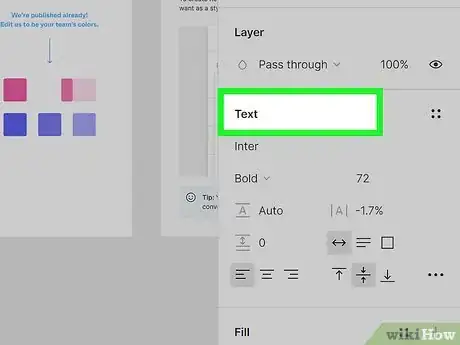
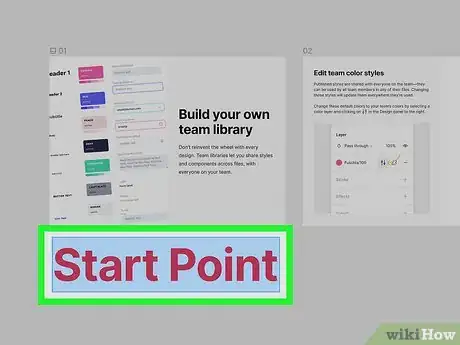
3Select the text you want to edit. You can do this by clicking and dragging the cursor over the text to highlight it in blue. When text is selected, its properties will appear in the Text properties panel on the right.
- If you don't want to change the look of the text but instead want to add, delete, or correct something, click the cursor to place it at the desired position instead. Now you can modify as needed.
- You can also select the text by clicking the text layer in the Layers panel on the left. Additionally, if you want to change the look of multiple text layers at once, you can hold down the Shift key as you select multiple text layers.
-
4Find out if a Text Style is applied to this text. If you see a panel called "Text" in the right sidebar when text is selected, there are no Text Styles applied to the selection. But if you don't see a "Text" panel and do see one called "Ag," this means there's a text style applied to that text overriding your ability to make changes. See Using Text Styles for more information on Text Styles.
-
5Change the look of the text. While the text or text layer is selected, the size, alignment, font face, and other options you choose in the Text panel will be applied to the text.
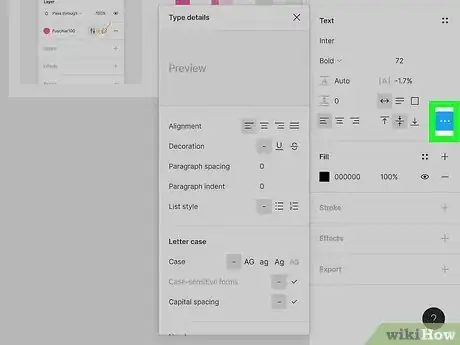
- Click the three horizontal dots at the bottom-right corner of the Text panel to expand the Type Details window. Here is where you'll find your alignment, decoration, and spacing options.
- Use the Stroke panel to add an outline (or inner line) to your text and adjust its size and color.
- The Effects panel lets you add text effects like drop shadow, inner shadow, and blurring.
- If the Text panel is grayed out and you see a yellow icon with "A?" next to the font's name, the font is not installed on your computer.[2] You can't edit the text unless you install the missing font or choose a replacement. To choose a replacement font, click the A? to open the Missing Fonts screen, and then select a font you have installed.
-
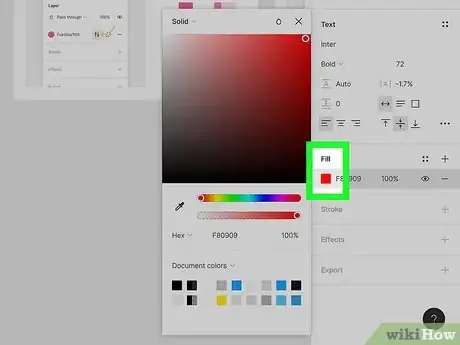
6Change text color. The Color of text is actually controlled by the Fill panel in the right sidebar, not on the Text panel. Clicking the desired color in the Fill panel will recolor the selected text.
-
7Move text around. When you move text in Figma, all text on the text layer will move. Here's how to move text:
- Press the M key on the keyboard to select the Move tool.
- Click the text layer you want to move in the Layers panel. This surrounds the text with a bounding box.
- Click and drag the text to the desired position.
-
8Resize text with the Scale tool. Figma recommends only changing the size of text using the Text panel, but you can also resize text with the scaling tool. The difference is that the text size may change to a different size than other text in your presentation, so things may not be as uniform. Still, this is handy if you're working with text that you need to resize to fit in a certain area. Here's how to scale text:
- Press the K key on the keyboard to open the Scale tool.
- Click the text layer in the Layers panel on the left.
- Drag any of the corner bounding boxes on the text outward to expand it, or inward to make it smaller.
Adding Text
-
1Click the Text tool. This is the T icon at the top of Figma. This activates the Text tool. You can also open this tool by pressing the T key on your keyboard.
-
2Choose how to create a new text layer. When you add text to Figma, you're adding a new layer containing that text. There are two ways to create a text layer:
- One is to click the location where you want to add text. This creates a new text layer with text resizing set to Auto Width, which means that as you type, the width of the text box expands as you enter more text.[3]
- The other is to click and drag your mouse to draw a text box with the desired dimensions. This not only defines the size of the text layer before you start typing, but also sets the text resizing to Fixed Width, which lets you enter more text. It also automatically wraps the text so it overflows onto the next line.
-
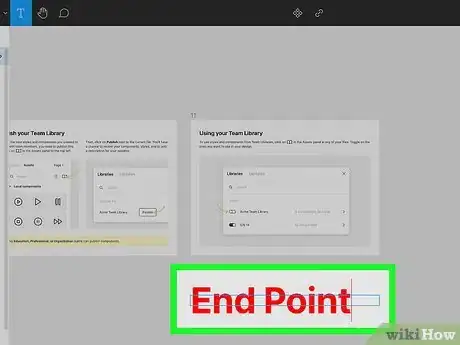
3Start typing. Whether you clicked the mouse at the desired location or draw a text box, a cursor will appear and you can start typing. You'll have some generic font settings by default—a smallish black font—but you change it by selecting it and using the Text panel in the right sidebar, or by creating or applying a text style.
- Your text layers appear in the Layers panel with a "T" before them.
Creating and Applying Text Styles
-
1Select some text that has properties you want to use. Text Styles allow you to define properties for text that you can use in any of your team's projects. Once you've customized an area of text to your liking, click the name of the text layer in the Layers panel so you can create a style from it.
- For example, if you're designing a website and want all section headers to be 36pt and right aligned, you can create a Header style with those properties and apply it to every header on your website.
- When you make changes to a Text Style's properties later, such as its typeface, alignment, or spacing, the changes will affect all text to which you've applied that style. This is a great way quickly change text all across your entire design without tediously editing multiple text layers separately.
- Text Styles do not include color. You can add color using the Fill panel, or by creating a Color Style, which we'll get to later.
-
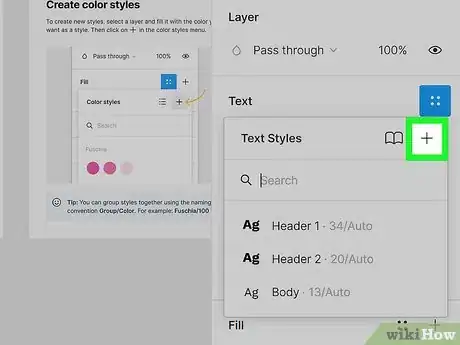
2Click the Style icon on the Text panel. The Text panel is in the properties bar on the right side of Figma, and the Style icon is the four dots at the panel's top-right corner. This opens the Text Styles window.
-
3Click the + on the Text Styles window. It's at the top-right corner . This opens the "Create new text style" window.
-
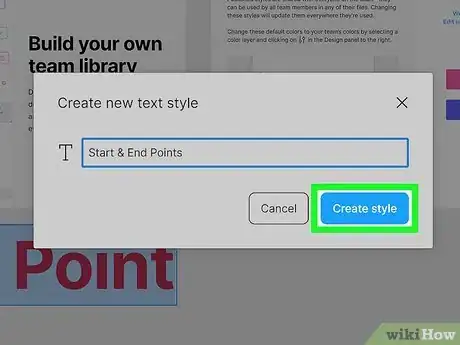
4Type a name and click Create style. This creates a new style using the properties of the selected text.
- Give the style a name that's reflective of the content you're applying the style to (such as "body" or "links"), or descriptive of the style itself (such as "red header").
-
5Assign a Text Style to other text. Now that you've created a Text Style, you can apply it to any text layers in your project. Here's how:
- Select the layers you want to apply the style to in the Layers panel. To select multiple layers, hold down the Shift key as you click each layer's name.
- Click the four dots at the top-right corner of the Text panel in the right sidebar.
- Click the name of the Text Style to apply it.
- When you try to modify text that has a style applied to it, you won't see a Text panel on the right—you'll just see "Ag" and the style's name.
-
6Remove a Text Style from text. If there's a style applied to text that you'd rather just edit separately, or you just want to assign the text a different style, you can easily unlink the Text Style from the text. Here's how:
- Either select the text layer(s) you want to remove the style from in the Layers panel, or press T to open the Text tool and highlight the text.
- Hover your mouse cursor over the name of the Text Style on the "Ag" panel in the right sidebar. You'll see a small link icon appear.
- Click the link icon to unlink the style from the text. The Text panel will then reappear in the right sidebar so you can edit the text separately.
-
7Change the properties of a Text Style. When you change something about a Text Style that's applied to text in your project (such as its size or color), those changes will affect all text with that style. Here's how you can make changes:
- Press T to activate the text tool, but don't select any text.
- Click the four dots at the top-right corner of the Text panel to open the Text Styles window.
- Hover your mouse cursor over the style's name.
- If you're editing a local style (one you created in this project), you'll see all of your options for editing the style now. You can also click the three dots to expand more options.
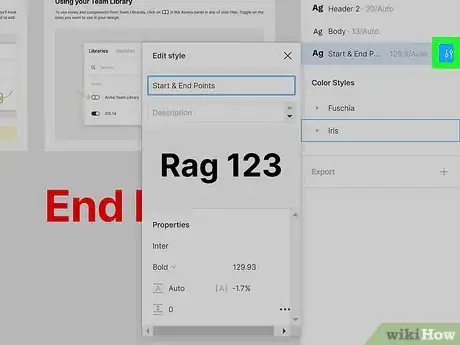
- If the style is in your Team Library, it will be marked a such, and editing it will be a little different. Click Go to style definition to view all styles in the Team Library, hover your mouse cursor over the style name, and click the two sliders to edit it there.
-
8Create a Color Style. Because Text Styles don't include color, you might want to create a Color Style so you can easily apply it styles to correspond with Text Styles. The process is very similar to creating a Text Style:
- Select some text and choose a color from the Fill panel.
- Click the Style icon on the Fill panel (the four dots).
- Click the + to create a new style.
- Type a name for the style, such as its color, and click Create style.
- You can now apply that color style to any layer in Figma, including text layers.
-
9Share Text and Color Styles to the Team Library. If you're a part of a team and you're all working on the same document, you can publish your styles so they are available to your team. Here's how:
- Click the Assets tab in the left sidebar.
- Click the Library icon (the open book) at the top.
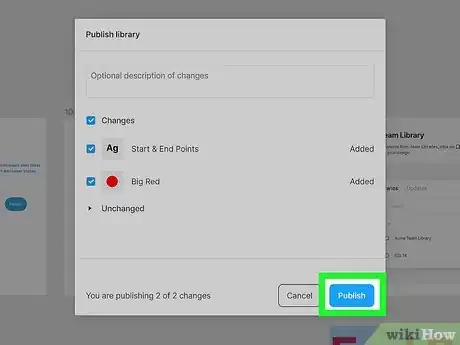
- Click Publish.
- Type a description of the changes you're making, such as "Adding header style," for the version history.
- Click the down arrow next to "Styles and components" to view and select styles to publish.
- Click Publish.
- Anyone working on the project in Figma will be prompted to receive the update.
References
About This Article
1. Press T to open the text tool.
2. Select a text layer to edit, or highlight some text.
3. Use the Text panel on the right sidebar to make changes.
4.

