This article was co-authored by Babis Kanellopoulos and by wikiHow staff writer, Jennifer Mueller, JD. Babis Kanellopoulos is a Personal Trainer and the Owner of Pod Fitness in London, UK. Babis specializes in helping clients use fitness to overcome difficulties and gain self-confidence. He has experience in kickboxing, long distance running, and martial arts. Pod Fitness sessions combine the focus of personal training with the benefits of small group, personalized, and structured training.
This article has been viewed 18,574 times.
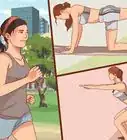
If you want a shapely, toned rear, you have to put in some time building your glutes. The glute kickback is a powerful exercise that specifically targets your glutes and requires no special equipment. You can perform basic glute kickbacks in your own home —all you need is enough floor space to move without knocking something over. If you're looking for a challenge, there are ways you can modify glute kickbacks to get an even more powerful strengthening and fat-burning workout.[1]
Steps
Performing the Basic Exercise
-
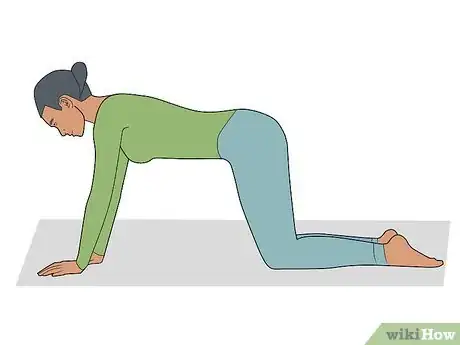
1Start from all fours on the floor. Kneel on the floor and place your hands in front of you, palms flat on the floor. Your hips and knees should be at 90-degree angles with your back parallel to the floor. Make sure your back is completely flat and not arched. Look forward and slightly down, but do not crunch your neck. You may want to use an exercise mat or towel to protect your knees.[2]
- Roll your shoulders back so that your shoulder blades are tucked in along either side of your spine. Your hands should be roughly shoulder-width apart with your elbows straight.
Tip: Take a moment in the starting position and turn your attention to your breath. Breathe deeply in through your nose, then exhale through your mouth. Repeat for a few breath cycles until you are comfortable with your breath.
-
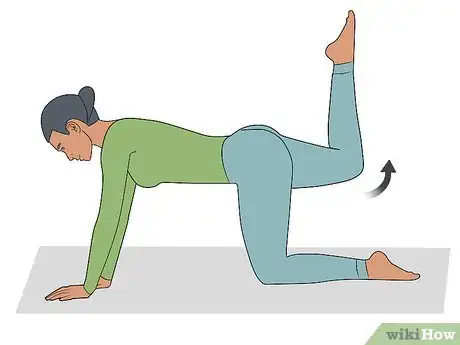
2Contract your glutes as you lift your right leg. On an exhale, raise your right leg, lifting your thigh first and keeping your knee at a right angle. Lift smoothly until your thigh is parallel to the floor. Hold the contraction briefly at the top before lowering your leg.[3]
- Make sure you feel the work primarily in your glutes and aren't bringing in your back at all. Your back should remain flat and your shoulders should still be even and parallel to the floor.[4]
- You may feel a stretch in your hip flexors, particularly if your hips aren't very flexible. If you find that the exercise hurts or you can't do it with proper form, stop.[5]
Advertisement -
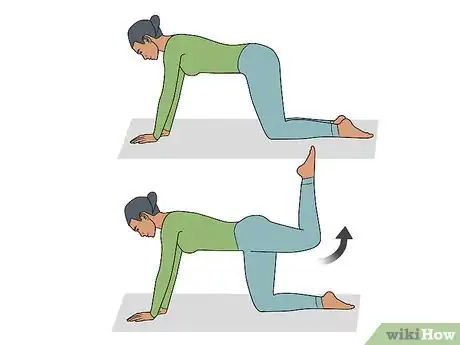
3Return to start and repeat with your left leg. Lower your right leg in a controlled motion as you inhale. It should take you about as long to lower your leg as it did to raise it. When your knee has returned to the floor, complete your breath cycle with an exhale as you raise your left leg.[6]
- Pay attention to your back and sides and check your form. Notice whether the exercise feels differently on your left side than it did on your right — this could indicate a muscle imbalance.
-
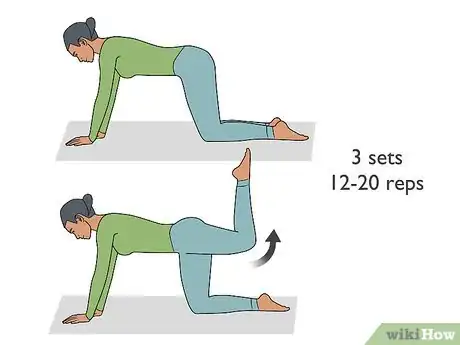
4Do 3 sets of 12 to 20 reps of this exercise. If you're alternating legs, one glute kickback with each leg constitutes a single rep. You can also do all reps on one leg first and then switch to the other leg to complete the set.[7]
- Rest for a few breath cycles in the starting position between sets.
- Add this exercise to other leg and lower-body exercises. Focus on your lower body at least 1 day a week as part of a regular workout regimen.
Modifying Glute Kickbacks
-
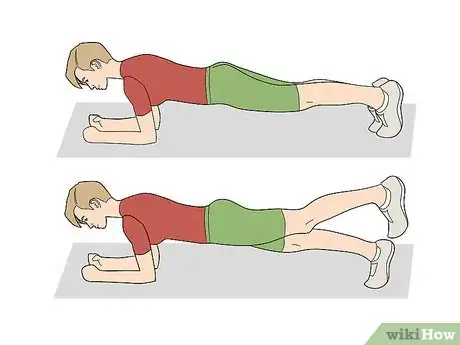
1Do the exercise from plank position to bring in your core. If you already have a stable plank, try glute kickbacks from that position instead of from all fours for an extra challenge. Bend your knee at a 90-degree angle and slowly raise your thigh, isolating your glute muscle and using your core to keep your body in position and your back straight.[8]
- For plank position, extend your legs out from all fours until your toes are resting on the floor. Engage your core to hold the position. You can also lower your upper body so that your forearms are resting on the floor for additional stability. Your arms should be facing forward and parallel to each other with your elbows at right angles.
- Doing glute kickbacks from plank position is more challenging than doing the exercise from all fours. Start with 3 sets of 6 to 10 reps, but only do as many as you can with proper form.
- Make sure your weight is balanced and you aren't leaning into your wrists.
-
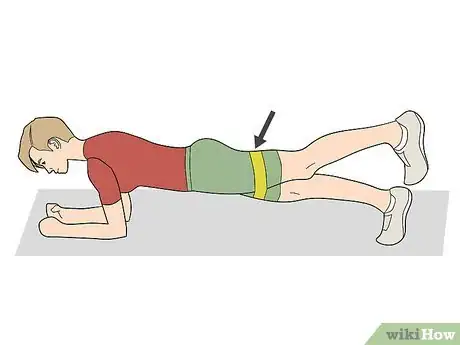
2Use a mini-band above your knees to add resistance. If you have a mini-band, wrap it around your thighs just above your kneecaps and get in position for glute kickbacks. When you raise your leg, the mini-band will provide resistance to add load to the movement.[9]
- You can do this variation using the standard all-fours starting position or the more advanced plank starting position.
-
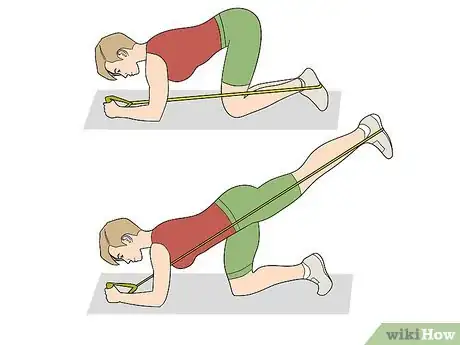
3Extend your leg straight using a resistance band. For this variation, get in the standard all-fours starting position. You'll need a longer resistance band with handles on the end. Loop the band around the middle of your foot and hold the handles with your hands in front of you. On an exhale, extend your foot up and out until your foot is higher than your back.[10]
- Take care when lowering your leg. Don't just drop it down and immediately release tension in the band. Lower your leg in a controlled movement at roughly the same speed as you raised it.
-
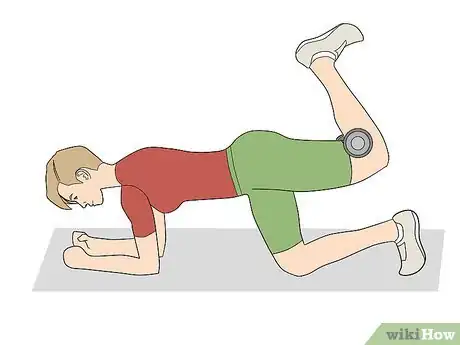
4Place a dumbbell in the crease of your knee to add load to the exercise. If you really want to build your glutes, you need to do exercises with load. Take a dumbbell of an appropriate weight for you and place it in the crease of your knee. You can hold it between your calf and your hamstring as you raise your leg to keep it from falling.
- With this variation, it's generally best to do all of your reps on one side and then switch to the other side. That way you aren't moving the dumbbell back and forth. However, if you prefer to alternate, you can put the same size and weight dumbbell behind each knee.
- If you're new to weight-lifting, a 2 lb (0.91 kg) dumbbell is a good place to start. If that's too heavy, move down to a lighter weight. You can also use ankle weights that wrap around your ankles.
Warning: Only use as much weight as you can lift while still maintaining proper form and isolating your glutes. Trying to do this exercise with poor form can cause a lower back injury.
Warnings
- Consult with your doctor before starting any new exercise program, particularly if you have a chronic disease or condition.⧼thumbs_response⧽
References
- ↑ https://www.exercise.com/exercises/glute-kickback
- ↑ https://www.bodybuilding.com/exercises/glute-kickback
- ↑ https://www.bodybuilding.com/exercises/glute-kickback
- ↑ Babis Kanellopoulos. Personal Trainer. Expert Interview. 6 July 2021.
- ↑ Babis Kanellopoulos. Personal Trainer. Expert Interview. 6 July 2021.
- ↑ https://www.bodybuilding.com/exercises/glute-kickback
- ↑ https://www.healthline.com/health/fitness-nutrition/glute-kickback#1
- ↑ https://kuttingedgefitness.com/glute-kickback/
- ↑ https://kuttingedgefitness.com/glute-kickback/
