X
This article was co-authored by Lois Wade. Lois Wade has 45 years of experience in crafts including sewing, crochet, needlepoint, cross-stitch, drawing, and paper crafts. She has been contributing to craft articles on wikiHow since 2007.
This article has been viewed 24,718 times.
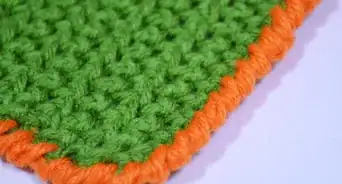
Interlocking crochet looks intricate and complex, but it is easier than it looks. You can use interlocking crochet to create blankets, hats, scarves, washcloths, or other projects. You will need some basic crocheting knowledge to do interlocking crochet. Practice the pattern and then start creating beautiful interlocking crochet designs.
Steps
Part 1
Part 1 of 3:
Creating the Foundation Chain
-
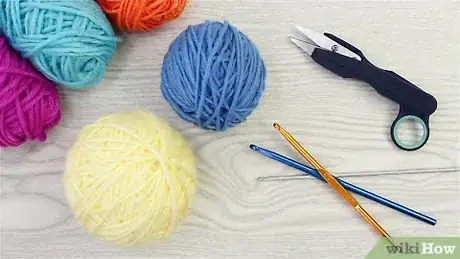
1Gather your materials. You will need a couple skeins of yarn and a crochet hook to do double crochet. Contrasting colors work best for interlocking crochet, so make sure that you choose two colors that will pop next to each other, like green and pink or purple and yellow. Also, choose smooth yarn types for this project and avoid anything too fluffy.[1] You will need:
- Two different colors of yarn.
- A size 8 crochet hook (or a hook that is appropriate for the type of yarn you are using).
- A pair of scissors.
-
2Determine how long to make your foundation chain. The number of links in your foundation chain will depend on how many squares you would like your finished interlocking crochet to have.[2]
- Multiply the number of squares you want to create by 2 and then add 4. For example, if you want your interlocking crochet to have 6 squares, then you would multiply 6 by 2, which equals 12, and then add 4, which equals 16.
- If you want larger squares, then multiply the total number of squares by 3 and then add 5.[3] For example, if you wanted your interlocking crochet to have 5 squares, then you would multiple this by 3, which equals 15, and then add 5, which equals 20.
Advertisement -
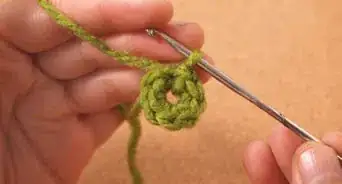
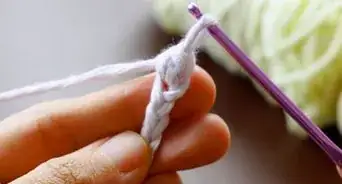
3Create your foundation chain. Use the number you came up with as your guide and create the foundation chain for your first filet mesh piece. For example, if you came up with 16 for your number, then chain 16 stitches.[4]
- You'll do this just like you would make any other foundation chain in crochet.[5]
Advertisement
Part 2
Part 2 of 3:
Making the Filet Mesh
-
1
-
2
-
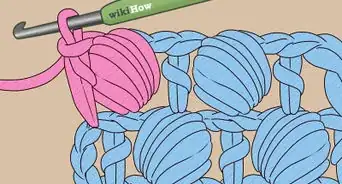
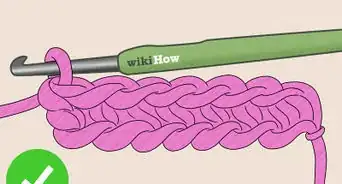
3Loop over and double crochet. Next, loop the yarn on your hook and double crochet into the foundation chain.[10]
- Continue to chain 1, skip 1, loop over, and double crochet until you reach the end. Keep making mesh squares following this pattern until you reach the end of your chain.[11]
-
4Chain 4 for the turning chain at end. The turning chain is what you will use to connect this piece to your second piece. Each of the filet mesh pieces you create will need a turning chain at the end. To create a turning chain, make a chain of 4 at the end of the piece and finish it by leaving a large loop. This will help to ensure that the chain does not come undone before you are ready to use it.[12]
-
5Make at least one more set of squares. For your second set of squares, use a different color and make the foundation mesh one square shorter than your first one.[13] This will result in a pattern and allow the colors of the second filet mesh piece to show through the windows on your first filet mesh piece.
Advertisement
Part 3
Part 3 of 3:
Connecting the Filet Mesh Pieces
-
1Lay filet mesh chains over each other. The chains of four should be on the same side and the longer of the two filet mesh chains should be on top. Line them up so that the second color shows through the square in the first color. This will mean that the edges will not be aligned. Instead, the edge of the second color filet mesh chain will be about ¼” to ½” in from the edge of the first color chain.[14]
-
2Loop the end of the longer chain over the hook. Take the long loop that you left on the end of your turning chain for the first (longer) filet mesh piece and loop it over your crochet hook. Pull the yarn until it is tight on the hook.[15]
-
3Insert the hook through the back window of the shorter piece. To link the two piece, insert the hook in through the back of the second piece, but don’t go through the stitches. Just insert the hook through the window in the shorter filet mesh piece.[16]
-
4Double crochet through the longer piece to connect them. Next, insert the hook through the chain on the longer filet mesh piece and do a double crochet. This double crochet stitch will lock the two pieces together by looping around the edge of the shorter piece.[17]
-
5Continue to the end of the row. Keep inserting the yarn through the window of the shorter piece and double crocheting through the longer piece until you reach the end of the pieces. Keep the pieces aligned as you go.
- If you want to interlock more filet mesh pieces, then follow the same strategy. To add the next piece, you would use the turning chain of the shorter piece and insert it in through the window of a long piece to connect it.
Advertisement
Expert Q&A
-
QuestionWhat is an interlocking crochet chart?
 Lois WadeLois Wade has 45 years of experience in crafts including sewing, crochet, needlepoint, cross-stitch, drawing, and paper crafts. She has been contributing to craft articles on wikiHow since 2007.
wikiHow Crafts Expert Interlocking is just a variation on regular crochet. There are no new notations—you just follow the directions while crocheting through the 'holes' of the previous row.
 -
QuestionWhat's a filet mesh?
 Lois WadeLois Wade has 45 years of experience in crafts including sewing, crochet, needlepoint, cross-stitch, drawing, and paper crafts. She has been contributing to craft articles on wikiHow since 2007.
wikiHow Crafts Expert Filet mesh is crochet that has larger-than-average holes, or windows, in it.
 -
QuestionHow can you easily connect filet mesh pieces?
 Lois WadeLois Wade has 45 years of experience in crafts including sewing, crochet, needlepoint, cross-stitch, drawing, and paper crafts. She has been contributing to craft articles on wikiHow since 2007.
wikiHow Crafts Expert Interlocking crochet is one way, but there are multiple ways to connect filet mesh.
Advertisement
References
- ↑ https://www.youtube.com/watch?v=lBjwsSMAfXY
- ↑ https://www.youtube.com/watch?v=lBjwsSMAfXY
- ↑ https://www.craftsy.com/blog/2014/05/how-to-filet-crochet/
- ↑ https://www.youtube.com/watch?v=lBjwsSMAfXY
- ↑ Lois Wade. wikiHow Crafts Expert. Expert Interview. 8 June 2021.
- ↑ https://www.youtube.com/watch?v=lBjwsSMAfXY
- ↑ https://www.craftsy.com/blog/2014/05/how-to-filet-crochet/
- ↑ https://www.youtube.com/watch?v=lBjwsSMAfXY
- ↑ https://www.craftsy.com/blog/2014/05/how-to-filet-crochet/
- ↑ https://www.youtube.com/watch?v=lBjwsSMAfXY
- ↑ https://www.youtube.com/watch?v=lBjwsSMAfXY
- ↑ https://www.youtube.com/watch?v=lBjwsSMAfXY
- ↑ https://www.youtube.com/watch?v=lBjwsSMAfXY
- ↑ https://www.youtube.com/watch?v=YEF0n6GCME8
- ↑ https://www.youtube.com/watch?v=YEF0n6GCME8
- ↑ https://www.youtube.com/watch?v=YEF0n6GCME8
- ↑ https://www.youtube.com/watch?v=YEF0n6GCME8
About This Article
Advertisement
