This article was co-authored by wikiHow staff writer, Nicole Levine, MFA. Nicole Levine is a Technology Writer and Editor for wikiHow. She has more than 20 years of experience creating technical documentation and leading support teams at major web hosting and software companies. Nicole also holds an MFA in Creative Writing from Portland State University and teaches composition, fiction-writing, and zine-making at various institutions.
This article has been viewed 256,732 times.
Learn more...
If you need tech support for your Dell computer, monitor, printer, or other device, you'll want to know your service tag number. The service tag is a unique 7-digit alphanumeric you can use to identify your product, get support, download drivers, and find compatible accessories. The easiest way to find your service tag is to look at the black-and-white sticker on your device. If the sticker is missing or worn down, you can also find the service tag in the SupportAssist app, in the BIOS, and by running a simple command. This wikiHow article will teach you all of the ways you can locate your Dell service tag for any product.
Things You Should Know
- A service tag is a 7-digit alphanumeric code unique to your Dell device.
- Service tags are printed on black-and-white stickers on all Dell computers, tablets, projectors, printers, docking stations, and monitors from 2016 and later.
- You can also find the service in SupportAssist, the BIOS, and by running the command "wmic bios get serialnumber" in Command Prompt.
Steps


Using the Windows Command Prompt
-
1Press ⊞ Win+S. This activates the Windows Search bar next to the Start menu.
-
2Type cmd into the Search bar. A list of results will appear.
-
3Click Command Prompt in the search results. This opens the Windows Command Prompt.
-
4Type wmic bios get serialnumber at the prompt and press ↵ Enter. The Service Tag is the 7-digit alphanumeric code that appears below "SerialNumber."


Using Android Settings


Using a Linux Terminal
-
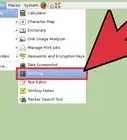
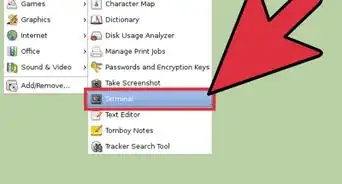
1Press Ctrl+Alt+T. This opens a terminal window on your Linux system.
-
2Type sudo dmidecode -s system-serial-number and press ↵ Enter.
-
3Enter your password and press ↵ Enter. Once your password is accepted, you'll find the 7-digit alphanumeric Service Tag below "SerialNumber."


Using the BIOS
-
1Turn off your Dell desktop or laptop PC. If you can't boot your computer into Windows or Linux and don't see the service tag sticker, you can access the service code from the BIOS. Begin by powering the computer off.
-
2Turn the PC back on and press F2 on the Dell logo screen. You'll need to be quick with this move—make sure you press this key as soon as you see the Dell logo. Press it several times quickly, and don't stop until you see the BIOS or UEFI screen.
-
3Select the System Information or Overview section. The BIOS (or UEFI) will be different on each system, but you'll find the service tag is in a section with one of these two names.


References
- ↑ https://www.dell.com/support/contents/en-us/article/product-support/self-support-knowledgebase/locate-service-tag/Notebook
- ↑ https://www.dell.com/support/kbdoc/en-us/000128625/service-tags-and-express-service-codes-for-dell-printers
- ↑ https://www.dell.com/support/contents/us/en/04/article/product-support/self-support-knowledgebase/locate-service-tag/Projectors-Monitors
- ↑ https://www.dell.com/support/contents/en-us/article/product-support/self-support-knowledgebase/locate-service-tag/tablets
- ↑ https://www.dell.com/support/contents/en-us/article/product-support/self-support-knowledgebase/locate-service-tag/docking-station
- ↑ https://www.dell.com/support/contents/us/en/04/article/product-support/self-support-knowledgebase/software-and-downloads/supportassist
About This Article

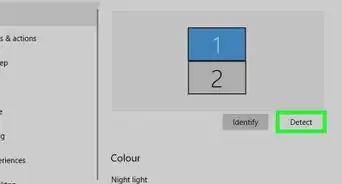
1. Open the Dell Drivers and Downloads page.
2. Click Detect PC or Detect Product.
3. Review the "Service Tag" heading at the top of the "Support" page.