This article was co-authored by Ryaan Tuttle and by wikiHow staff writer, Amber Crain. Ryaan Tuttle is a Home Improvement Specialist and the CEO of Best Handyman, Inc. in Boston, Massachusetts. With over 17 years of experience, he specializes in building home service businesses, focusing on creating scalable and efficient brands. With the help of his global team, the companies have achieved over 10+ million in sales and received recognition through magazine features, and enjoy partnerships with wikiHow and Jobber field service software. Boston Magazine and LocalBest.com have named Best Handyman Boston the Best Handyman in Boston. Ryaan holds Construction Supervisor and Home Improvement Contractor Licenses.
This article has been viewed 104,732 times.
Home repairs can hit a major snag if the screws you have are too long for the job! You can always stop what you're doing and make a trip to the hardware store to buy smaller screws, but if you're in the middle of a project, this can be inconvenient. You can't leave the ends of screws pointing out, and the easiest solution is to cut them with a wire stripper. Most people don't know that wire strippers, also known as wire cutters, can cut screws so effectively! You can use a wire stripper to measure, adjust, and cut screws, saving yourself time and money. If you trim a screw as far as you can and it's still too long, try adding a nut to the screw.
Steps
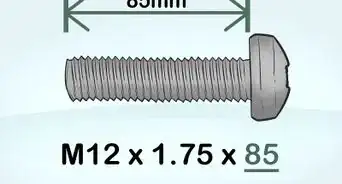
Measuring Your Screw
-
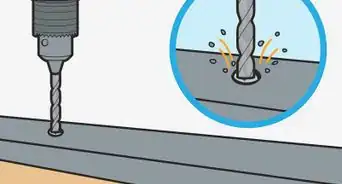
1Drill a pilot hole into your project surface. Never drill a screw directly into any surface. Drilling a pilot hole will prevent splitting and buckling, and will make it easier to determine if your screw is actually too long! To drill a pilot hole, choose a drill bit 1 size smaller from your actual screw size. Then, drill all the way down in the exact spot where you plan to put your screw.
- If you want your screw to be flush with the board, use a drill bit 1 size larger than your screw head. However, only drill about 1⁄8 inch (0.32 cm) into the wood.
-
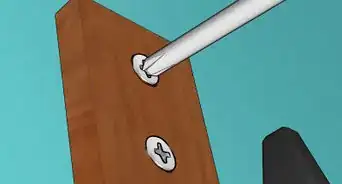
2Thread the screw into the hole. Use a drill or a screwdriver to work the screw into your pilot hole. A screwdriver is best for softer woods and delicate jobs, such as antique furniture. Use a drill for hardwood and metal.Advertisement
-
3Make sure the screw is fully sunk into the pilot hole. If your screw isn't all the way in, you won't get an accurate measurement. Make sure you've bolted the screw firmly into place. The head of the screw should be level to or slightly below your project surface.
- Don't drill too hard -- if you strip the screw, it will be almost impossible to remove.
-
4Check the backside of your project to see if the screw is poking out. Look on the other side of your project surface. If you can see or feel the tip of the screw poking out, it's too long and you'll need to cut it to fit. You don't need to take the screw out of the surface -- you can cut it right there with a wire stripper.[1]


Cutting the Screw
-
1Line up the wire stripper's printed side to your screw. Wire strippers have a side with measurements printed on them and a blank side. The side with measurements has the sharper end of the blade, so you'll want to cut with the screw inserted into the printed side. The tip of the screw should be poking out of the blank side.[2]
- You'll need to use a high quality wire stripper if you want to strip screws. Lower quality pairs, especially those included in tool kits, aren't strong enough to get the job done.
-
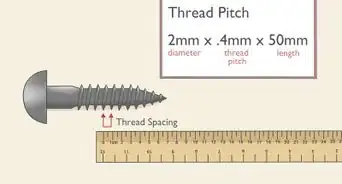
2Locate the correct hole size on your wire stripper. Wire strippers have multiple hole sizes. Choose one that fits your screw snugly but doesn't require it to be forced in. If the hole is too big, the screw may just bend instead of being cut. If it's too small, you won't get a close cut.[3]
-
3Press the wire stripper against the project surface. Slide the wire stripper over the screw until the printed side is pressed snugly against the underside of your project surface. The tip of the screw and the wire stripper should both be on the same side of the surface.[4]
-
4Squeeze the wire stripper until the end of the screw snaps off. To cut the screw, squeeze the wire stripper tightly until you feel the end of the screw fall off. It's okay to squeeze a few times, but avoid jiggling the wire stripper. You'll wind up with an uneven cut.[5]
- If you're having trouble cutting the screw, try squeezing the wire strippers 3-4 times. If you're not making any progress, go to the next smaller hole.


Finishing the Screw
-
1Trim any excess screw length. If you can cut the screw again, do it! Some wire strippers will be difficult to line up perfectly with a surface, so it's okay to make a second cut.
- If you're having a hard time accessing the back of the screw with your wire strippers, you can instead use a reciprocating saw with a long bi metal blade. The saw will make a smooth cut with no sharp edges.
-
2Sand down the tip of the screw (optional). If the remaining screw tip is almost level with the surface and is just a little rough, use a sander with coarse paper to smooth it out a little. Sandpaper in the 40 to 50 grit range should do the trick. Be careful -- sharp edges can damage a sander.[6]
- If you don't have a sander, try using heavy duty sandpaper (the kind that has material backing) on a sanding block. Run it over the screw tip a few times.[7]
- If you're sanding down multiple screws, it's easier to use a grinder or drill with a grinding tip. This will save you time and elbow grease.
-
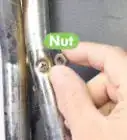
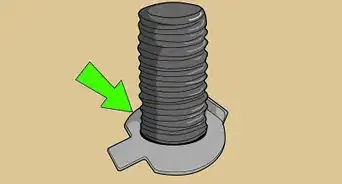
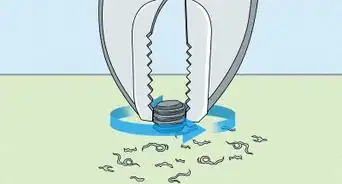
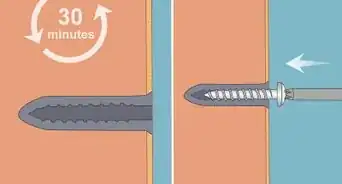
3Add a nut for longer screws (optional). If there is a longer piece of screw that you can't trim any further, use a nut with the same thread size to hold it in place and prevent snags. Just use a wrench to hold it snugly in place.[8]
- As an alternative, you can use screw end caps, also called thread covers. These are soft and flexible, making them easy to slide over the exposed end of your screw.

Expert Q&A
-
QuestionWhat tool is best for cutting screws?
 Ryaan TuttleRyaan Tuttle is a Home Improvement Specialist and the CEO of Best Handyman, Inc. in Boston, Massachusetts. With over 17 years of experience, he specializes in building home service businesses, focusing on creating scalable and efficient brands. With the help of his global team, the companies have achieved over 10+ million in sales and received recognition through magazine features, and enjoy partnerships with wikiHow and Jobber field service software. Boston Magazine and LocalBest.com have named Best Handyman Boston the Best Handyman in Boston. Ryaan holds Construction Supervisor and Home Improvement Contractor Licenses.
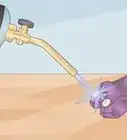
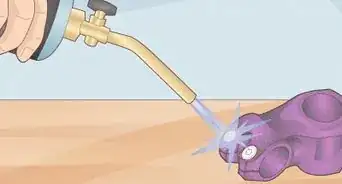
Home Improvement SpecialistGrinders or Dremel tools are amazing for cutting screws. You can also use a typical forage angle grinder with a metal blade on it.
Things You'll Need
- Wire stripper
- Screws
- Sander (optional)
- Coarse grit sandpaper and sanding block (optional)
- Nut (optional)
Warnings
- After cutting a screw, always check to see how sharp the edge is. If it's very sharp and still poking out even slightly, it might be dangerous. Hone down that sharp edge with some coarse grit sandpaper.⧼thumbs_response⧽


References
- ↑ https://www.doityourself.com/forum/hardware-fasteners/345859-how-cut-shorten-screw-have-still-useable.html
- ↑ http://www.hometalk.com/3807108/how-to-trim-the-screw-posts-on-a-drawer-knob?expand_all_questions=1
- ↑ http://www.hometalk.com/3807108/how-to-trim-the-screw-posts-on-a-drawer-knob?expand_all_questions=1
- ↑ http://www.hometalk.com/3807108/how-to-trim-the-screw-posts-on-a-drawer-knob?expand_all_questions=1
- ↑ http://www.hometalk.com/3807108/how-to-trim-the-screw-posts-on-a-drawer-knob?expand_all_questions=1
- ↑ https://www.doityourself.com/forum/hardware-fasteners/345859-how-cut-shorten-screw-have-still-useable.html
- ↑ https://diy.stackexchange.com/questions/21875/what-kind-of-drill-bit-would-i-use-to-grind-down-the-end-of-a-protruding-screw
- ↑ http://www.hometalk.com/3807108/how-to-trim-the-screw-posts-on-a-drawer-knob?expand_all_questions=1
- ↑ Ryaan Tuttle. Home Improvement Specialist. Expert Interview. 18 June 2021.
About This Article

If a screw is too damaged or stripped for you to use a screwdriver to remove it, you can cut it with a pair of wire cutters. Line up the side of the wire strippers that have measurements printed on them with the screw so the tip is poking out of the blank side of the wire strippers. Hold the wire strippers flush against the surface with the screw in it and squeeze the handles until the end of the screw snaps off. If the screw still has some extra length sticking out, make another cut with your wire clippers. Sand down any remaining bit of the screw so it’s flush with the surface. For tips about how to add a nut for longer screws, keep reading!