X
wikiHow is a “wiki,” similar to Wikipedia, which means that many of our articles are co-written by multiple authors. To create this article, 10 people, some anonymous, worked to edit and improve it over time.
This article has been viewed 41,999 times.
Learn more...
Scrunchies are a comfortable, fashionable way to pull your hair back. As opposed to a regular hair band, the scrunchie's "scrunched" material pulls less and minimizes breakage, all while dressing up your hairstyle. Crocheting a scrunchie is fast and easy - a perfect project for beginners, rainy days, or using up those leftover balls of yarn.
Steps
Part 1
Part 1 of 3:
Deciding on a Scrunchie Style
-
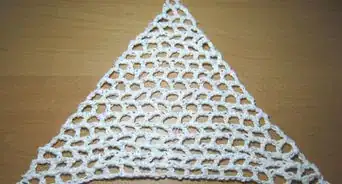
1Choose how voluminous you want the scrunchie. You're essentially crocheting a tube around the elastic hair band, so you can play with the size. Note that you'll need more yarn for larger scrunchies.
- For a bunchier scrunchie, plan to make your tube longer.
- For a puffier scrunchie, you can extend the length of the chain stitch recommended here.
-
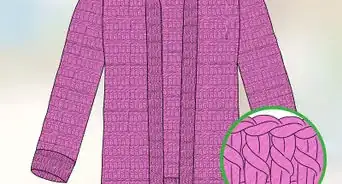
2Decide on a texture. Different types of yarn produce very different textures.
- Fun fur yarn and chenille are playful choices for children and the young at heart.
- Mercerized cotton has a sleek effect for a more classic hair accessory.
- Choose ribbon yarn for a sporty style.
- Note that textured yarns are generally more difficult to work with than plain or smooth yarns.
Advertisement -
3Pick a color. Scrunchies can be obvious or subtle depending on the color and texture. Tones that contrast with the hair color stand out, while those that blend are less likely to draw attention to themselves.
- Bright colors like pink, purple, or yellow are a cheerful choice, while darker colors like navy and black work better with more neutral or classic styles.
-
4Buy your materials if you don't have them already. You can by a crochet needle, yarn, and knitting needle at a craft store or online.
- Hair bands without the metal joiner tend to last longer than those that have them. You can purchase these at a drugstore or beauty supply store. Some craft stores may also carry them.


Advertisement
Part 2
Part 2 of 3:
Making the Scrunchie
-
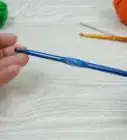
1Make a slip stitch. Do this about 6 inches (15 cm) from the end of the yarn.
- Make a loop with the yarn. The free end (i.e., the end that does not lead to the ball of yarn) should pass behind the loop.
- Insert the crochet hook through the loop, hooking the free end.
- Pull the hooked yarn forward (towards you) through the loop and then upwards into the hook's working area.[1]
- Hold the base of the slipknot with your forefinger and pull the free end to tighten.
- The loop should be firm but not too tight; it should easily slide back and forth along the hook.
- Check that you have 6 inches (15 cm) left on the free end.
-
2Make a chain 10 to 12 chain stitches long. Note that you might need to make this longer if you want a scrunchie with a wider tube.
- Start your chain stitch with a yarn over (passing the yarn over from behind the hook).
- Use the hook end to draw this yarn through the loop on the yarn. Now you have your first chain stitch.
- Repeat this step nine to eleven more times.[2]
-
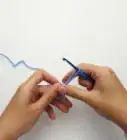
3Pass one end of the chain through the hair band and slip stitch the two ends of the chain together to form a loop.
- Insert the hook into the loop of the first chain next to the slipknot.
- Yarn over.
- Pull the yarn through both loops on the hook.[3]
- You want the loop to go through the hair band so that you have two interlocked circles.
- This will be the "base round."
- Place a marker on the slip stitch to mark the end of this first round.
-
4Make 3 more chain stitches. Push the hook through the stitch underneath, yarn over, and pull the new stitch through. Hold the base round horizontal with the three new stitches standing upright.
-
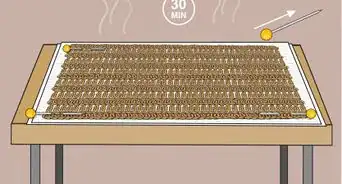
5Work a double crochet stitch (called a treble stitch in UK terminology - see Tips, below) into each of the remaining chain stitches on the base round.
- Push the crochet hook through the stitch.
- Yarn over twice. In other words, wrap the yarn around your hook twice before pushing the hook through the work.
- Push the hook through.
-
6Join the round with a slip stitch. Work a slip stitch from your current stitch to the third chain stitch from Step 4 to form a round.
-
7Repeat Step 3 ten to twenty times. You will notice that you are making a tube that encases the hair band. The tube will follow the hair band around into a circle.


Advertisement
Part 3
Part 3 of 3:
Finishing the Scrunchie
-
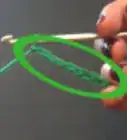
1Check the tube length. Your last round should reach the bottom of your base round without stretching. You may be tempted to cheat, but this will result in a scrunchie that looks small and flat rather than full and ruffled.
- When you are done, it is time to join the two ends into a doughnut shape.
-
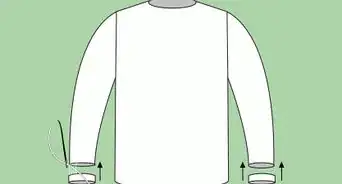
2Break off the yarn, leaving about 15 inches (40 cm) of yarn from the hook. You're going to use this yarn to sew up the edges.
- Thread a blunt knitting needle onto the end of the yarn and sew the two edges together. Make sure that the stitches on both rounds line up so that you get a smooth join.
- Tie a knot in the end of the yarn and break it off. Leave about 4 inches (10 cm) of yarn.
-
3Pull the remaining thread into the inside of the scrunchie. You can do this with the yarn needle or the hook.
-
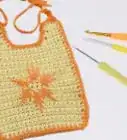
4Enjoy wearing your scrunchie, or wrap it up and give as a gift. Once you see how easy it is, you'll be making lots more!


Advertisement
Community Q&A
-
QuestionHow do I start it off on the rubber band?
 T. ChinsenTop AnswererPart 2, Step 1 details how to attach the yarn to the hair elastic and start the scrunchie.
 -
QuestionHow do you add beads?
 Community AnswerThe easiest way to add a bead is to stitch it on with the same wool after you have finished. All you need to do is get a strand of wool (around an inch long) and loop it around a stitch, then once it is looped through the stitch thread on a bead and tie a knot.
 -
QuestionHow do I make multicolored scrunchies?
 Community AnswerUse multicolored yarn. Alternatively, change solids after rounds.
Advertisement
Things You'll Need
- Basic crochet skills: if you can form a double (or treble, see Tips) stitch and you can crochet in the round, you can make a scrunchie
- A crochet hook (for 8-ply or double knitting yarn, as used here, you will need a 3-mm to 4-mm hook)
- 8-ply yarn: a ball of yarn the size of your fist (or about 30 grams) should be plenty for this project
- A hair band
- Stitch marker
- Yarn needle
- Scissors
References
About This Article
Advertisement