This article was co-authored by wikiHow staff writer, Jessica Gibson. Jessica Gibson is a Writer and Editor who's been with wikiHow since 2014. After completing a year of art studies at the Emily Carr University in Vancouver, she graduated from Columbia College with a BA in History. Jessica also completed an MA in History from The University of Oregon in 2013.
There are 12 references cited in this article, which can be found at the bottom of the page.
This article has been viewed 10,175 times.
Learn more...
Novelty yarn is always fun and ribbon yarn is no exception! Boutique ribbon yarn looks just like a flat ribbon with an unusual edge. One edge is a thin string that looks like a ladder that's connected to the ribbon in between gaps. Although you'll be making standard crochet stitches, you'll work into these gaps to create your crocheted project. Try a simple scarf to get used to working with ribbon yarn—you'll love the frilly, ruffled texture.
Steps
General Techniques
-
1Work with the hook size that's recommended for your yarn. If you're working from a pattern, read the instructions to see what kind of yarn they recommend and how much you'll need to make your project. Then, read the yarn label to see what size hook you should use. The yarn company has already taken the guesswork out of which hook works best for that specific yarn, so save time and stick with their recommendation.[1]
- For example, a popular style of ribbon yarn works best with a size US J-10 (6 mm) crochet hook.
- If you'll be wearing your crocheted project, pick a ribbon that's comfortable and choose a color you like.
-
2Pick ribbon yarn with ladder edging if you want to crochet something frilly. Some ribbon yarns are smooth, thin strips of fabric. These types are called tape ribbon while other types of ribbon yarn are wide and flat. These boutique yarns have a delicate edge that has gaps like a ladder along 1 side. Use this type of yarn to make an extra-ruffly project like a scarf.[2]
- The tape style ribbon yarn is great for knitting projects where you can tightly weave the yarn so it lays flat. You can use them for crochet projects, but the yarn may twist or curl.
Advertisement -
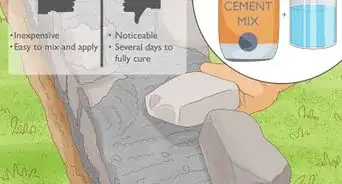
3Pair crochet ribbon with regular yarn to give your project more stability. If you feel the ribbon, you'll probably find that it's thin and flimsy. This is fine if you're making a ruffled edge or scarf, but it can make it difficult to crochet a project with structure like a basket or piece of clothing. To strengthen your yarn, pair it with a heavier yarn and work the two yarns together at the same time.[3]
- For example, if you're crocheting a blanket, pair a ribbon yarn with a mohair or cotton yarn to give it a little extra support.
-
4Wind the ribbon yarn around a cardboard tube to make it easier to work with. Most ribbon yarn is sold as a hank, which is yarn that's loosely twisted into a long coil. If you don't wind it before you start crocheting, the yarn tends to tangle. To wind the yarn, untwist the hank and untie the yarn from the thin loops of string holding the hank together. Then, slowly wind the ribbon yarn around an empty paper towel tube.[4]
- Although you could wind the yarn into a ball, it will twist a lot which makes it difficult to crochet with.
-
5Use a stitch marker if you take a break when crocheting. Ribbon yarn can be really slick, which makes it super easy to accidentally unravel. If you have to set down your project for a minute, put a stitch marker onto your work. This keeps it from unraveling so you can quickly pick up right where you left off![5]
- Don't have a stitch marker? Use an earring with a clasp, a paperclip, or a safety pin.
-
6Make a practice swatch to become comfortable with the ribbon yarn. It's understandable that you might want to jump right into your new ribbon yarn project, but a little practice can really help. Crochet a simple swatch of about 30 rows of the stitches that your pattern calls for—this gives you a feel for working with the material.[6]
- If you're working with tape-style ribbon yarn, you can block it to see how it holds its shape. Don't block boutique ribbon yarn since it's so ruffled and frilly that it's not meant to hold a defined shape.


Project Ideas
-
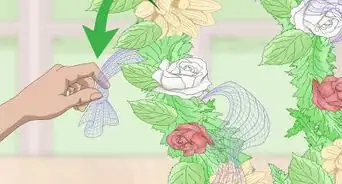
1Use ribbon yarn to make a fun, frilled scarf or shawl. Scarves might be the most popular way to work with ribbon yarn since they're lightweight and you get great texture from the yarn. Pick a scarf pattern that specifies using boutique ribbon yarn since you can't just swap out novelty yarn on its own. Work into the gaps on the ladder edge of the novelty yarn to create the ribbon effect.[7]
- Are you new to crocheting? A simple scarf is a great project for beginners since you don't have to check your gauge and you can make the scarf any size you like.
-
2
-
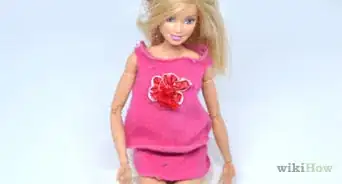
3Pair ribbon yarn with standard yarn to add texture to sweaters or skirts. Since boutique ribbon yarn can't hold much shape on its own, pair it with standard yarn if you want to crochet a piece of clothing. This gives your shirt, sweater, or skirt a flouncy, wavy effect.[9]
- Want to make clothes with tape-style ribbon yarn? No problem! Choose a light, loose pattern like a summer top or swimsuit cover instead of a sturdy, heavy sweater since tape-style yarn doesn't hold its shape well.
-
4Crochet a loose bag or tote using tape-style ribbon yarn. Don't use frilly boutique ribbon yarn for a bag, since it's not sturdy enough. Instead, find a crocheted bag pattern and use flat tape-style yarn. For a simple project, crochet the bag in the round and add straps.[10]
- If you want to crochet a small clutch or handbag, keep your stitches tight so the fabric doesn't have gaps for items to fall through.


Ribbon Yarn Scarf
-
1Insert a crochet hook into a gap 6 in (15 cm) from the end of your ribbon yarn. Unwind some of your boutique ribbon yarn and measure 6 inches (15 cm) from the end you started pulling. Then, take a size US J-10 (6mm) crochet hook and push it through the gap along the edge of the ribbon yarn.[11]
- Although ribbon yarns vary by brand, you might find that each gap on the ladder edge measures around 1 inch (2.5 cm). This can help you quickly measure 6 inches (15 cm) from the raw end.
- Hold the ribbon yarn so the ribbon portion hangs below the laddered edge with the gaps.
-
2Skip 1 gap and make a chain stitch with the thin edge. Don't remember how to chain? It's really easy—once you skip 1 hole at the edge of the yarn, insert your hook into the following gap and grab the yarn with the crochet hook tip. Then, pull it through the loop that's already on your hook. This makes 1 chain.[12]
-
3Keep skipping 1 and chaining 1 four more times. To get the bottom edge of your scarf started, continue to skip 1 gap and insert your hook into the following one. Grab the thin yarn and pull it through both your loops. Continue to do this until you've made a total of 5 chain stitches.[13]
- You'll have to pause occasionally and unwind your ribbon yarn from the cardboard spool as you work.
-
4Chain 1 stitch and turn your work to start your first row. Make another chain stitch and flip your work around so you can start crocheting back across the edge that you just made. It should already look ruffled so you'll need to look closely at the stitches as you work.[14]
-
5Skip a chain and single crochet (SC) into the next stitch. To start row 1, insert your hook into the gap of the second chain from the hook. Then, make a single crochet stitch. Remember that to make a SC, you insert your hook into the space of the next chain and pull it onto your hook. Then, push your hook into the following space and pull the loop up and through both of the loops that are on the hook.[15]
- If you like having a visual marker for the rows, stick a stitch marker onto the first SC stitch of row 1.
-
6Single crochet into the next 3 chain stitches and make 1 more chain stitch. You're almost done working into the starting edge of your scarf! Make a single crochet stitch into the following 3 chain stitches and work 1 chain stitch at the end of the row.[16]
-
7Make a single crochet stitch into every stitch on the second row. Turn your work so you can crochet back across the row. You're just working 1 single crochet stitch into each of the single crochet stitches from row 1.[17]
- Don't forget to move your stitch marker whenever you turn your work. This really makes it a lot easier to see where the row began.
-
8Keep working single crochet rows until the scarf is as long as you want. Repeat row 2, which is single crocheting into every stitch and chaining 1 at the end. Do this until your scarf is about 50 inches (130 cm) or as long as you like. Keep in mind that if you want a really long scarf, you might need an extra skein of ribbon yarn.[18]
-
9Cut a 6 in (15 cm) tail and tie a knot at each end of the yarn. Stop your scarf from unraveling before you can finish it. Tie a simple knot at the very end of your scarf and cut a long yarn tail at that end. Then, tie a knot at the other end of the scarf where you started crocheting.[19]
- Remember that you left a 6 in (15 cm) yarn tail at your started end when you cast on the chain stitches.
-
10Thread a sewing needle and sew the tails through the ends of your scarf. You might be familiar with weaving in tails, but ribbon yarn is a little different. Thread a sewing needle with sewing thread that matches the color of your scarf. Bunch the yarn tail along the end so it matches the ruffled edge and hold it while you sew it in place.[20]
- Don't forget to do this for the yarn tail you made when you cast on.
- If the sewing part feels overwhelming, it's totally okay to just tie off the ends and trim the ribbon yarn close to the knot. The knot might be visible, but you may be able to fluff the ribbons to hide the ends.


Things You'll Need
- 1 3.5-ounce (100g)/48 yards (44 m) hank of boutique ribbon yarn
- Size US J-10 (6mm) crochet hook
- Scissors
- Cardboard paper towel tube
- Stitch marker
- Sewing needle and thread


References
- ↑ https://www.stitchpiecenpurl.com/ribbon-yarn.htm
- ↑ https://youtu.be/h7ZMs3ao1Sc?t=246
- ↑ https://www.threadsmagazine.com/forum/crocheting-with-ribbon-yarn
- ↑ https://youtu.be/4fqrvCC9nZI?t=154
- ↑ https://youtu.be/h7ZMs3ao1Sc?t=501
- ↑ https://www.stitchpiecenpurl.com/ribbon-yarn.htm
- ↑ https://www.stitchpiecenpurl.com/ribbon-yarn.htm
- ↑ https://www.stitchpiecenpurl.com/ribbon-yarn.htm
- ↑ https://www.stitchpiecenpurl.com/ribbon-yarn.htm
- ↑ https://grandmotherspatternbook.com/archives/25249
- ↑ https://www.yarnspirations.com/on/demandware.static/-/Sites-master-catalog-spinrite/default/dwe25956f3/PDF/RHC0125-021725M.pdf
- ↑ https://youtu.be/h7ZMs3ao1Sc?t=278
- ↑ https://www.yarnspirations.com/on/demandware.static/-/Sites-master-catalog-spinrite/default/dwe25956f3/PDF/RHC0125-021725M.pdf
- ↑ https://youtu.be/h7ZMs3ao1Sc?t=328
- ↑ https://www.yarnspirations.com/on/demandware.static/-/Sites-master-catalog-spinrite/default/dwe25956f3/PDF/RHC0125-021725M.pdf
- ↑ https://youtu.be/h7ZMs3ao1Sc?t=404
- ↑ https://www.yarnspirations.com/on/demandware.static/-/Sites-master-catalog-spinrite/default/dwe25956f3/PDF/RHC0125-021725M.pdf
- ↑ https://youtu.be/h7ZMs3ao1Sc?t=469
- ↑ https://youtu.be/8YuSnNFx0lQ?t=650
- ↑ https://www.yarnspirations.com/on/demandware.static/-/Sites-master-catalog-spinrite/default/dwe25956f3/PDF/RHC0125-021725M.pdf
About This Article