X
wikiHow is a “wiki,” similar to Wikipedia, which means that many of our articles are co-written by multiple authors. To create this article, volunteer authors worked to edit and improve it over time.
The wikiHow Video Team also followed the article's instructions and verified that they work.
This article has been viewed 36,016 times.
Learn more...
The cable stitch is a popular way to add texture to crochet garments and other works. A basic cable stitch is made by simply working stitches around the posts that lie below them, but a crossed cable stitch requires you to create slanted stitches around these posts.
Steps
Method 1
Method 1 of 2:
Basic Cable Stitch[1]
-
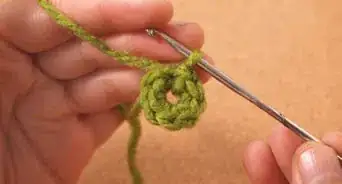
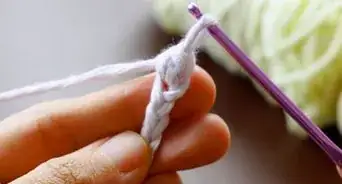
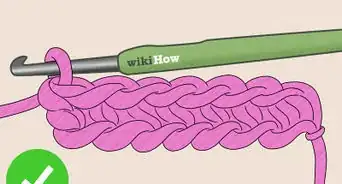
1Work a foundation chain. Attach the yarn to your crochet hook using a slipknot, then work a foundation of 12 chain stitches.
- If you do not know how to work a chain stitch or make a slipknot, please consult the "Tips" section.
-
2Work one row of double crochet. Chain an additional three stitches, then double crochet once into each stitch of your foundation chain. Turn the work when you reach the end of the row.
- Check the "Tips" section if you do not know how to double crochet.
- The foundation chain and first row are not part of the cable stitch itself. Instead, they merely provide a base for you to work your first cable stitches from.
Advertisement -
3Double crochet into the start of the next row. Create a turning chain of three stitches, then double crochet once into each of the first two stitches of the previous row.
- A turning chain is a set of chain stitches that brings your row height to the point it needs to be at for your next row.
- This step begins your first cable row.
-
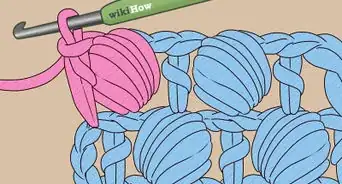
4Work two triple crochets into the front posts only. Work one triple crochet into the next stitch, catching the front posts of the previous row's stitch only. Work one more triple crochet into the stitch after that, catching the front posts only again.
- Check the "Tips" section for instructions on making a triple crochet.
- When you work a front post stitch, the hook will enter the stitch through the front, go around that front post, and then come back out to the front again.[2]
-
5Double crochet after the cables. Work one double crochet into each of the next two stitches.
- These two double crochets balance out the two that come before the cable stitch. The number of stitches you make here should always equal the number of stitches you made prior to working the two front post triple crochets.
- This step completes one basic cable stitch. The basic cable stitch, in general, is made simply by forming stitches around the posts of the stitches in the row directly below them.
-
6Repeat to the end of the row. For this example, you will need to double crochet once into each of the next two stitches, front post triple crochet once into the two stitches after that, and double crochet once into the final two stitches of the row.
- If you had a longer foundation, you would have needed additional sets of cable stitches after that.
- Completing this step completes a full cable row.
-
7Double crochet into the start of the next row. Turn the work, then create a turning chain of three chain stitches. Double crochet once into each of the next two stitches.
- This step starts the "wrong side" row. The purpose of this row is to balance out the cable row, so the stitches will essentially be the reverse of those on your cable row.
-
8Work two triple crochets into the back posts only. Work one triple crochet into the back posts of the first front post triple crochet you run into. Work another triple crochet into the back posts of the second front post triple crochet from your previous row.
- To work a back post stitch, insert the hook beside the post from the back, go around the post, and bring the hook out through the back again.
-
9Double crochet after the cables. After working your back post triple crochets, work one double crochet into each of the next two stitches.
-
10Mirror the rest of the row. For this row, you will need to work two double crochets, two back post triple crochets, and two final double crochets to reach the end of the row.
- No matter how many stitches your previous row has, you should mirror the stitches made in that previous row. Double crochet once into each normal double crochet. Back post triple crochet into each front post triple crochet.
-
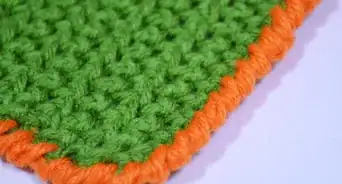
11Alternate back and forth as needed. At this point, you already have a full set of basic cable stitches. If you want a longer cable pattern, alternate back and forth between cable rows and wrong side rows until you reach the length you desire.
- Once you reach your desired pattern length, the project is finished.


Advertisement
Method 2
Method 2 of 2:
Six-Stitch Crossed Cable[3]
-
1Create a foundation chain. Attach the yarn to your crochet hook using a slipknot, then work a foundation of 20 chain stitches.
- If you do not know how to make slip knots or chain stitches, please see the "Tips" section at the end of this article.
-
2Work two rows of double crochet. Make three additional chain stitches, then work one double crochet into each stitch of your foundation chain. Chain three at the end of this row, turn, and work one double crochet into each double crochet of your previous row.
- If you do not know how to double crochet, please check the "Tips" section for further instructions.
- This step and the one before it merely creates a foundation for you to work with when creating a cable stitch. These two steps are not actually part of the cable stitch itself.
- Note that cable stitches can also be worked into foundation rows of single crochet,[4] but it is more commonly seen with rows of double crochet, half double crochet, or treble crochet.
-
3Double crochet across the beginning of your cable row. Chain three, then double crochet once into each of the next six stitches.
- This step starts the crossed cable row, or the row in which you'll make your crossed cable stitches.
- Crossed cables, in general, are made by skipping stitches, working a set of front post stitches, and returning to the skipped stitches to make additional front post stitches. In this example, you'll skip three stitches, and work cables across six stitches. The number of skipped stitches and stitches you'll work over may vary based on the specific pattern instructions you're following, however.
-
4Front post double crochet into the next stitch. Skip over the next three stitches. In the fourth stitch, double crochet once into the front posts only.
- Work the front post stitch by inserting the hook through the front of the post, behind it, and back out to the front of the work.
-
5Repeat twice more. Work one double crochet into the front posts only of the next two stitches, giving you a total of three front post double crochets lying side-by-side.
- Note that these stitches should all be slanting to the right.
-
6Front post double crochet into your skipped stitches. Return to the first of your three skipped stitches and double crochet once into front posts only. Double crochet once into the front posts only of the second and third skipped stitches, as well.
- This step creates a cross cable with stitches that slant to the left.
-
7Double crochet to the end of the row. Work one double crochet into each of the remaining stitches until you reach the end of the row.
- This step completes one crossed cable stitch row.
-
8Double crochet into the start of the next row. Turn the work and chain three. Skip the first stitch of the previous row, then double crochet once into each of the next six stitches.
- You're starting what is known as a "wrong side" row in this step. This row will balance out the cable row and help keep the overall work lying flat.
-
9Back post double crochet into the next six stitches. Work one double crochet into the back posts only of the next six stitches in the row.
- Work a back post stitch by inserting the hook through the back of the post, in front of it, and out again to the back of the work.
-
10Double crochet to the end of the row. Work one double crochet into each stitch until you reach the end of the row.
- When you reach the end of the row, you've completed one wrong side row.
-
11Repeat the two rows as needed. You already have a full crossed cable at this point, but you should alternate between the crossed cable row and the wrong side row as often as needed until the cable pattern becomes as long as you would like it to be.
- Once the pattern reaches your desired length, the process is complete.


Advertisement
Community Q&A
-
QuestionI'm doing a Night Owl blanket and in the instructions it says to "...work 6 post reverse cable". How do I do these stitches?
 Community AnswerTriple crochet into the post of the fourth, fifth and sixth post, then in back triple crochet in the first, second, and third posts. Just in case the post is vertical part of the previous rows stitches. Triple crochet is yarn over twice, pull loop from around post (in this case), yarn through two loops - three times.
Advertisement
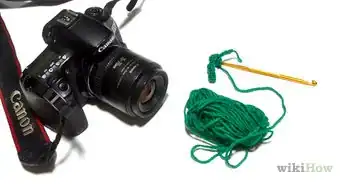
Things You'll Need
- Yarn
- Crochet hook
References
About This Article
Advertisement