This article was co-authored by wikiHow staff writer, Nicole Levine, MFA. Nicole Levine is a Technology Writer and Editor for wikiHow. She has more than 20 years of experience creating technical documentation and leading support teams at major web hosting and software companies. Nicole also holds an MFA in Creative Writing from Portland State University and teaches composition, fiction-writing, and zine-making at various institutions.
The wikiHow Tech Team also followed the article's instructions and verified that they work.
This article has been viewed 539,895 times.
Learn more...
USB flash drives make it easy to keep frequently-used files on hand for use on any USB-enabled computer. These neat little devices can even pack up to a terabyte of data in a device no larger than two inches, though they are far more common (and affordable) in smaller capacities. Copying files to your USB drive is incredibly simple, even if it’s your first time using one. This wikiHow teaches you how to copy files from your PC or Mac to your USB flash drive.
Steps
Windows
-
1Insert your USB drive into an available USB port. If you're using a laptop, your USB port(s) will usually be on either side of the computer. If you have a desktop computer, you'll typically find USB ports on the front panel and/or the rear. If you have an all-in-one computer, you'll often find USB ports on the side of the monitor.
- If it's your first time connecting the drive to your PC, Windows may automatically install some drivers so it's properly recognized.
- Depending on your settings, you may see a pop-up window upon connecting your USB drive asking what you want to do. You can click the option to view the files on the drive, or just close the window for now and continue with this method.
-
2Press ⊞ Win+E to open File Explorer. You can also open File Explorer by clicking the folder icon on your taskbar.Advertisement
-
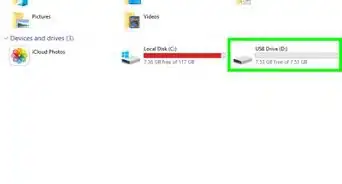
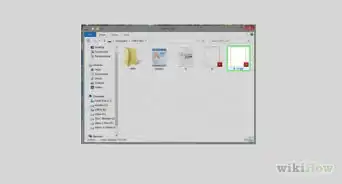
3Click This PC. You will see this in the left column. This displays all drives that are connected to your computer (including the USB flash drive you just connected) in the main panel under "Devices and Drives."
-
4Open the folder containing the files you want to copy. You'll typically see a list of folders in the left panel under This PC, as well as in the main panel above the drives.
- You'll usually find your personal files, such as those you create in Microsoft Office, in the folder called Documents.
- If you downloaded a file from a website or an email, it'll usually download to the folder called Downloads. If you don't see it there, check the one called Desktop or the Documents folder.
- Any pictures you transfer to your computer will usually be in the Pictures directory by default.
-
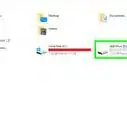
5Copy the file(s) you want to add to the USB flash drive. If it's just one file, just right-click it and select Copy from the menu. To copy more than one file at a time, hold down the Control key as you click each file you want to copy, right-click the highlighted area, and then select Copy.
- You can also copy an entire folder at once by right-clicking it and selecting Copy.
-
6Click This PC in the left sidebar again. This displays the connected drives again.
-
7Double-click your USB flash drive. You should see it under "Devices and drives."
- Your USB flash drive may have a name that's similar to the manufacturer of the drive (e.g. "Sandisk"), or it could just be called something like "Removable Drive" or "USB Drive."
-
8Find a place on your USB drive to store the copied files. You can copy the files to a specific folder, or just copy them to the main area (the "root") of the drive.
- Creating a new folder with a memorable name will help you stay organized. If you want to create a new folder, just click the New folder icon in the toolbar at the top, type a name for the folder, and then press Enter. Then, double-click the new folder to open it.
-
9Right-click a blank area in the right panel and select Paste. This pastes the file(s) you copied to your USB flash drive.
- When working with a file in an app like Microsoft Word, you can save your files directly to your USB flash drive. When choosing a saving location, just select your USB flash drive as the destination.
-
10Eject the drive safely. To ensure you don’t harm the data on the USB drive, you’ll need to safely eject the drive. To do this:
- At the bottom right corner of the screen by the clock, find the USB icon (depending on your version of Windows, it may have a checkmark over it). If you don't see it, click the up-arrow near the clock to show hidden icons.[1]
- Click the icon and choose Eject (name of drive).
- When you see a confirmation that says "Safe To Remove Hardware," you can remove the USB drive from the port.


macOS
-
1Plug the USB flash drive into a USB port. If you’re using a laptop, the USB ports are located on the sides of the unit. On a desktop Mac, the ports are typically on the rear of the monitor or on the back of the device. Once plugged in, the drive will automatically mount and display an icon on your desktop that looks like a small white hard drive.
-
2Double-click the USB drive icon on your desktop. This is the new icon that appeared which represents your drive. The contents of the drive will appear in a new window. You can copy files directly to the root (main folder), or to any folder in the right panel.
- The amount of storage space available on the USB drive also appears at the bottom of this window.
- You can also access the USB drive by launching Finder, then selecting the USB drive from the "Devices" area on the left side of the screen.
-
3Create a new folder for your copied files (optional). It may be helpful to create a new folder on the USB drive for the files you’ll be copying. Having folders with appropriate names for the types of files they contain can help you stay organized.
- With the USB drive window open, press Shift + Command + N to create a new folder.
- Type a name for the folder and press Return.
-
4Press ⌘ Command+N to open a new Finder window. Leave the current window displaying your USB drive open—you'll want to be able to see the contents of both windows on the screen at the same time.[2]
- You can also open a second Finder window by clicking the Finder icon on the Dock—it's the two-toned smiley face icon.
-
5Browse for the files you want to copy in the new Finder window. For example, if you want to copy files that are in your Documents folder (such as those you've edited with Pages or Microsoft Word), click Documents in the left panel of the Finder window.
- Files you downloaded from the internet or web-based email will usually be in the Downloads folder.
-
6Drag the file(s) to the USB drive window. To copy one file without erasing it from the computer, just drag it to the open USB drive folder.
- If you want to copy more than one file at a time, hold down the Control key as you click to select each file you want to copy. Then, drag any of the highlighted files to the open window displaying the contents of your USB drive.
- If you created a new folder to which you’d like to copy files, drag the file(s) right to that folder.
- You can also drag an entire folder to the USB drive. This would create a new folder with the same name on your USB drive.
-
7Eject the USB drive when you're finished. Ejecting your USB drive before removing it from your Mac can help prevent data corruption.[3] To do so, go to the desktop and drag the USB drive icon to the Trash (the trash icon turns to an “eject” icon as you drag). After that, you can safely remove the USB drive.


Community Q&A
-
QuestionCan I add folders without deleting what is already on the flash drive?
 Community AnswerYes. On a Mac, open the drive in Finder and create a new folder by clicking File --> New Folder. In Windows, open the file in Computer or Windows Explorer and click "New Folder" or File --> New Folder.
 -
QuestionHow do I move pictures from an Android tablet to a USB flash drive?
 Community AnswerYou cannot directly plug an Android tablet into a USB flash drive, but there is a way. First, you need a computer/laptop. You can share the picture to the computer/laptop by email, Bluetooth, or by directly plugging the tablet into the computer and finding the file of the picture. Once the picture is on the laptop/computer, you can plug the flash drive into the computer/laptop, then drag the picture to the flash drive.
 -
QuestionHow can I open thumb drive files if I do not have Office?Community AnswerIf you want to open Office documents without Office, try Google Drive or LibreOffice.


References
- ↑ https://support.microsoft.com/en-us/windows/safely-remove-hardware-in-windows-10-1ee6677d-4e6c-4359-efca-fd44b9cec369
- ↑ https://support.apple.com/guide/mac-help/change-how-folders-open-in-the-finder-on-mac-mchlp1032/mac
- ↑ https://support.apple.com/guide/mac-help/use-external-storage-devices-with-mac-mchl027f1d66/mac
About This Article

1. Press Windows Key + E.
2. Plug in the USB drive.
3. Double-click the USB drive.
4. Open the folder to which you want to save files.
5. Drag a file from your computer to the folder on the drive.