This article was co-authored by David Balkan. David Balkan is a Professional Plumber, CEO of Balkan Sewer and Water Main Service, and President of Balkan Sewer and Drain Cleaning. As a hands-on owner of these companies for over 40 years, David is knowledgeable about water service lines, sewers, and drain line issues. David is a Committee Chairman of the Master Plumbers Council and has sat on the Executive Committee of the Sub Surface Plumbers Association of New York for over 30 years. His knowledge and solution-oriented approach contributed to Balkan Sewer and Water Main Service being the largest and most trusted service in New York City and the recipient of the 2017 Angie’s List Super Service Award.
There are 17 references cited in this article, which can be found at the bottom of the page.
A new outdoor faucet can dramatically reduce your water bill and improve your water pressure, but how do you change a faucet if you’ve never dabbled in plumbing? Fortunately, replacing an outdoor faucet (also called a hose bibb, spigot, or sillcock) is super simple—you just need a few tools and a little patience. No matter what type of faucet you have, we’re here to help you tackle this project without damaging your brick wall in the process.
Things You Should Know
- Before installing a new faucet, turn off your water supply and determine if your old faucet is soldered or screw-on.
- For a screw-on faucet, simply remove your faucet with a pipe wrench. Before attaching a new faucet, wrap plumber’s tape around its threads to prevent any leaks.
- For a soldered faucet, cut the pipe directly behind your faucet. Attach a compression fitting to the end of the remaining pipe, and then screw on your replacement faucet.
- Be sure to turn off your new faucet before turning your water supply back on.
Steps
Getting Started
-
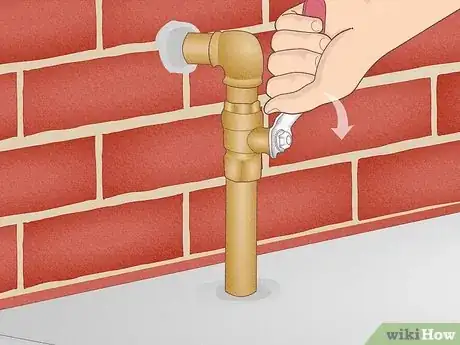
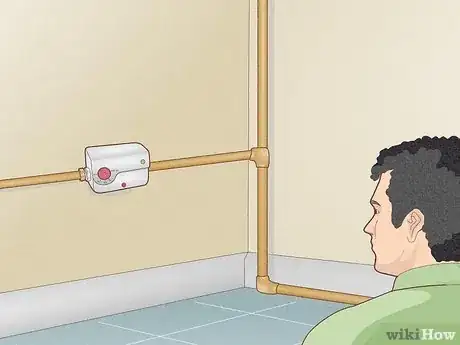
1Turn off your water supply. To find the outdoor valve, look inside the room directly behind your brick wall. Turn the valve clockwise to shut off your water, and then turn on the outdoor faucet to let any excess water drip out.[1]
- For ball-style valves, shut off your water supply by turning the handle clockwise until it’s in a horizontal position perpendicular to the pipes.[2]
- If you can’t access the area behind your brick wall, search for the outdoor valve inside your basement or utility room. In older homes, the valve is located near the ceiling, but you can find it next to the main water line in newer homes.[3]
- If you don’t have a dedicated outdoor line, shut off the main water line instead. It’s usually located on the lowest level of your home like the basement, garage, or crawl space.[4]
- Alternatively, turn off the water at the meter if you can’t shut off your home’s water supply. The valve is usually located on the sidewalk in front of your home.[5]
-
2Check if your faucet is soldered or screwed on. A soldered faucet is permanently attached to a metal pipe, so you can’t twist off the faucet to replace it. To check for a soldered connection, look behind the faucet to see if it appears welded. If so, you’ll need to purchase a pipe cutter to replace the faucet.[6]
- A screw-on faucet, also known as a threaded faucet, has visible grooves where the pipe connects to the fitting. Since the grooves are on the outside of the faucet, it has “male” threads.[7]
- Unlike a soldered faucet, you don’t need any tools to remove the spigot-–simply unscrew it.
Advertisement -
3Determine what type of plumbing you have throughout your home. Examine the material of your water line before purchasing any parts for your faucet. Incompatible materials may lead to corrosion, so check if you have copper, galvanized, PVC, or PEX pipes.[8]
- Copper: extremely rigid pipes that are found in the majority of homes[9]
- Galvanized steel: these pipes are rarely found in new homes because they corrode over time
- PEX: color-coded plastic piping that often weaves through ceilings, walls, basements, and crawl spaces
- PVC: lightweight plastic tubing that frequently serves as the home’s main water supply line
Fixing a Screw-On Faucet
-
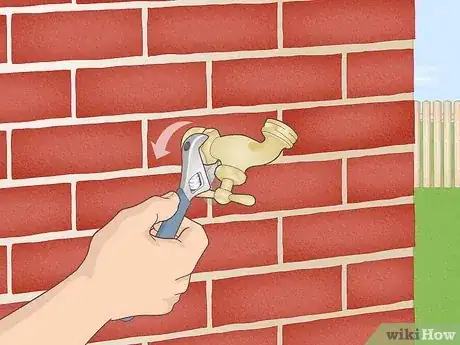
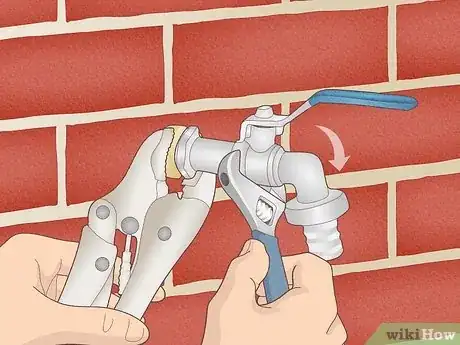
1Use a pipe wrench to unscrew the faucet. Attach your wrench to the threaded connector, and turn it counterclockwise to remove the faucet. Once your faucet is completely disconnected, remove it from the brick wall.
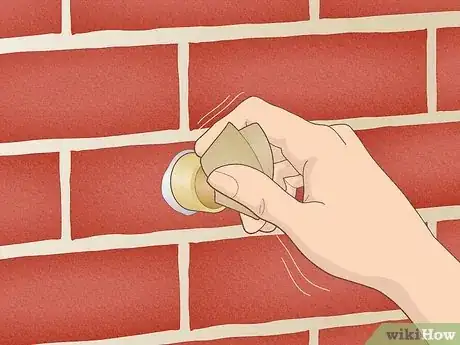
- If your faucet is hard to remove, coat the threaded connector with plumber’s grease to loosen it. After removing the faucet, clean up any corrosion or debris around the pipe with a wire brush.
- Be sure to purchase the correct replacement faucet for your home. If your disconnected faucet has a long metal rod attached to it, you need to purchase a frost-free model, which prevents your pipes from freezing in cold weather.[10]
- If your old entire faucet rested on the exterior of the brick wall (without a metal rod), you can purchase a standard faucet.
-
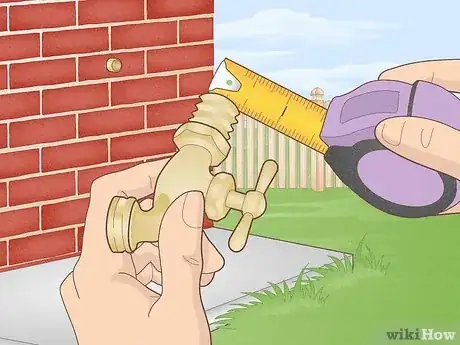
2Measure the diameter of your faucet to purchase a replacement. Use a tape measure to measure the diameter of the threaded end of the faucet (male fitting).[11]
- If you have a frost-free faucet, be sure to measure the length of its rod from tip to tip.
- Most outdoor faucets come in diameters of 0.5 in (1.3 cm) or 0.75 in (1.9 cm).[12]
-
3Wrap plumber’s tape around the threads of your new faucet. Apply plumber’s tape on one side of the threads and overlap the tape in a clockwise motion. This ensures there’s no gap between the faucet and the pipe, preventing possible leaks.[13]
- If your pipe juts out from your brick wall, use plumber’s tape to cover the threads of your pipe instead.
- Alternatively, apply thread sealant around the threads of the faucet to create an air-tight seal.[14]
-
4Screw on your threaded replacement faucet. Secure locking pliers onto the threaded fitting of your pipe with one hand, and use your other hand to attach your faucet with a wrench. Twist the faucet clockwise until it stops, while keeping the fitting stable.[15]
- After installing your new faucet, make sure your faucet is off before turning your water supply back on.
Fixing a Soldered Faucet
-
1Cut the pipe directly behind the faucet with a pipe cutter. Clamp the pipe cutter around the pipe, leaving 0.5 in (1.3 cm) of pipe exposed to fit the compression adaptor. Twist the knob of the cutter to tighten it, and then turn the pipe cutter several times until it moves easily. Tighten the knob again and repeat this motion until the pipe is completely cut.[16]
- Be sure to measure the diameter of your pipe with a tape measure to ensure you buy the correct size pipe cutter and replacement parts.
- You can use a hacksaw to cut your pipe, but it won’t leave a smooth, clean finish.[17]
-
2
-
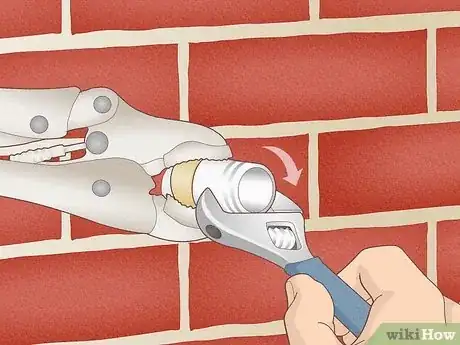
3Attach a compression fitting to the end of your pipe. Unscrew the nut of the compression fitting and slide it over your pipe. Place the compression fitting over the end of your pipe, and use locking pliers to hold the fitting still. With the other hand, use a wrench to securely tighten the nut to the fitting.[19]
- To buy the appropriate size fitting, measure the diameter of your cut pipe with a tape measure. Most fittings come in 0.5 in (1.3 cm) or 0.6 in (1.6 cm) sizes.
-
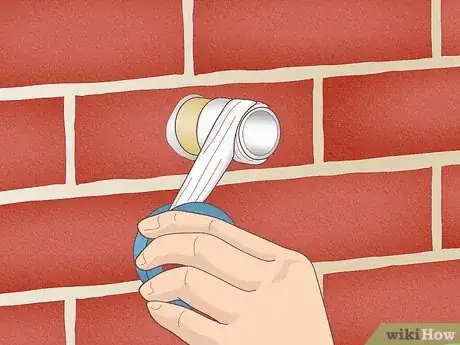
4Wrap plumber’s tape around the threads of your compression fitting. Apply one layer of plumber’s tape over the threads of your fitting, overlapping the ends to secure a firm seal.[20]
-
5Twist your new faucet onto the compression fitting. Using your hands, attach your replacement faucet to the fitting in a clockwise motion. When it gets too difficult to twist by hand, use a wrench to secure the faucet snugly.[21]
- After installing your new faucet, make sure your faucet is off before turning your water supply back on. Open the faucet for one minute, and then turn it off. If you see any drips or leakage, use a wrench to fully tighten the connection between the compression fitting and faucet.
Warnings
- If you can’t turn off your water supply, call a plumber to replace your spigot. Never attempt to change a faucet without shutting off your water—you risk flooding your home.[24]⧼thumbs_response⧽
Things You’ll Need
Fixing a Screw-On Faucet
- Pipe wrench
- Wire brush (optional)
- Tape measure
- Plumber’s tape
- Locking pliers
- Screw-on replacement faucet
Fixing a Soldered Faucet
- Pipe cutter
- Sandpaper
- Compression fitting
- Plumber’s tape
- Pipe wrench
- Soldered replacement faucet
References
- ↑ https://youtu.be/t7hsJgTy43M?t=69
- ↑ https://youtu.be/khJy9yYNe7w?t=159
- ↑ https://youtu.be/t7hsJgTy43M?t=65
- ↑ https://www.citizensutilityboard.org/blog/2018/09/05/preparing-for-winter-how-to-properly-drain-outdoor-faucets
- ↑ https://www.emwd.org/sites/main/files/file-attachments/howtoturnoffwateratmeter.pdf?1547595625
- ↑ https://www.theartofdoingstuff.com/how-to-replace-or-move-your-leaky-outdoor-faucet
- ↑ https://mae.ufl.edu/designlab/Lab%20Resources/Types_of_threads.pdf
- ↑ https://www.freshwatersystems.com/blogs/blog/how-to-determine-pipe-thread-type-and-pipe
- ↑ https://www.neit.edu/blog/the-5-types-of-plumbing-pipes
- ↑ https://upgradedhome.com/silcock-vs-hose-bib
- ↑ https://youtu.be/06aLqXy0gHg?t=222
- ↑ https://thegrowmonster.com/connect-a-garden-hose-to-an-outdoor-spigot
- ↑ https://www.theartofdoingstuff.com/how-to-replace-or-move-your-leaky-outdoor-faucet
- ↑ https://youtu.be/2qqhjCgqo0Y?t=118
- ↑ https://www.theartofdoingstuff.com/how-to-replace-or-move-your-leaky-outdoor-faucet
- ↑ https://www.theartofdoingstuff.com/how-to-replace-or-move-your-leaky-outdoor-faucet
- ↑ https://www.pipsisland.com/how-to-cut-a-copper-pipe
- ↑ https://www.theartofdoingstuff.com/how-to-replace-or-move-your-leaky-outdoor-faucet
- ↑ https://www.theartofdoingstuff.com/how-to-replace-or-move-your-leaky-outdoor-faucet
- ↑ https://www.theartofdoingstuff.com/how-to-replace-or-move-your-leaky-outdoor-faucet
- ↑ https://www.theartofdoingstuff.com/how-to-replace-or-move-your-leaky-outdoor-faucet
- ↑ https://www.h2ouse.org/no-water-in-the-house
- ↑ https://youtu.be/cALQ3PR7k30?t=68
- ↑ https://bathroomupdateguide.com/2019/09/19/can-you-change-a-faucet-without-turning-off-the-water
