X
wikiHow is a “wiki,” similar to Wikipedia, which means that many of our articles are co-written by multiple authors. To create this article, 13 people, some anonymous, worked to edit and improve it over time.
This article has been viewed 53,434 times.
Learn more...
Create your own camcorder light to improve the visual ability of your camcorder in dim light or darkness.
Steps
-
1Collect the items needed to complete this project. These are listed below under "Things You'll Need".
-
2Find some suitable elasticized fabric.Advertisement
-
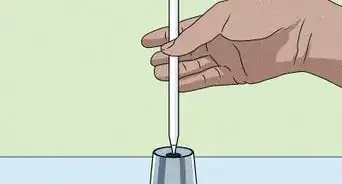
3Measure the circumference of the camcorder lens or whatever mounting point the light will attach to. Then measure the same for the elasticized fabric.
- Cut the elastic to the measurement. Be sure to add a couple centimeters or inches to your measurement to compensate for overlap.
-
4Using the glue gun, put a dollop of glue on the edge of the elastic strip. Overlap the two edges while forming a circle.
-
5Hold this in place until glue hardens, approximately 20 seconds.
-
6Follow this wiring diagram for the next steps.
- Note that the colourful stripes on a resistor denote its value. For a 470 ohm the stripes on the left side of the resistor are yellow, purple, black, black and on the right side brown.
- When measuring out the wires, make you have enough slack to make it around the whole lens and then some.
-
7Please read the "Warnings" section below before continuing with the next steps.
-
8Plan out the light circuit before soldering.
-
9Solder the resistor to the positive terminal on the first LED. Continue to solder the link from the negative terminal on the first LED to the positive terminal on the second LED.
- This is the series circuit. Repeat this for all the series circuits, there are three. Refer back to the wiring diagram.
-
10Test the circuits by touching the positive lead (the end with the resistor) to the positive side of the battery and the negative lead (the negative side of the second LED) to the negative side of the battery. If the light comes on, the lights are wired properly. If they do not, check your solder connections.
-
11Solder on the wires (see "Things You'll Need" below for sizing).
-
12Cover all the connections in glue to prevent the electrical components from touching and arcing. This will also weatherproof your light.
-
13Glue the three sets of lights equally around the elastic strap that you created earlier.
-
14Combine all the wires coming from the light circuits (there should be 3 positive wires and 3 negative wires). With these wires striped twist them into each set of three into one. Now there should be two wires. This completes your series circuit.
-
15Solder the negative wire to the negative end of the battery connector.
-
16Solder the positive end to one end of the switch. Refer to the picture in step 14.
-
17Solder the positive wire of the battery connector to the other end of the switch. Refer to the picture in step 14.
-
18Test the soldering by plugging in the battery and turning on the switch. All the lights should illuminate. If not, double check your soldering.
-
19Cover all the connections in glue for weather proofing. Allow to dry.
-
20Try it out!


Advertisement
Warnings
- LEDs are polar. This means they must be wired in a certain way. On most LEDs, the positive terminal is the longer one, but to be sure, look into the bulb portion––the negative terminal is the larger portion of metal inside the bulb.⧼thumbs_response⧽
- Solder irons and glue guns use high heat and may burn you. Be careful!⧼thumbs_response⧽
- Solder contains lead and lead is poisonous, so don't inhale the fumes. Wear protective gear and wash your hands after touching solder.⧼thumbs_response⧽
Advertisement
Things You'll Need
- 6-3v 20mA LED s3-470 ohm resistors
- 3-small connector wires (connection between first and second LEDs)
- Length of wire (preferably red for positive black for negative)
- Length of elastic or elasticized fabric
- Small switch
- Battery connector
- 9v battery
- Soldering iron
- Solder glue gun with glue
- Protective gear when soldering


About This Article
Advertisement