This article was co-authored by wikiHow staff writer, Sophia Latorre. Sophia Latorre is a Content Manager on the wikiHow team. Before joining wikiHow, Sophia worked as a technical editor and was published in six International Energy Agency (IEA) Wind Annual Reports. Now, she writes, edits, and reviews articles for the wikiHow Content Team, working to make the content as helpful as possible for readers worldwide. Sophia holds a BA in English from Colorado State University.
wikiHow marks an article as reader-approved once it receives enough positive feedback. This article has 33 testimonials from our readers, earning it our reader-approved status.
This article has been viewed 719,731 times.
Learn more...
Do you have an assignment to make a model of an Egyptian pyramid? It's a fun school project that can be approached in a variety of ways. Though there are lots of methods out there, you can easily make a realistic-looking pyramid out of cardboard, sugar cubes, or clay.
Steps
Using Cardboard
-
1Gather your supplies. This cardboard pyramid looks like a realistic flat-sided pyramid, but it's lightweight and doesn't take very long to put together. You probably have most of the supplies on hand already. For this project you will need:[1]
- A large flattened cardboard box or piece of cardboard
- Ruler
- Pencil
- Scissors
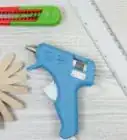
- Hot glue gun and sticks
- Brown or black permanent marker
- White school glue
- Paint brush
- Sand
-
2Cut out a cardboard square. Cut out a square of cardboard that is 14 inches (35.5 cm) by 14 inches (35.5 cm). This square will be the base of the pyramid.[2]
- You can make the base in any size you need, but keep in mind that the rest of the measurements will need to be altered if you change the size of the base.
Advertisement -
3Cut out four cardboard triangles. Use your ruler and pencil to draw four triangles with 8-inch (20.3 cm) bases that are 12 inches (30.5 cm) tall.[3]
- Place a dot 12 inches (30.5 cm) from the center point (which is at 4 inches or 10.2 cm) of the bottom line to create a perfect triangle.
- You can use a craft knife instead of scissors if the cardboard is stiff and difficult to cut.
-
4Hot-glue the triangles together. Lean the triangles in so that their points meet and create a pyramid shape. You can temporarily tape them together or have a friend or family member help you if it’s tricky to get all four pieces to stay together. Then, seal the edges together with a line of hot glue.[4]
- Be very careful when using hot glue, as it can burn you. Keep your hands away from the nozzle and the glue. Make sure you have a safe surface to rest your hot glue gun on when you’re not using it as well.
-
5Hot-glue the pyramid to the square. Center the pyramid on top of the square. Put a line of hot glue along all four bottom edges of the pyramid and press it down in the middle of the square.[5]
-
6Let the glue dry completely. It’s important to allow the glue to dry completely before moving on to the next step. Wait a few hours before moving on to ensure your pyramid doesn’t fall apart.[6]
-
7Draw “bricks” on the pyramid. Use a brown or black permanent marker to draw horizontal and vertical lines on the pyramid that look like bricks. This will make your pyramid look more realistic.[7]
-
8Paint the pyramid with white school glue. Pour some white school glue into a dish and use a paintbrush to paint the entire cardboard pyramid with an even coating of glue. Don't forget to cover the edges, too, so you'll be able to hide the cracks with sand.[8]
- Alternatively, you could rub a glue stick over the cardboard before adding the sand.
-
9Sprinkle on the sand. Before the glue dries, cover the pyramid with sand. Try to sprinkle on an even amount so that the entire pyramid is evenly coated in a layer of sand.[9]
-
10Let the pyramid dry. Allow the pyramid to dry overnight, rather than finishing this project the day that it’s due. This way the glue and sand will be firmly stuck on and your finished product will look great.[10]


Using Clay
-
1Collect your materials. Making a clay pyramid allows you to get creative by making realistic indents and grooves in the walls to resemble an ancient Egyptian pyramid. You'll need the following materials for this method:[11]
- A large ball of modeling clay (the kind that air dries)
- A piece of cardboard
- Rolling pin
- Knife
- Ruler
- Pencil
- Scissors
- Paint (sandy brown color)
- Paintbrush
-
2Cut out the cardboard base. Use the ruler and pencil to draw a square on your piece of cardboard. An 8-inch by 8-inch (20.3 cm by 20.3 cm) base is a good size, or you could make a larger base if you have plenty of clay. Cut out the square when you're finished.[12]
-
3Roll out the clay. Knead the clay into a ball, the place it on a clean, dry surface. Use the rolling pin to roll out the clay to a thickness of 1 inch (2.5 cm).[13]
-
4Cut a square out of the clay. Cut a 6-inch by 6-inch (15.2 cm by 15.2 cm) square out of the clay. Center it on top of the cardboard base.[14]
-
5Cut additional squares out of the clay. The next layer should be 5 inches by 5 inches (12.7 cm by 12.7 cm), followed by 4 inches by 4 inches (10.2 cm by 10.2 cm), 3 inches by 3 inches (7.6 cm by 7.6 cm), 2 inches by 2 inches (5.1 cm by 5.1 cm), and finally 1 inch by 1 inch (2.5 cm by 2.5 cm). Stack each layer in the center of the previous layer.[15]
-
6Bevel the edges and create ridges. Press your ruler against the sides of the squares to slant them slightly downward. You can also create ridges by using the knife to make markings that look like stone shapes in the sides of the pyramid.[16]
-
7Let the clay dry. Leave it alone for several hours, or even overnight, to give the pyramid time to dry and harden. Refer to the instructions on the clay packaging if you’re unsure how long it takes to dry completely.[17]
-
8Paint the pyramid. Pour the paint into a dish and use the paintbrush to spread an even coating on the pyramid. Alternatively, cover the pyramid in a light coating of white school glue and sprinkle it with sand before the glue dries.[18]
-
9Allow your project to dry. Let your finished pyramid to dry overnight. Then, take it to school and show off your hard work.[19]


Using Sugar Cubes
-
1Assemble your supplies. This simple pyramid looks like a step-sided pyramid, with individual "stones" visible instead of flat sides. It requires just a few household supplies, including:[20]
- A large box of sugar cubes (around 400 cubes)
- A piece of cardboard
- A ruler
- A pencil
- Scissors
- White school glue
- Paint (sandy brown color)
- Paintbrush
-
2Cut a cardboard square. Use your ruler and pencil to draw a 12-inch by 12-inch (30.5 cm by 30.5 cm) square. Cut out the square and use it as the base for your pyramid.[21]
-
3Make a sugar cube square. Create a 10 by 10 square base of sugar cubes in the center of the cardboard square (using 100 sugar cubes total). Glue down each sugar cube using white school glue.[22]
-
4Add the second layer to the pyramid. Position a 9 by 9 square of sugar cubes in the center of the first layer (using 81 cubes). Glue down each sugar cube.[23]
-
5Continue adding layers. Each layer should be 1 cube smaller than the previous layer, so the next layer is 8 by 8 (64 cubes), then 7 by 7 (49 cubes), 6 by 6 (36 cubes), 5 by 5 (25 cubes), 4 by 4 (16 cubes), 3 by 3 (9 cubes), 2 by 2 (4 cubes), and finally a single sugar cube on top.[24]
-
6Let the glue completely dry. Allow the glue to dry for several hours to ensure all the sugar cubes are firmly in place.[25]
-
7Paint the pyramid. Use a paintbrush to paint the entire pyramid a sandy brown color. Use only a small amount of paint, and be careful not to damage the pyramid as you go.[26]
-
8Let the pyramid dry. Allow the pyramid to dry completely overnight. You can then proudly present it at school.[27]


Community Q&A
-
QuestionWhere do you get the sugar cubes from?
 Community AnswerSugar cubes can be found at the grocery store or supermarket. Choose plain white ones or brown sugar cubes so you don't have to paint them.
 -
QuestionHow long does the first method take?
 Community AnswerOne day, because you have to let it dry overnight.
 -
QuestionWhere can I get a hot glue gun?Community AnswerHobby Lobby, Michael's, or Joann Fabrics! They should have it, or just go to Walmart or Target and look in the craft aisle.


References
- ↑ http://sciencing.com/build-pyramid-school-project-5467882.html
- ↑ http://sciencing.com/build-pyramid-school-project-5467882.html
- ↑ http://sciencing.com/build-pyramid-school-project-5467882.html
- ↑ http://sciencing.com/build-pyramid-school-project-5467882.html
- ↑ http://sciencing.com/build-pyramid-school-project-5467882.html
- ↑ http://sciencing.com/build-pyramid-school-project-5467882.html
- ↑ http://sciencing.com/build-pyramid-school-project-5467882.html
- ↑ http://sciencing.com/build-pyramid-school-project-5467882.html
- ↑ http://sciencing.com/build-pyramid-school-project-5467882.html
- ↑ http://sciencing.com/build-pyramid-school-project-5467882.html
- ↑ http://sciencing.com/build-pyramid-school-project-5467882.html
- ↑ http://sciencing.com/build-pyramid-school-project-5467882.html
- ↑ http://sciencing.com/build-pyramid-school-project-5467882.html
- ↑ http://sciencing.com/build-pyramid-school-project-5467882.html
- ↑ http://sciencing.com/build-pyramid-school-project-5467882.html
- ↑ http://sciencing.com/build-pyramid-school-project-5467882.html
- ↑ http://sciencing.com/build-pyramid-school-project-5467882.html
- ↑ http://sciencing.com/build-pyramid-school-project-5467882.html
- ↑ http://sciencing.com/build-pyramid-school-project-5467882.html
- ↑ http://www.brighthubeducation.com/science-fair-projects/76976-make-a-step-pyramid-for-a-school-project/
- ↑ http://www.brighthubeducation.com/science-fair-projects/76976-make-a-step-pyramid-for-a-school-project/
- ↑ http://www.brighthubeducation.com/science-fair-projects/76976-make-a-step-pyramid-for-a-school-project/
- ↑ http://www.brighthubeducation.com/science-fair-projects/76976-make-a-step-pyramid-for-a-school-project/
- ↑ http://www.brighthubeducation.com/science-fair-projects/76976-make-a-step-pyramid-for-a-school-project/
- ↑ http://www.brighthubeducation.com/science-fair-projects/76976-make-a-step-pyramid-for-a-school-project/
- ↑ http://www.brighthubeducation.com/science-fair-projects/76976-make-a-step-pyramid-for-a-school-project/
- ↑ http://www.brighthubeducation.com/science-fair-projects/76976-make-a-step-pyramid-for-a-school-project/
About This Article

To build a pyramid out of cardboard for a school project, cut a square out of cardboard, then cut out 4 cardboard triangles, with the bases slightly smaller than the square. Hot glue the long edges of the triangles together so they stand up in a pyramid shape, then glue the bottom of the pyramid to the square to form a base. Let the glue dry completely, then draw bricks onto the pyramid with a permanent marker. For an even more realistic appearance, brush white school glue onto the pyramid, then sprinkle sand over the glue. Allow the pyramid to dry overnight. Keep reading to learn how to make a pyramid out of clay!