This article was co-authored by wikiHow staff writer, Travis Boylls. Travis Boylls is a Technology Writer and Editor for wikiHow. Travis has experience writing technology-related articles, providing software customer service, and in graphic design. He specializes in Windows, macOS, Android, iOS, and Linux platforms. He studied graphic design at Pikes Peak Community College.
Learn more...
Do you want to make a stunning movie poster in Photoshop? Do you want to know how to blend photos together? One of the most popular movie poster designs is to have a scene from the movie as the background and have a large portrait of your characters which fades into the background. You can easily create this effect using a layer mask and gradient blends. This wikiHow teaches you how to blend photos for a movie poster design in Adobe Photoshop for Windows and macOS.
Things You Should Know
- When creating a new Photoshop document, choose a canvas size that's the same height and width of the poster you want to create.
- Before placing a subject on top of another image, remove the background from the subject image for a seamless blend.
- To blend the images, add a layer mask to the subjects, then apply linear or radial gradient blends, depending on whether the subjects have backgrounds.
Steps
Getting Started
-
1Get the images you need. If you want to blend images together in a movie poster, you'll first need to get the images you want to blend together. Movie posters tend to be pretty large, so you'll want to ensure your images are a very high resolution. For best results, use camera raw files. The following are some of the images you will need to make your poster.
- Background image: Your background image should be a scene or a major location from your movie. It should give the viewer a good idea of what the movie is about. Make sure any objects or scenery are near the bottom of the photo. You'll want lots of space over the top of the object in the photo so that you can blend other photos.
- Main Character(s): You will need a large photo of the main character(s) of your movie. They should be wearing the costumes they are wearing in the movie and striking a dramatic pose. Make sure your actors are standing in front of a plain white background or green screen so that you can easily remove the background. You can have all your main characters together in one photo, or you can blend several separate photos of the different characters together in one poster.
- Supporting Characters (optional): In addition to the main characters, some movie posters contain smaller images of supporting characters around the main characters. If this is what you want to do, you will need to take separate photos of all your characters.
-
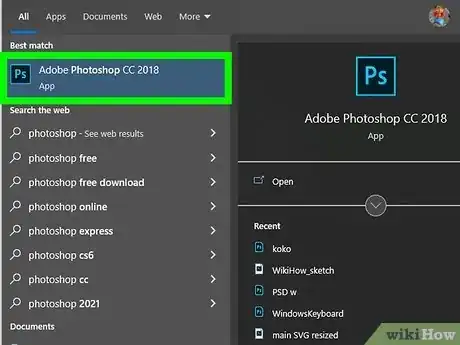
2Open Photoshop. Photoshop has an icon that resembles a blue square that says "Ps" in the middle. Click the Photoshop icon to open Photoshop. You can use any version of Photoshop.
- You must purchase a Photoshop or Adobe Creative Cloud subscription to download and install Photoshop. You can try a free trial of Photoshop at https://www.adobe.com/products/photoshop.html. If you do not wish to purchase a subscription to Photoshop, you can use GIMP instead.
Advertisement -
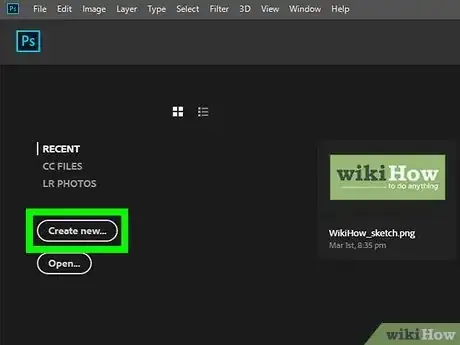
3Click Create New. It's in the menu bar to the right on the title screen. This opens the dialogue box used to create a new Photoshop document.
- Alternatively, you can create a new document in Photoshop at any time by clicking File in the menu bar at the top and then clicking New.
-
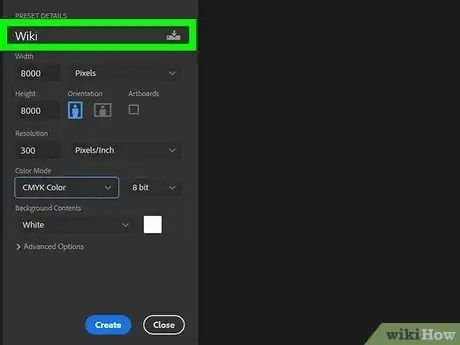
4Enter a file name for your poster. Use the field below "Project Details" to enter the name of your document.
-
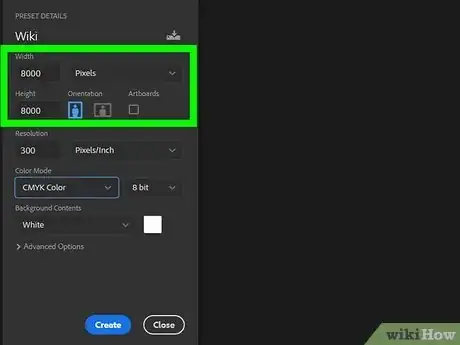
5Enter the height and width of your poster size. Use the drop-down menu next to "Height" to select your unit of measurement (i.e., inches or centimeters), then use the boxes below "Height" and "Width" to enter the dimensions for your movie poster. Consider how your movie poster will be used and make your Photoshop document the largest possible size you will need. It is much easier to scale an image down to smaller sizes than it is to enlarge an image. Additionally, you will want to add a half-inch bleed to the height and width of your document. The following are some common movie poster sizes:[1]
- 27×40 inches (68.6×101.6 cm): This is the most common size for movie posters that are distributed to movie theaters. With a bleed, the document size comes out to 27.5x40.5 inches.
- 40×60 inches (101.6×152.4 cm): This is an extra-large size movie poster that is most commonly used in advertisements at bus stops or subway stations. With a bleed, this document size comes out to 40.5x60.5 inches.
- 24×36 inches (61x91.5 cm): This is the size of movie posters that are bought from a retail store and hung in your bedroom or living room. With a bleed, this document size comes out to 24.5x36.5 inches.
- 18×24 inches (45.7x61 cm): This is a medium-sized poster that is viewable from up to 15 feet away. With a bleed, this document size comes out to 18.5x24.5 inches.
- 11x17 inches (28x43.1 cm): This is a standard tabloid-size sheet of paper. It is best used for small indoor advertisements like in waiting rooms, or lounges. This size can usually be printed using a standard home printer. With a bleed, the document size comes out to 11.5x17.7 inches.
- Bleed: The purpose of a bleed is to create some excess print outside the normal poster size. This is to prevent unsightly white lines along the edge of a poster when it is trimmed to the specified size by the print shop.
-
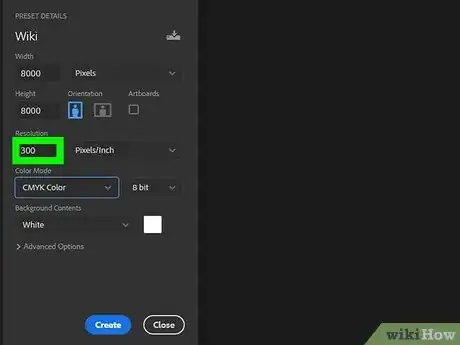
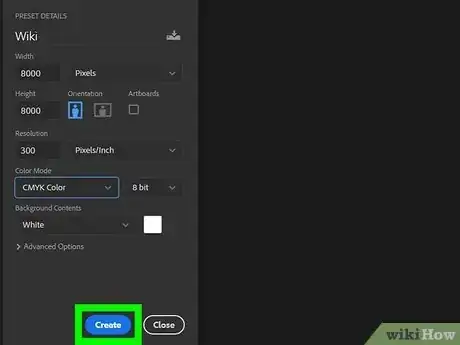
6Set the resolution to 300 pixels per inch. This is the standard resolution for print documents. Use the box below "Resolution" to enter "300." Then use the drop-down menu to the right to select "Pixels/Inch."
-
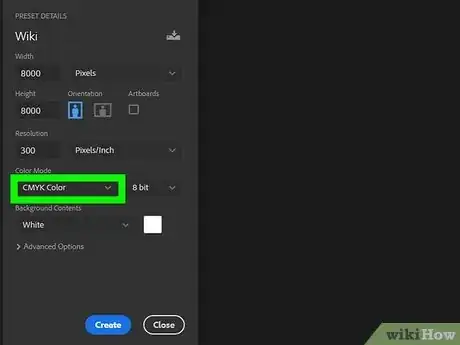
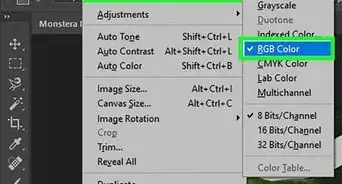
7Select "CMYK Color" as the color mode. CMYK color is used for print materials like posters. Use the drop-down below "Color Mode" to select "CYMK Color."
-
8Click Create. It's the blue button in the lower-right corner. This creates a new Photoshop document with the design parameters of your poster. [2]
Placing Your Images
-
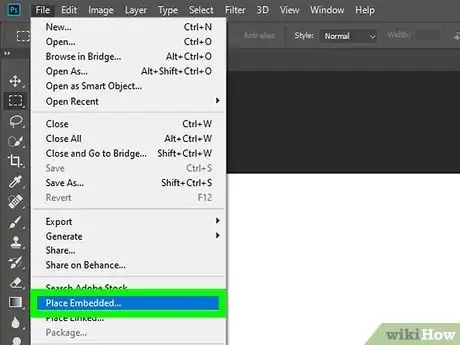
1Place the background photo into your document. Use the following steps to place your background image into the Photoshop document:
- Click File in the menu bar at the top.
- Click Place.
- Select your background image.
- Click Open.
- Click and drag the image to reposition it if needed.
- Click the checkmark icon in the menu bar at the top.
-
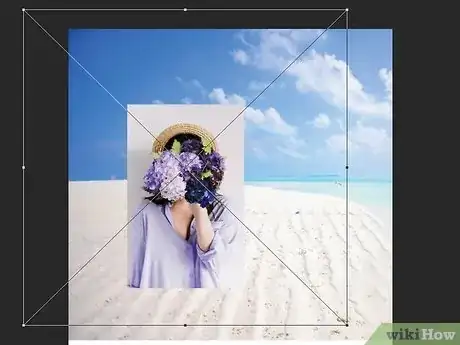
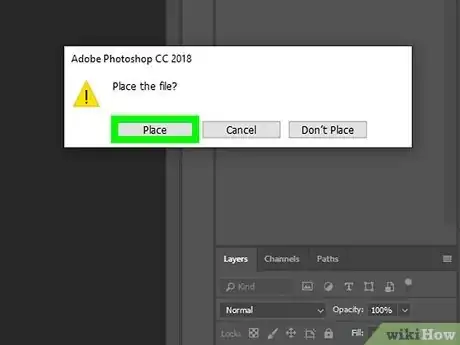
2Place your main characters into the Photoshop file. This will place the image of your main characters into the Photoshop document as a separate layer. Use the following steps to place the image into your Photoshop document:
- Click File in the menu bar at the top.
- Click Place.
- Select the image of your main characters.
- Click Open.
- Click and drag the image to reposition it if needed.
- Hold Shift and click and drag the corners of the image to resize it if needed.
- Click the checkmark icon in the menu bar at the top.
-
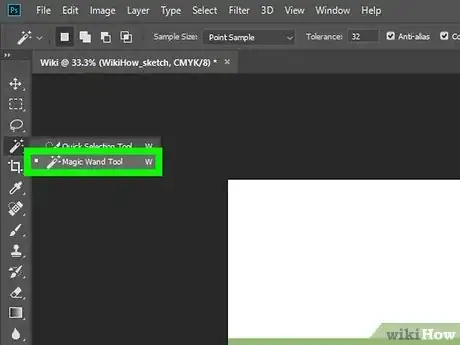
3Remove the background from the image of your main characters (optional). If your characters are standing in front of a plain colored background, you can use the Quick Selection tool, or the Magic Wand tool to select the background. Then press Backspace to delete the background. Be careful not to select any part of your character or their costume. Then zoom in and use the Eraser tool to carefully erase any excess background from the image that is still left.
- Alternatively, if you want to blend the background of your main character image into the movie poster image, go ahead and skip this step. Sometimes keeping the background can create a nice texture.
- Before removing the background, you may want to duplicate the image. That way you have a copy of the original image in case you mess it up. You can also see what it looks like with and without the background. To duplicate the image, right-click the layer the image is on in the Layers panel and click Duplicate Image. Then click the eyeball icon next to the original image to hide it.
-
4Place the images of your support characters. If you have any images of your support characters, use the same steps you used to place the image of your main characters to place the images of your support characters. Position them where you want them to go and remove the background from the image if you desire to do so.
-
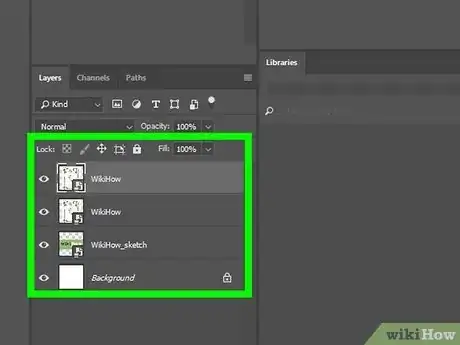
5Adjust the layers of your characters. Once you have all the images of your characters placed into your Photoshop file, use the Layers panel to adjust the different layers. You can move the layers forwards or backward by clicking and dragging them up and down in the Layers panel. By default, the Layers panel is to the left.
- If you do not see the Layers panel, click Window in the menu bar at the top and then click Layer.
Blending Your Images
-
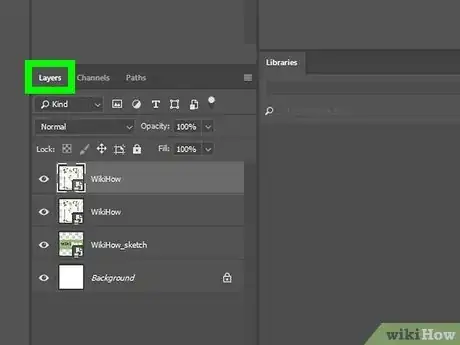
1Open the Layers Panel. If you don't see the Layers panel to the right in Photoshop, use the following steps to display the Layers panel.
- Click Window in the menu bar at the top.
- Click Layers.
-
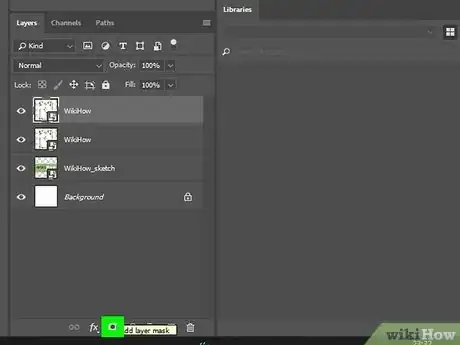
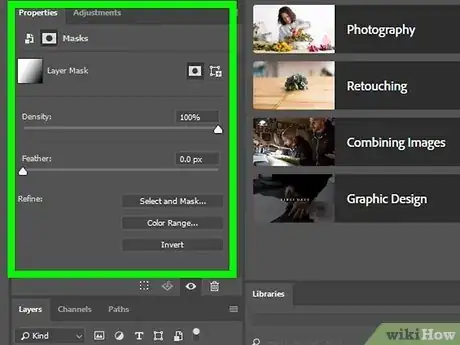
2Apply a layer mask to all the character images. This will display a white thumbnail image next to the image of your characters in the Layers panel. This is a layer mask. You can use a layer mask to reveal and conceal parts of the image using black and white color brushes or gradients. Use the following steps to apply a layer mask and repeat for all your characters:
- Click the layer that contains an image of a character.
- Click Layer in the menu panel at the top.
- Click Layer Mask.
- Click Reveal All.
-
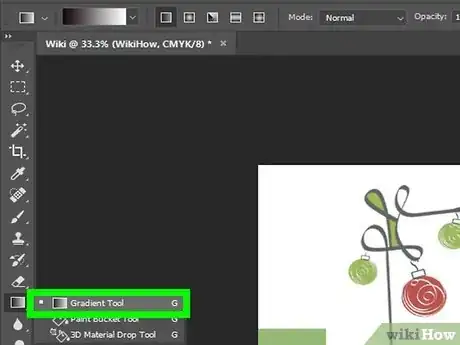
3Apply a linear gradient blend to the layer mask. You can use the Gradient tool to apply a gradient blend to a layer mask in Photoshop. This creates a fade-to-transparency effect. To do so:
- Make sure the foreground and background colors are set to the default black and white.
- Click the layer mask to the right of the thumbnail image of a character image in the Layers panel.
- Press G or select the Gradient tool in the toolbar.
- Click and drag downward starting just below your characters' faces and stopping before the scene at the bottom of the poster. This creates a gradient mask blend.
- If you are not happy with how the blend looks, simply use the Gradient tool to click and drag again to create a new gradient blend. It will replace the old one. Keep trying until you are happy with how it looks.
- To change the foreground and background color back to the default black and white, simply click tiny icon that resembles black and white swatches above the foreground and background colors in the toolbar.
-
4Apply a radial gradient blend to character images that have a background. If you want to blend the background of an image into the movie poster image, you can do so using a radial gradient blend:
- Make sure you have a layer mask applied to the image and select the layer mask in the Layers panel.
- Select the Gradient tool.
- Click the icon that resembles a white faded dot in the menu panel at the top to select a radial gradient.
- Click and drag from the center of the character's face to the background to create a radial blend.
- If you are not happy with how the blend looks, try again. Try clicking and dragging at different angles and sizes.
-
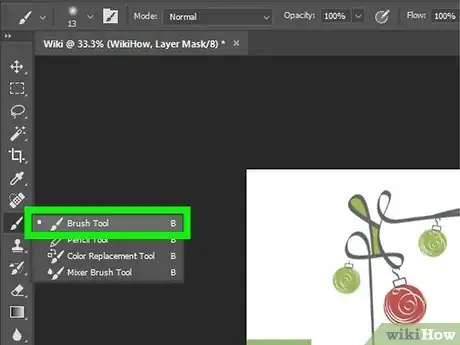
5Use the Brush tool to refine the blend. After applying your gradient blends, you can use the brush tool to refine the blend. To do so:
- Click the layer mask on a layer you want to refine.
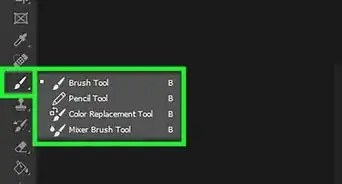
- Select the Brush tool in the toolbar. Be sure to use a soft brush for best results. You can also try different brush types to create a more textured blend.
- Select black as the foreground color to hide the image.
- Select white as the foreground color to reveal the image, then click and paint over the parts you want to touch up.[3]
- To create a more subtle blend, click the drop-down menu next to "Opacity" in the menu bar at the top. Then use the slider bar to lower the opacity. You can paint over your entire image using a low-opacity brush to create a ghost-like image.
References
- ↑ https://coastalcreative.com/standard-poster-sizes/
- ↑ https://www.photoshopessentials.com/basics/create-new-documents-photoshop-cc/
- ↑ https://helpx.adobe.com/ie/photoshop/how-to/blend-two-images-gradient.html
- ↑ https://blog.adobe.com/en/publish/2018/02/27/idmovieweek-designing-show-stopping-posters-type




-Step-9-Version-2.webp)


