This article was co-authored by wikiHow staff writer, Jessica Gibson. Jessica Gibson is a Writer and Editor who's been with wikiHow since 2014. After completing a year of art studies at the Emily Carr University in Vancouver, she graduated from Columbia College with a BA in History. Jessica also completed an MA in History from The University of Oregon in 2013.
There are 8 references cited in this article, which can be found at the bottom of the page.
The wikiHow Video Team also followed the article's instructions and verified that they work.
This article has been viewed 20,842 times.
Learn more...
If you're disappointed by domed cakes that are difficult to frost, by making a few simple adjustments, both before baking and after, you can solve this problem. Before you bake, wrapping the pans with cake strips or wet towels will help to keep the cake from baking too quickly in the center. Reducing the oven temperature and increasing the cooking time will help to keep the cake's top even. After baking, if your cakes still have a little dome or have risen too much on one side, the solution is to level the cake, which can be done using a cake leveler tool or a serrated knife to cut off the domed top before you frost.
Steps
Preventing Domed Cakes
-
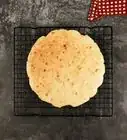
1Use cake strips to help the cake bake slowly and evenly from the edges, so the center doesn't puff up. Wrap cold cake strips around the outside of the pan. Soak the long narrow strips in cold water for 15 minutes and then squeeze out the excess water. Wrap a cake strip around the outside of each pan and secure it in place.[1]
- Some cake strips are made with Velcro while others might require a pin to fasten them.
- Purchase cake strips from a baking supply shop or online.
-
2Use old, clean dish towels to wrap the pans if you don't have cake strips. Take an old dish towel and cut it into long strips that match the size of your cake pans. Run a strip under cold water and squeeze out the excess before wrapping the strip around the outside of the cake pan. Tie the ends of the strip together or fasten them with a pin.[2]
- Avoid using any towels that have been used to clean up cleaning materials since these could be hazardous in the oven.
Advertisement -
3Match the pan size to the cake batter. One of the simplest ways to prevent a cake from doming is to ensure that the pan is filled evenly and is not overfilled with batter. Follow the recipe's instructions on pan size with care; the author of the recipe should have clarified the appropriate pan size for the amount of batter created. If this is not clear, there are cake capacity charts available but a general rule is to fill pans of a depth of 1 to 2 inches (2.5-5cm) halfway with batter and pans that are 3 to 4 inches (7.5-10cm) deep two-thirds the way with batter.[3] With more experience, you'll get used to eyeballing the correct level and you'll instinctively know when it has been overfilled.
- This is especially important if you're baking 3 or more cakes, such as for layered cake batters.[4] Measure each portion of the cake batter when you fill each separate pan. Use identical cake pans for each cake to be baked and set these on a scale when you pour in the batter. Measure the exact same amount of batter into each pan to ensure even baking. If you accidentally put more batter into 1 pan than another, it will puff up and crown more than the other, so scoop out any excess.
-
4Bake the cake at 325 °F (163 °C) instead of 350 °F (177 °C). Most cake recipes instruct you to bake the cake at 350 °F (177 °C). Instead, bake your cake at 325 °F (163 °C) because it will rise more slowly in the oven. This can prevent a crown or dome from forming.[5]
- If the recipe already calls for baking the cake at 325 °F (163 °C), continue to follow the recipe instructions.
-
5Increase the baking time by half if you reduced the oven temperature. If you did turn down the oven temperature by 25 degrees, the cake will take longer to bake. To figure out when the cake should be finished, add half of the time to the original baking time.[6]
- For example, if the recipe originally called for the cake to bake at 350 °F (177 °C) for 30 minutes, add 15 minutes if you're baking it at 325 °F (163 °C). Begin checking the cake at 45 minutes to see if it's done.
-
6Press down on the warm cake, if the cake still has a small dome. If the cake still crowned a little as it baked, remove it from the oven and lay a clean kitchen towel directly on top of the cake. Press down gently in the center to flatten the cake.[7]
- Avoid pushing too hard or the cake will sink in the center.
- Use caution when pressing down because the cake pan will still be hot.


Cutting a Level Top
-
1Cool the cake for at least 1 hour before you cut the top. Once you remove the cake from the oven, place it on a wire rack to cool. Remember to take it out of the pan so the cake doesn't stick to it. Leave the cake to cool for at least 1 hour.[8]
- If you try to cut a warm cake, you'll get jagged cuts with lots of excess crumbs.
-
2Secure the cake to a cake board with frosting. Get out a plastic or greaseproof cardboard cake board that's slightly larger than your cake. Spoon about 1 tablespoon (15 g) of frosting onto the center of the board and then place the cake directly onto it.[9]
- You don't need to spread the frosting. Instead, the dollop of frosting in the center will anchor the cake to the board.
-
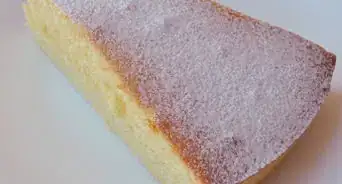
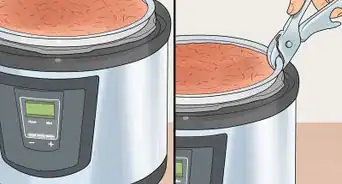
3Use a cake leveler to make a completely even cut. Set the legs of a cake leveler next to the cake and adjust the height of the tool. The wire should be level with the flattest part of the cake. Hold the sides of the cake leveler with both hands and gently move it across the cake so it cuts off the dome.[10]
- Lift away the dome and discard it. You can also crumble it and use it as a garnish for other desserts.
-
4Cut the cake with a serrated knife if you don't have a cake leveler. Place the cake board with the cake onto a lazy susan. Slowly turn the lazy susan with 1 hand and hold the serrated knife in the other hand. Place the serrated knife near the top of the cake where it starts to crown. Gently move the knife back and forth while you turn the lazy susan so the knife slices across the top of the cake.[11]
- Hold the knife as level as you can so the cake top is even.
- Remove the domed part of the cake and discard it or use it in another dessert.
-
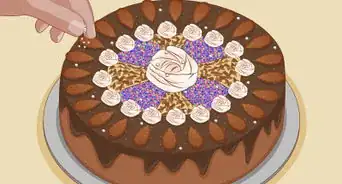
5Decide if you'd like to cut the cake into layers. Once you've cut off the dome, decorate the cake or cut it into layers. To cut the cake into layers, determine if you want to make a 2 or 3-layer cake. Adjust the cake leveler to the height you want the layers to be or use the serrated knife. Cut horizontally through the cake to make even layers.
- Set each layer on a cake board and set them aside until you're ready to assemble the cake.

Warnings
- When adjusting the cooking time and temperature, be aware that this may affect the overall outcome of the cake. Experiment with this when it's okay to make mistakes rather than doing it at a time when producing a perfect cake really matters!⧼thumbs_response⧽
Things You'll Need
Preventing Domed Cakes
- Cake strips or old towel
- Clean kitchen towel
- Scale
Cutting a Level Top
- Wire rack
- Cake board
- Lazy susan
- Frosting
- Serrated knife
- Cake level tool
References
- ↑ https://iambaker.net/how-to-bake-a-level-cake/
- ↑ https://iambaker.net/how-to-bake-a-level-cake/
- ↑ https://fatdaddios.com/help/cake-batter-serving-charts
- ↑ https://www.completelydelicious.com/how-to-bake-flat-cake-layers/
- ↑ https://www.thekitchn.com/3-simple-ways-to-bake-a-flat-topped-cake-every-time-230658
- ↑ https://www.completelydelicious.com/how-to-bake-flat-cake-layers/
- ↑ https://livforcake.com/flat-top-cakes/
- ↑ https://www.craftsy.com/cake-decorating/article/how-to-level-a-cake/
- ↑ https://youtu.be/gqo3YzoRKgA?t=33
About This Article