This article was co-authored by wikiHow staff writer, Christopher M. Osborne, PhD. Christopher Osborne has been a wikiHow Content Creator since 2015. He is also a historian who holds a PhD from The University of Notre Dame and has taught at universities in and around Pittsburgh, PA. His scholarly publications and presentations focus on his research interests in early American history, but Chris also enjoys the challenges and rewards of writing wikiHow articles on a wide range of subjects.
The wikiHow Video Team also followed the article's instructions and verified that they work.
This article has been viewed 67,547 times.
Learn more...
If you’re craving a quick batch of fresh-baked cookies, keeping stashes of frozen cookie dough in the freezer is a great time-saver. Even better, many types of cookie dough can be baked from frozen with only slight adjustments to the instructions for baking them fresh. So, go ahead and make some big batches of your favorite cookie doughs, store them in the freezer, and get ready to satisfy your cookie fix whenever you like!
Steps
Baking and Making Frozen Drop Cookie Dough
-
1Thaw frozen drop cookie dough balls only if specifically called for. If you buy a package of frozen chocolate chip cookie dough balls, for instance, you may be instructed to bake them straight from frozen or to thaw them just slightly. If a friend gives you a freezer bag full of homemade dough balls and their recipe for baking them, you can either thaw the dough or bake it straight from frozen—you won’t taste a difference!
- If you do choose to thaw the drop cookie dough balls, place them on a baking sheet and defrost them in the fridge overnight or on the countertop for 1-2 hours.
-
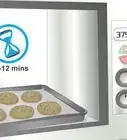
2Bake frozen dough balls 1-2 minutes longer than a fresh dough recipe indicates. Preheat your oven and space out the still-frozen dough balls on your baking sheet, all according to your chosen recipe—you don’t need to increase the oven temperature or the spacing between dough scoops. Just plan to add 1-2 minutes to the overall baking time—12-13 minutes instead of 10-11, for instance.
- If you’re baking packaged frozen dough balls or following a recipe that’s intended for frozen dough balls, just follow the instructions as-is.
- Keep an eye on the cookies as they approach the recommended baking time. Pull them from the oven when they look just slightly underdone—they’ll finish baking outside the oven.
Advertisement -
3Mix a batch of drop cookie dough for freezing now and baking later. Once you’ve tasted how great frozen dough chocolate chip cookies are, you’ll want to mix up your own batch! Pick out your favorite chocolate chip cookie recipe and follow the same instructions as always. You’ll never know the dough was frozen when they come out of the oven! If you need inspiration, check out the recipes for:[1]
- Chocolate chip cookies
- Chewy chocolate chip cookies
- Chickpea chocolate chip cookies (gluten free)
-
4Scoop balls of dough onto a parchment-lined baking sheet. Make the scoops the same size as you would if you were baking them fresh. You can use a tablespoon to keep the scoops roughly the same size, although many bakers find that ice cream scoops work great for this.[2]
- You can place the scoops very close together on the baking sheet, so long as the dough balls aren’t touching.
- Consider spraying your tablespoon or ice cream scoop with cooking spray to help the sticky dough release more easily.
- The baking sheet needs to fit into your freezer. If it won’t fit, you can scoop your dough balls into a few empty ice cube trays instead. Spray the trays with cooking spray beforehand, if desired.
-
5Freeze the dough balls on the tray for 1 hour or until solid. Pop the tray of cookie dough balls into your freezer, then check on them after an hour. If they’re frozen solid, move onto the next step. If not, let them freeze for up to another hour.[3]
-
6Place the frozen dough balls into a zip-close freezer bag for storage. Once they’re frozen solid, the dough scoops should release easily from the parchment paper. Simply toss them into one or more zip-close freezer bags and stash them in the freezer until you’re ready to bake them.[4]
- Label the bags with the date, number of dough balls, and cookie type.
- Bake the frozen dough balls within 6 weeks for the best results. After that, the flavor and texture of the cookies might suffer.
- If you froze your dough scoops in ice cube trays, just pop them out and put them in a zip-close bag.


Using Frozen Dough Logs and Making Your Own
-
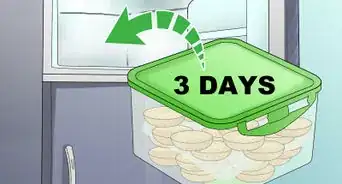
1Thaw a frozen dough log only slightly before slicing it. If you buy a frozen cookie dough log or are given one by a friend, don’t worry about thawing it completely. When you’re ready to slice and bake cookies from it, give it 10-15 minutes on the counter to defrost a bit. Even better, let it defrost for 1-2 hours in the fridge. This slight defrosting will make the log easier to slice and less likely to crumble.[5]
- A slight thaw is all you need. As long as it’s just a little soft on the outside, it will slice and bake up just fine.
-
2Slice and lay out your cookies for baking as per your recipe. Cut cookie rounds from the dough with a sharp knife, usually aiming for a consistent thickness of between 0.25–0.5 in (0.64–1.27 cm). Place them on a baking sheet as directed in your recipe.[6]
- Cookie dough logs should always be chilled thoroughly before slicing and baking, and there’s really no difference between working with a dough log that’s been chilling in the fridge for an hour or one that’s slightly thawed after being frozen for a month.
-
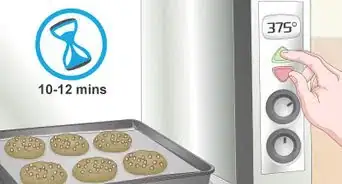
3Bake the cookies for 1-2 minutes longer at the recipe’s recommended temperature. If your recipe calls for baking cookies from chilled dough at 375 °F (191 °C), use the same temperature for frozen dough. Simply add a couple minutes to the estimated baking time.[7]
- Add just a little time to account for the still-frozen centers of the cookie rounds.
- Even with the longer estimated baking time, though, check the cookies regularly for doneness. Shortbread cookies can go from slightly browned to overcooked very quickly.
-
4Mix your own batch of dough and form it into a log shape. Tasting sliced cookies baked from frozen may inspire you to whip up your own dough log for freezing! Many cookie recipes, especially for various types of shortbread cookies, call for you to form the dough into a log, chill it, and slice cookie rounds from it for baking. To freeze this type of dough for baking later, mix it and form it into a log according to the standard recipe for chilled dough baking.[8]
- You’ll usually be instructed to mix the dough and work it into a log shape by hand, aiming for a log with a diameter equal to those of the cookies you want to bake. Work the dough only as much as is necessary to form it into the log shape.
- You can use a recipe for classic shortbread cookies, or try your hand at shortbread swirls.
-
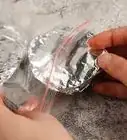
5Wrap the dough log in wax paper and twist the ends. You can also use plastic wrap, but the frozen dough may release a bit more easily from wax paper. In either case, twisting the ends of the wrapping helps the log to maintain its shape.[9]
- After you wrap the log, place it in a zip-close freezer bag. Label the bag with the date and cookie type.
-
6Freeze the log for up to 6 weeks before using it. After you’ve wrapped, bagged, and labeled it, just pop the dough log in the freezer for use whenever you need some quick homemade cookies. Label the date clearly, though, because after about 6 weeks of freezing the quality of the resulting cookies will be reduced.[10]


Thawing and Baking Cut-Out Cookie Dough, and Making More
-
1Thaw frozen cookie dough discs until they’re pliable before you start baking. If you buy (or are given) frozen dough for cut-out cookies such as sugar cookies, it will likely be in the form of one or more thick discs. Take the frozen dough and defrost it in the fridge overnight, or on the counter for about 2 hours. The dough needs to be completely thawed and pliable before proceeding, so wait longer if necessary.[11]
- You want the dough to thaw but remain thoroughly chilled, so defrosting in the fridge is the better option if you have the time.
-
2Roll out the dough and cut out your shapes. Use a rolling pin to spread out a dough disc until it reaches the recommended thickness in your recipe—often 0.25 in (0.64 cm). Then press your selected cookie cutters into the dough, cut out as many cookies as you can, quickly rework the dough into another thin disc, cut out some more cookies, and repeat until you’re out of dough.[12]
- If the dough is getting stuck in your cookie cutters, try dipping the cutters in flour first, or spraying them with cooking spray.
-
3Follow your recipe for baking the cookies on baking sheets. Since this dough is already thawed, use both the recommended temperature and baking time in your recipe. Check often for doneness, starting at least a few minutes before reaching the recommended baking time.[13]
- While the finished cookies cool a bit, whip up some colorful icing and add a decorative touch!
-
4Make your own dough discs for freezing. After you’ve baked cut-out cookies from thawed frozen dough, you might be eager to try your hand at mixing the dough yourself for freezing. For cookies that are cut into shapes using cookie cutters, you’ll usually mix the dough, form it into several discs, chill them, roll them out into thin discs, cut out the shapes, and bake the cookies. To freeze the dough for use later, you’ll simply put the discs in the freezer instead of the refrigerator.[14]
- Aim for making the discs around 1 in (2.5 cm) thick, but don’t worry about being precise with the thickness or the circular shape.
- Cut-out sugar cookies are great for many types of get-togethers and celebrations.
-
5Wrap the discs in plastic wrap, then put them in zip-close freezer bags. Once you’ve created your thick discs of dough, wrap and bag them up for freezing. Make sure you label the bags with the date and cookie type, and try to use the frozen dough within 6 weeks for the best quality.[15]


References
- ↑ https://www.handletheheat.com/how-to-freeze-cookie-dough/
- ↑ https://www.handletheheat.com/how-to-freeze-cookie-dough/
- ↑ https://www.handletheheat.com/how-to-freeze-cookie-dough/
- ↑ https://www.handletheheat.com/how-to-freeze-cookie-dough/
- ↑ https://www.thekitchn.com/how-to-freeze-cookie-dough-cooking-lessons-from-the-kitchn-195223
- ↑ https://www.thekitchn.com/how-to-freeze-cookie-dough-cooking-lessons-from-the-kitchn-195223
- ↑ https://www.thekitchn.com/how-to-freeze-cookie-dough-cooking-lessons-from-the-kitchn-195223
- ↑ https://www.thekitchn.com/how-to-freeze-cookie-dough-cooking-lessons-from-the-kitchn-195223
- ↑ https://www.thekitchn.com/how-to-freeze-cookie-dough-cooking-lessons-from-the-kitchn-195223
About This Article