wikiHow is a “wiki,” similar to Wikipedia, which means that many of our articles are co-written by multiple authors. To create this article, 21 people, some anonymous, worked to edit and improve it over time.
wikiHow marks an article as reader-approved once it receives enough positive feedback. In this case, 90% of readers who voted found the article helpful, earning it our reader-approved status.
This article has been viewed 183,368 times.
Learn more...
Drawing with graphite, or "lead" pencils is a time-honored tradition among artists. When working with sketches or complete drawings, it's important to understand how to smudge only when you intend to! With some practice and hard work, you'll be able to create a smear-free, totally professional-looking drawing.
Steps
-
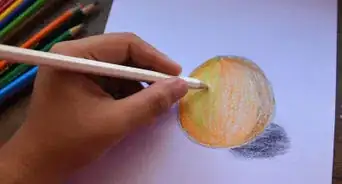
1Be careful. It sounds pretty obvious, but it's the first step to better quality finishes with graphite. Be mindful, and watch how your drawing is developing, and try not to rest the heel of your hand on parts that you have already drawn on. Any oils from your hand can make smudges permanent. Any loose particle of graphite will get caught in that oil and deposit itself on your nice white surface. Watch what you're doing.[1]
-
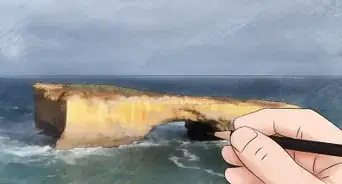
2Use good quality paper. Bristol board with a vellum or kid finish, or Canson papers are excellent for this purpose - they have what's known as "resist" and "tooth" which is critical for a good appearance with a pencil drawing. Don't use thin typing paper or scratch paper to do your masterpiece on - invest in some good quality paper with some heft to it. These papers not only resist smudges a little bit, but they erase cleanly if you do smudge on them.Advertisement
-
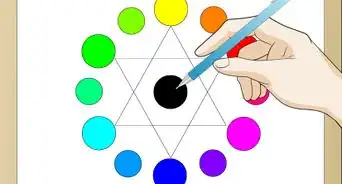
3Think about the softness of your lead. Softer leads: 6B thru HB, with 6B as the softest and HB as the hardest. 2B is the hardness used most often by animators on cartoons. The softer the lead, the blacker the lines - and the more smear. Harder leads: H - 6H - with H as the softest and 6H as hardest, are most often used by architects or for drafting. Remember that the softer your leads, the more careful you will need to be about smudges and fingerprints.[2]
-
4Get the right erasers. You will need a white plastic eraser - if you're doing a lot of fine details, get one of the "pen-type" ones that you can just click to feed more eraser out. Also, get a kneaded eraser - this is a special type of putty that picks up graphite, and which can be formed with your fingers into just the right shapes. You may also want to look into an electric eraser - these are capable of the greatest detail.[3] You can also get what's called 'cleaning powder." It's really just a bag full of eraser crumbs, but if you smear a lot, it can help clean up your drawings quite a lot.
-
5Use a brush to remove eraser or graphite crumbs - don't brush them off with your hand. Soft brushes like this can be purchased at any art supply store. Take care not to use the brush for any purpose other than this, though, or you may find that dirt or other foreign stuff will get transferred from the brush onto your nice drawing.
-
6Use a mahl stick or a drawbridge.[4] If you're working on a large picture, sometimes you just have to put your hand somewhere. Luckily, there are a couple of tools specifically made for this problem. The first, a mahl stick, is nothing more than a length of doweling with a non-mar rubber tip. Holding the stick in your non-drawing hand, put the rubber tip on the desk or the paper, out of the area where you are working. Now put a pencil or a paperback book at the other end of the stick, where you are holding it. Continue to hold onto the mahl stick so that you can move it with your drawing hand. Rest the heel of your drawing hand on the stick rather than on your drawing, and draw. It keeps your hand up off the picture. A drawbridge is similar - it's usually a piece of clear acrylic about 4"x12", with rubber feet on the bottom. Put the drawbridge on the drawing, where your drawing hand needs to rest, and use it to rest your hand on, instead of laying your hand directly on the drawing.
-
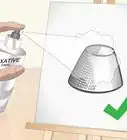
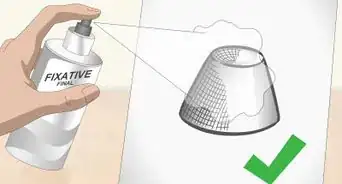
7Fix as you work. Get a can of workable fixative.[5] There are several kinds - make sure you get the workable kind. This is a kind of spray coating which prevents smearing, but it can be erased, and you can draw over it. Don't use too much - it can make the drawing difficult to work on. But used sparingly, this stuff really helps.
-
8Fix permanently when finished. Use a permanent fixative on the drawing when you are done. Make sure you sign your work first!


Community Q&A
-
QuestionCan I use hairspray to protect my drawing?
 Community AnswerHairspray can be used to seal acrylic paintings and charcoal drawings, but will often leave a glossy finish. Only use if you have nothing else.
 -
QuestionWhat do I do if I rage?
 Community AnswerTake a break. You can come back to it once you have calmed down. If you rage, you will probably end up ruining your hard work.
 -
QuestionWho was the artist in the last few pictures?
 AnonymousSuperWriterCommunity AnswerIt is probably the author that has created this article. Check in the discussion page to see if it is a rising star. If is, it will show the name of the author.
Things You'll Need
- Erasers
- Mahl stick or drawbridge
- Workable Fixative
- Permanent Fixative
- Photo/Tracing Paper

References
- ↑ https://www.youtube.com/watch?v=bnKgLVPXcN4
- ↑ https://www.creativeartcourses.org/best-pencils-for-drawing-and-sketching/
- ↑ https://www.creativeartcourses.org/the-top-10-uses-for-rubbers-and-erasers/
- ↑ https://crafts.stackexchange.com/questions/376/how-can-i-avoid-smudging-my-pencil-drawings
- ↑ https://crafts.stackexchange.com/questions/376/how-can-i-avoid-smudging-my-pencil-drawings