This article was co-authored by wikiHow staff writer, Jack Lloyd. Jack Lloyd is a Technology Writer and Editor for wikiHow. He has over two years of experience writing and editing technology-related articles. He is technology enthusiast and an English teacher.
The wikiHow Tech Team also followed the article's instructions and verified that they work.
This article has been viewed 406,653 times.
Learn more...
This wikiHow teaches you how to turn a simple photo background into a black background. You can do this by using the Pixlr online photo editor, or by using Paint 3D if you have a Windows computer. You can also use the free GIMP 2 program to cut a subject out of a photo and paste the subject onto an all-black background.
Steps
Using Pixlr
-
1Open Pixlr. Go to https://pixlr.com/editor/ in your computer's browser.
-
2Click OPEN IMAGE FROM COMPUTER. It's in the middle of the page. Doing so opens a window.Advertisement
-
3Select a picture. Click the picture to which you want to add a black background.
-
4Click Open. It's in the lower-right corner of the window. The picture will be uploaded to Pixlr.
-
5Click the "Fill" icon. This bucket-shaped icon is in the column of drawing options that's on the left side of the window.
- You can also just press G on your keyboard.
-
6Select black as your color. Click the black square at the bottom of the column of drawing options.
-
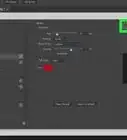
7Adjust the tolerance. Click the "Tolerance" drop-down box at the top of the Pixlr page, then raise or lower the tolerance.
- Tolerance dictates how precise your coloring is. A higher tolerance means that more of the photo will be colored in with one click, while a lower tolerance is ideal for photos with one-color backgrounds.
-
8Click part of your picture's background. It will turn black.
-
9Adjust the tolerance if needed. If too much of the picture turned black, undo the step and lower the tolerance; if not enough turned black, undo the step and increase the tolerance.
- You can undo steps by pressing Ctrl+Z (or ⌘ Command+Z on a Mac).
-
10Continue clicking the background until it's all black. This will involve some trial and error, so keep adjusting the tolerance as you go if need be.
-
11Click File. It's in the upper-left side of the Pixlr window. A drop-down menu will appear.
- If you're using a Mac, make sure that you click File on the Pixlr webpage and not in the upper-left corner of your Mac's screen.
-
12Click Save…. This option is in the drop-down menu. A window will open.
-
13Click My Computer. It's on the left side of the window.
-
14Click Save. You'll find this in the bottom-right corner of the window.
-
15Select a save location. Click a folder on your computer in which you want to save the picture.
-
16Click Save. It's in the bottom-right corner of the window. Your picture will be saved with a black background.


Using Paint 3D
-
1
-
2Type in paint 3d. This will search your computer for the Paint 3D program.
-
3Click Paint 3D. It's at the top of the Start window. Paint 3D will open.
-
4Click Open. This folder-shaped icon is in the middle of the Paint 3D window.
-
5Click Browse files. It's near the top of the page. Doing so opens a File Explorer window.
-
6Select a picture. Go to the folder in which your picture is located, then click the picture.
-
7Click Open. It's in the bottom-right corner of the window. Your picture will open in Paint 3D.
-
8Click the "Fill" icon. This bucket-shaped icon is on the right side of the Paint 3D window, just below the "Marker" heading.
- If you don't see this option, make sure that you're on the drawing tab by clicking the paintbrush icon at the top of the window.
-
9Select black as your color. Click the black box in the lower-right section of the window.
-
10Click a solid part of your picture's background. It will turn black.
- If too much of the picture turns black, press Ctrl+Z to undo the action, then drag the "Tolerance" slider that's on the right side of the page to the left.
-
11Repeat until your picture's background is all black. This may take some trial and error, so keep undoing changes that you don't like and adjusting the "Tolerance" slider as needed.
-
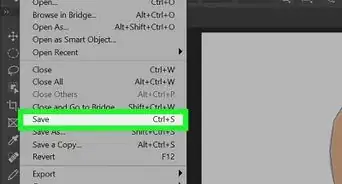
12Save your changes to the picture. Press Ctrl+S to do so. Your picture's background will now be black instead of whatever it was before.
- If you want to preserve the original picture, first copy it by selecting it and pressing Ctrl+C and then paste it elsewhere by pressing Ctrl+V.


Using GIMP 2
-
1Open GIMP 2. Its app icon resembles a fox-like animal chewing on a paint brush. You should see the GIMP 2 staging window open.
- If you don't have GIMP 2 installed, you can download it from the official website: https://www.gimp.org/downloads/
-
2Click File. It's in the upper-left corner of the window. A drop-down menu will appear.
-
3Click Open…. This option is in the File drop-down menu.
-
4Select your picture. Click the picture that you want to open.
-
5Click Open. It's in the bottom-right corner of the window. The picture will open in GIMP 2.
- You may be prompted to convert color elements of the picture. If so, just click Keep to continue.
-
6Press the F key. This will open the "Free Select" tool, which allows you to draw an outline around your subject.
- If this doesn't work, click the Tools tab, select Selection Tools, and click Free Select.
-
7Draw around your subject. Make sure that you draw as close to the subject's actual outline as possible, since you'll be cutting out the outline and pasting it onto a black background.
- The start of your outline must connect to the end of your outline.
-
8Copy the subject. Press either Ctrl+C (Windows) or ⌘ Command+C (Mac).
-
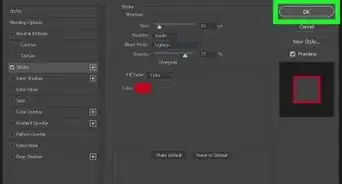
9Create a new canvas. Click File, click New... in the drop-down menu, and then do the following:
- Click the Advanced Options heading.
- Click the "Fill with" drop-down box.
- Click Foreground color in the drop-down menu.
- Click OK
-
10Paste your subject onto the black background. Press Ctrl+V (or ⌘ Command+V on a Mac) to do so. You should see the copied subject appear in the middle of the black background.
-
11Export the picture. Click File, click Export As..., add a title at the top of the window, click Export, make sure that the "Save background color" box is checked, and click Export again. This will save your photo with its black background.


Community Q&A
-
QuestionWhat can I do if I do not have Photoshop?
 Community AnswerThere are a number of websites you can do for picture-editing. For example, Deviantart provides the same qualities as Photoshop for their users for free.
Warnings
- Photos with complex backgrounds cannot have their backgrounds changed with Pixlr or Paint 3D.⧼thumbs_response⧽


About This Article
1. Open Paint3D.
2. Click Open.
3. Click Browse Files.
4. Select an image and click Open.
5. Click the Fill icon.
6. Select black.
7. Click a solid part of the picture's background.
8. Repeat until the whole background is black.