This article was co-authored by wikiHow staff writer, Nicole Levine, MFA. Nicole Levine is a Technology Writer and Editor for wikiHow. She has more than 20 years of experience creating technical documentation and leading support teams at major web hosting and software companies. Nicole also holds an MFA in Creative Writing from Portland State University and teaches composition, fiction-writing, and zine-making at various institutions.
This article has been viewed 90,600 times.
Learn more...
Grid lines, which are the faint lines that divide cells on a worksheet, are displayed by default in Microsoft Excel. You can enable or disable them by worksheet, and even choose to see them on printed pages. Gridlines are different than cell borders, which you can add to cells and ranges and customize with line styles and colors. This wikiHow article will show you how to show gridlines in your Excel worksheet, both on the screen and printed, as well as how to add cell borders to make your data stand out.
Things You Should Know
- On Windows, open your Excel sheet. Go to File > Options > Advanced > "Display options for this worksheet". Choose your worksheet and select "Show gridlines."
- On Mac, open your Excel sheet. Click the Page Layout tab. Find the "Gridlines" panel and check the "View" box.
- Add borders to cells in both OS's by selecting your cells and clicking Home. Click the arrow next to the Borders icon and choose a style.
Steps
Enabling Gridlines in Windows
-
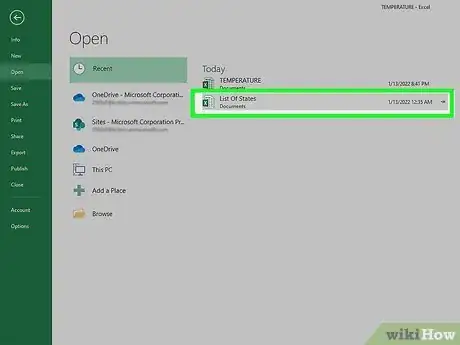
1Open the workbook you want to edit. Gridlines always appear on worksheets by default, but you can enable or disable them for any individual worksheet in your settings.
- If the issue is that you can see gridlines on your worksheet but aren't seeing them on printed pages, you can just enable gridlines when printing. Skip to Step 8 to learn how.
- If you see gridlines on the page but want to add more obvious borders around certain cells or ranges, see Adding Cell Borders in Windows and macOS.
-
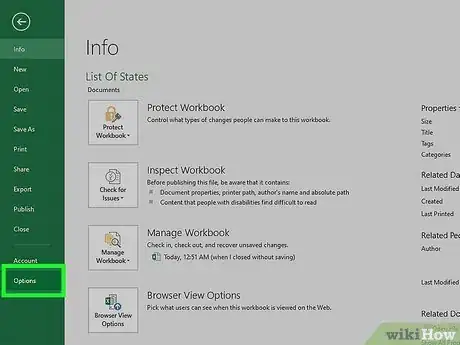
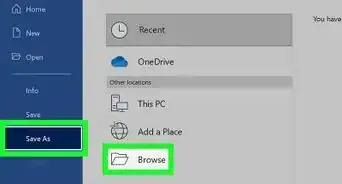
2Click the File menu and select Options. The Excel Options window will expand.Advertisement
-
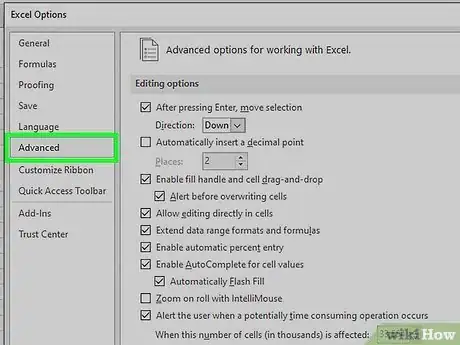
3Click the Advanced tab. It's in the left panel.
-
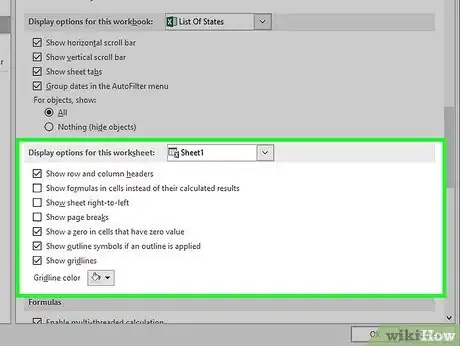
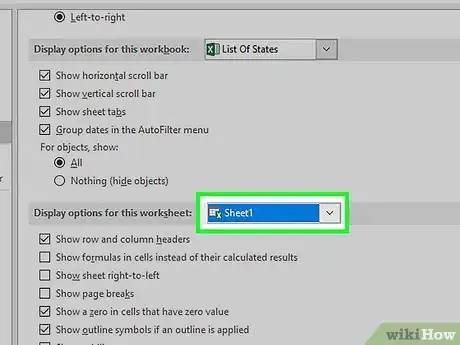
4Scroll down to the "Display options for this worksheet" area. It's in the right panel just after the "Display options for this workbook" group.
-
5Select the sheet that doesn't have gridlines from the "Display options for this worksheet" menu. If you already see the name of the active worksheet here, you can skip this step.
-
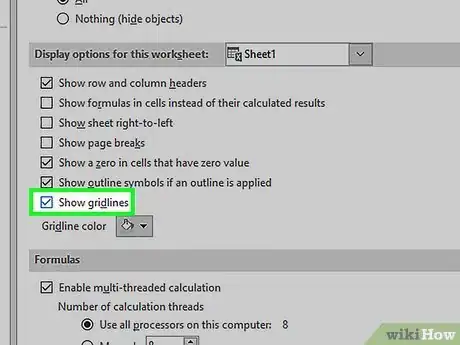
6Check the box next to "Show gridlines." If gridlines were hidden, the checkbox would be blank. Clicking the box re-enables gridlines.
- If there was already a check next to "Show gridlines" but you don't see lines on your sheet, the color may be too light. Click the "Gridline color" menu to choose a darker gray color.
-
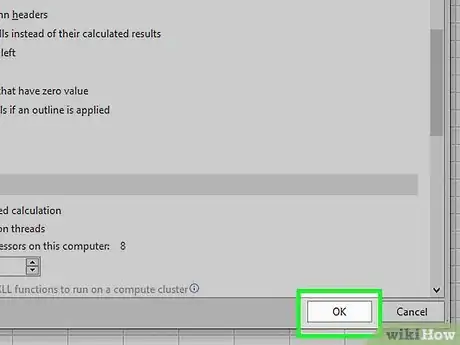
7Click OK. Gridlines are now visible on your worksheet.
-
8Show gridlines when printing (optional). Gridlines, by default, do not appear on printed versions of your worksheet. If you want to see gridlines when you print, you'll need to enable them in your Page Setup options. Here's how:
- Click the name of the sheet you want to print at the bottom of your workbook.
- Click the Page Layout tab at the top.
- Click the small arrow at the bottom-right corner of the "Page Setup" panel in the toolbar.
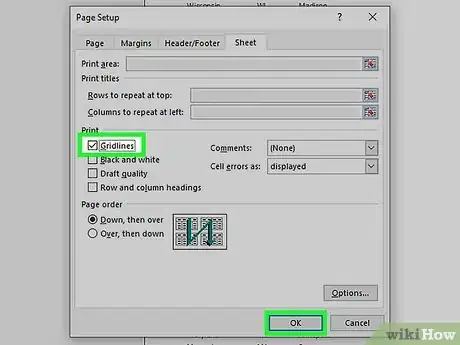
- Click the Sheet tab.
- Check the box next to "Gridlines" under "Print."
- Click OK. Now when you print this sheet, gridlines will appear on each page.
Enabling Gridlines on macOS
-
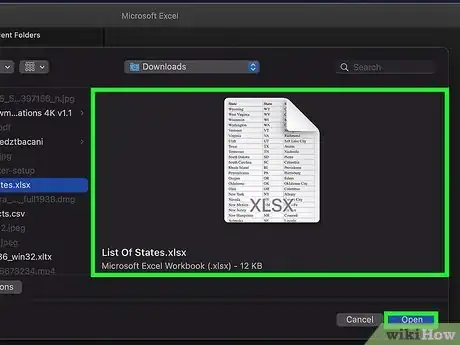
1Open the workbook you want to edit. Gridlines always appear on worksheets by default, but you can enable or disable them for any individual worksheet in your settings.
- If you already see gridlines on the page but want to add more obvious borders around certain cells or ranges, see Adding Cell Borders in Windows and macOS.
- If your workbook is not open to the sheet that doesn't have gridlines, click the name of that sheet at the bottom of the workbook to open it now.
-
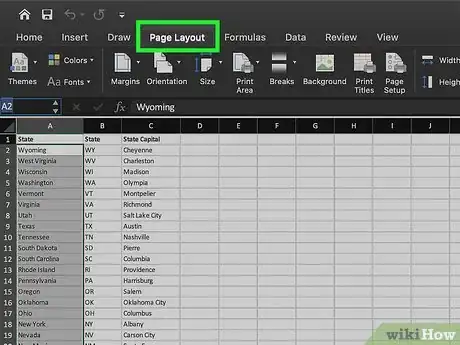
2Click the Page Layout tab. It's at the top of Excel.[1]
-
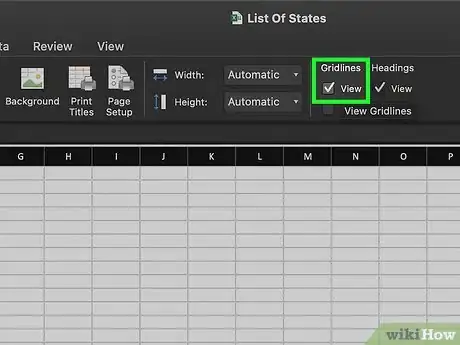
3Check the box next to "View" on the "Gridlines" panel. This is in the toolbar at the top of Excel. As long as this box is checked, gridlines will be visible for this worksheet on the screen.
-
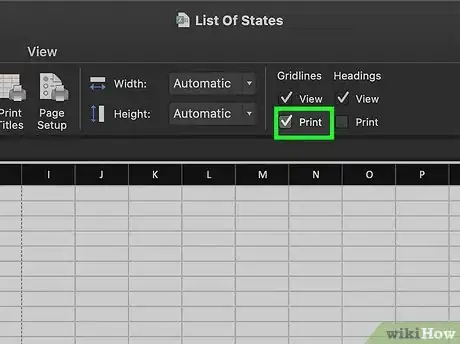
4(optional) Check the box next to "Print" to print gridlines. If you want to see gridlines on the printed version of your worksheet, this option ensures they'll show up.
Adding Cell Borders in Windows and macOS
-
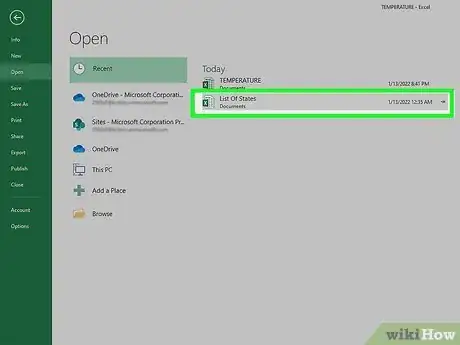
1Open your workbook in Excel. Gridlines appear on all sheets by default, but they may not be bold enough to make your data stand out. If you want to surround certain data with more visible lines, you can add borders to those cells.
-
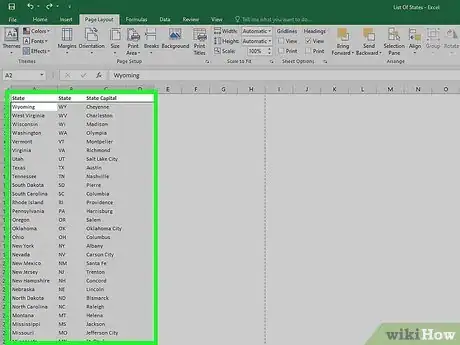
2Select the range of cells you want to add borders to. You will be able to add a border that surrounds the entire selected range, and/or around each individual cell in the range.[2]
-
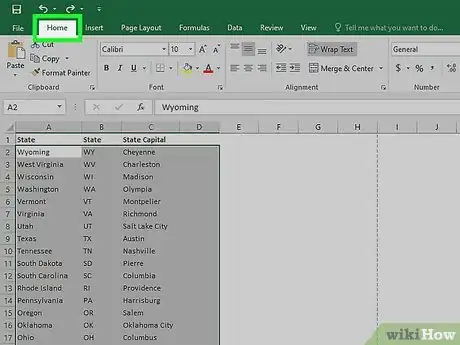
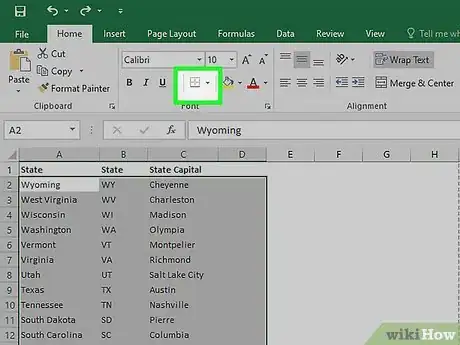
3Click the Home tab. It's at the top of Excel.
-
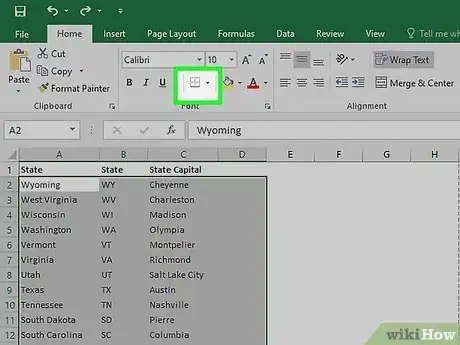
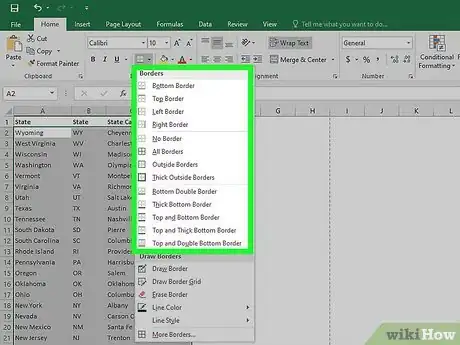
4Click the arrow next to the Borders icon. The Borders icon is a dotted grid on the "Font" panel at the top of Excel. A list of border styles will appear.
-
5Select a border style. If you want to add darker grid lines that surround each selected cell, choose All Borders. Otherwise, choose any of the other options, such as Outside Borders, which adds one solid border around the selected range.
-
6Click the arrow next to the "Borders" icon again. Now that you've inserted some cell borders, you can customize how they look.
-
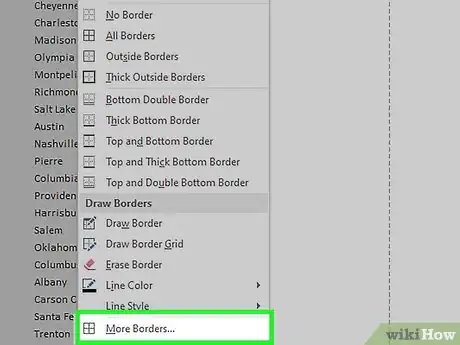
7Click More Borders…. It's at the bottom of the menu.
-
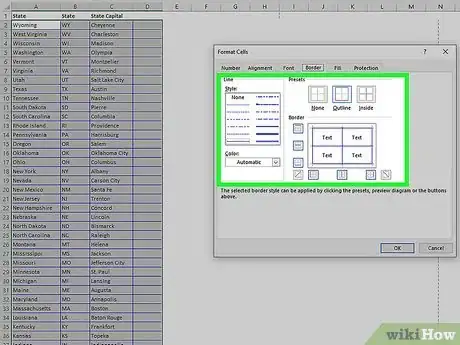
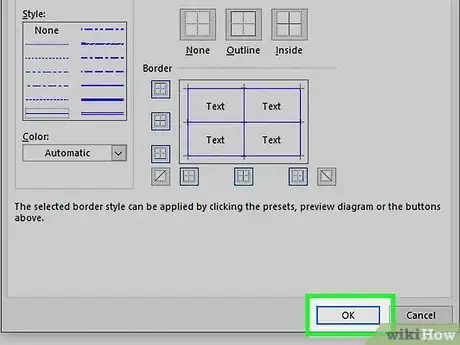
8Choose your border options.
- To customize the actual line used in the border (such as changing a solid line to a dotted line), select one of the line styles from the Styles area.
- To make the border a different color, choose a color from the Color menu.
-
9Click OK. This adds your border preferences to the selected range.
- To remove cell borders, click the arrow next to the Borders icon in the toolbar, and then choose No Border.
- Unlike gridlines, cell borders are always shown on printed sheets.
References
About This Article
1. Click the File menu and select Options.
2. Click Advanced.
3. Select the sheet from the "Display options for this worksheet" menu.
4. Check the box next to "Show gridlines."
5. Click OK.
