

PowerPoint 2013
Advanced Presentation Options
Introduction
There are many things to keep in mind when giving a presentation. How long will your presentation last? What will you say? If you're not in the same location as your audience, how will they view it? Fortunately, PowerPoint offers tools to help you ensure your presentation goes smoothly.
In this lesson, you'll learn how to Rehearse and Record slide shows in advance. You'll also learn about alternative presentation options, such as creating a video of your presentation or presenting your slide show online to remote audiences. Finally, you'll learn how to customize your presentation with hidden or rearranged slides.
Optional: Download our practice presentation for this lesson.
Rehearsing slide show timings
Rehearsing timings can be useful if you want to set up a presentation to play at a certain speed without having to click through the slides to present it. Think of it as a tool to help you practice presenting your slide show. Using this feature, you can save timings for each slide and animation. PowerPoint will then play back the presentation with the same timings when you present it.
Rehearsing is often one of the last steps in creating a well-polished presentation. If you've never presented a slide show before, you may want to review our lesson on Presenting Your Slide Show to become familiar with the basics.
To rehearse timings:
- Select the Slide Show tab, then locate the Set Up group.
- Click the Rehearse Timings command. You will be taken to a full-screen view of your presentation.
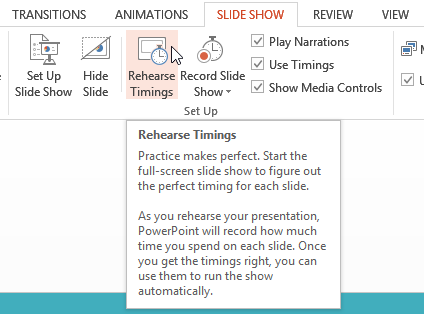 The Rehearse Timings command
 - Practice presenting your slide show. When you are ready to move to the next slide, click the Next button on the Recording Toolbar in the top-left corner. If you prefer, you can also use the right arrow key.
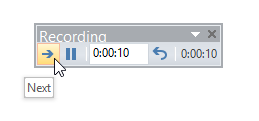 Navigating to the next slide using the Recording toolbar
 - When you have reached the end of the show, a dialog box will appear with the total time of your presentation.
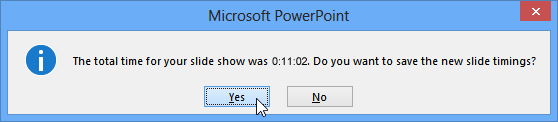 Verifying the new slide timings
 - If you are satisfied with your timings, click Yes.
If you need more than one try to get the timings just right, the Recording Toolbar has options to let you take a break or start over on a slide. To pause the timer, click the pause button on the toolbar. No actions taken while the timer is paused will be included in the timings. To re-record the timings on the current slide, simply click the repeat button.
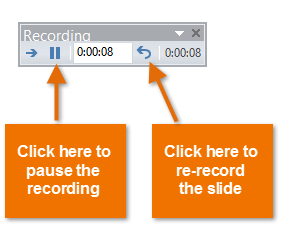 The Recording toolbar
Recording your slide show
The Record Slide Show feature is similar to the Rehearse Timings feature, but it's a bit more comprehensive. If you have a microphone for your computer, you can even record voiceover narration for the entire presentation. This is useful if you plan on using your slide show for a self-running presentation or a video. Your mouse won't show up on screen in recorded slide shows, so if you would like to point out details on screen you can use PowerPoint's laser pointer option.
To record a slide show:
- Click the Slide Show tab, then locate the Set Up group.
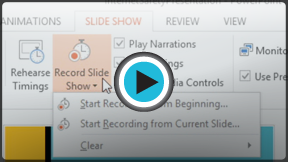
- Click the Record Slide Show drop-down arrow. Select either Start Recording from Beginning or Start Recording from Current Slide.
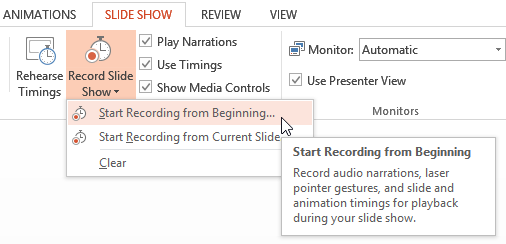 The Record Slide Show command
 - A dialog box will appear. Select the desired options. Remember, you can only record narration if you have a microphone attached to your computer.
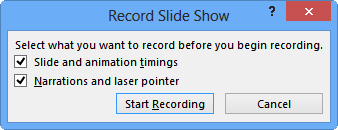 Recording options
 - Click Start Recording. Your presentation will open to a full screen.
- Perform your slide show. Make sure to speak clearly into the microphone if you are recording narration. When you are ready to move to the next slide, click the Next button on the Recording Toolbar in the top-left corner or use the right arrow key.
Navigating to the next slide using the Recording toolbar - When you reach the end of the show, PowerPoint will close the full-screen view.
- Your slide show timings and narration are now included in your presentation. The slides with narration will be marked with a speaker icon in the bottom-right corner.
 Slides with narration
To point out details during your recording, press and hold the Ctrl key and the left mouse button. Your cursor will show up as a laser pointer. Simply move your mouse to indicate the desired details. Release the Ctrl key when you are finished pointing out things on screen.
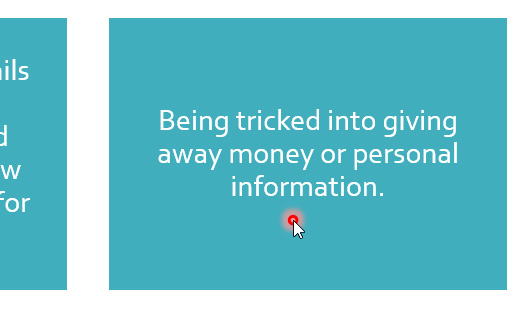 Using the laser pointer
To remove narration or timings from a recorded slide show:
- Click the Slide Show tab, then locate the Set Up group.
- Click the Record Slide Show drop-down arrow.
- Hover the mouse over Clear, then select the desired option.
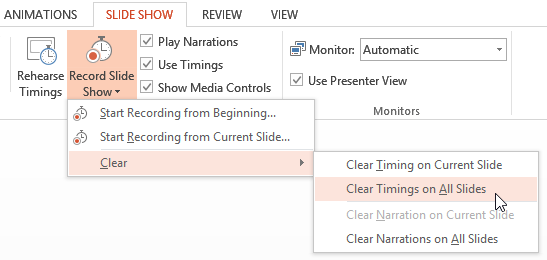 Clearing timing on all slides


