X
wikiHow is a “wiki,” similar to Wikipedia, which means that many of our articles are co-written by multiple authors. To create this article, volunteer authors worked to edit and improve it over time.
This article has been viewed 27,863 times.
Learn more...
ManageBac is a system where teachers and students can go paperless by submitting tasks online. Teachers can also check them online as well, making it very useful. ManageBac follows the IB programme and allows schools to work better with ManageBac. However, it might be slightly difficult to navigate ManageBac. Read on to learn more.
Steps
Part 1
Part 1 of 14:
The Basics
-
1
-
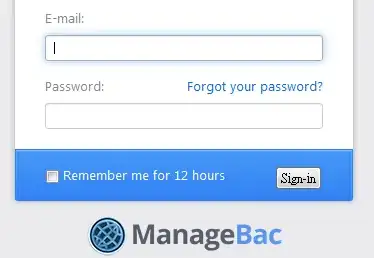
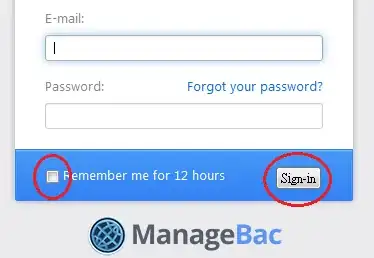
2Login to ManageBac. Enter your email address and password. You should have created your password through the email that was sent to you. If you want your account to be remembered for 12 hours, there is a check-box for that. Checking the check-box is not recommended for public computers.
- Forgot your password? No problem! You could press the Forgot your Password? An email would be sent to your email address. You can then change your password.
Advertisement -
3Find the navigation bar. It will be on the top which gives you quick access to five pages:
- Dashboard - This is your homepage. You can also view your upcoming events and deadlines.
- Profile - This profile that others can view. You can also view your scores and marks, portfolio, and other information.
- IB Manager - This is where you organise your IB activities.
- Classes - Join classes and view assessments.
- Groups - Join groups to do more activities.
-
4Find help if you need it. There is a help button to the right of the navigation bar under the logout button. Clicking it will open a new tab in your browser where you can look for help.
-
5Notice the three buttons above the 'Help' button. It displays your full name, a message box, and a logout button.
- Full Name - You can change your full name. Clicking this will link you to changing your email address and password for ManageBac. You could also set some notifications.
- Message Box - Teachers can notify students of new tasks or messages by sending messages.
- Logout - A simple click on this button would log you out of your account on your current device.
Advertisement
Part 2
Part 2 of 14:
Dashboard
-
1Meet your Dashboard. Your dashboard is your homepage where you can view your next 2 weeks of activities, upcoming deadlines and events, activities, and classes and groups.
-
2Learn more about your deadlines and events. To do this, place your mouse over the i icon and wait for the information to load. You can view the date, time, files, class, and description of the deadline or event.
-
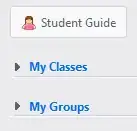
3View your classes and groups. To the right of the screen there will be a student guide, my classes, and my groups.
- Student Guide - This is the same thing as the Help button.
- My Classes - You can expand this to reveal all the classes that you participate.
- My Groups - You can expand this to reveal all the groups that you participate.
-
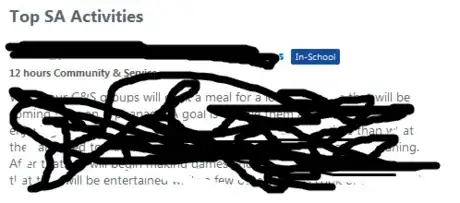
4See your C&S or SA activities. Scroll down the page to see your top Community&Service or Service as Action activities. You can read the description of your activity.
Advertisement
Part 3
Part 3 of 14:
Profile
-
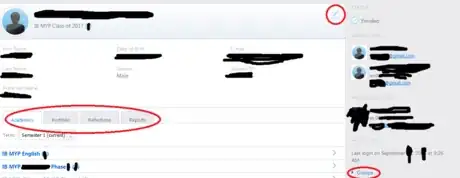
1Get to know your profile. In your profile, you can view your academic progress, portfolio, reflections, and reports. You can also view your parent, homeroom, and MYP adviser information.
- Academic Progress - Here you can view your personal information, scores for assessments, MYP progress, and subject units. You can also see if you have submitted your work or not.
- Portfolio - Your portfolio is divided into multiple sections that cover all your subjects ranging from Community Project homework to Physical and Health Education homework. You can also upload files, photos and link videos and websites. You can even write a journal!
- Reflections - You can use this page to set your term/semester goal.
- Reports - You can view your academic reports here. Note!: If it is blank throughout your academic year, it means that your school didn't purchase the ManageBac Report Card system.
-
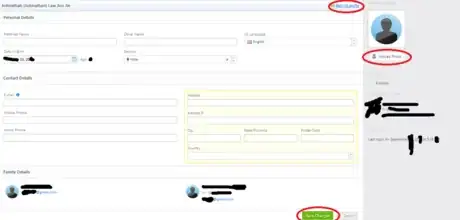
2Edit your profile information and change your profile. You can change your profile by clicking the pencil button at the top right. When editing your profile, you can edit your gender, date of birth, email address, contact information (e.g. city and house address). If you prefer to be called a name, you could put that in the Preferred Name box or if you have another name, you can put that in the Other Name box. If you are more comfortable to view webpages in Spanish or French, you can change the UI (user interface) language as well. Unfortunately, there are only 3 UI languages available. You also have the choice to edit your profile picture which anybody can view, so be sure not to upload any inappropriate pictures. You can also always delete your uploaded picture to restore the default picture. There are family details at the bottom of the page but it is not for you to change. Once you're done editing your profile, click Save Changes at the bottom.
-
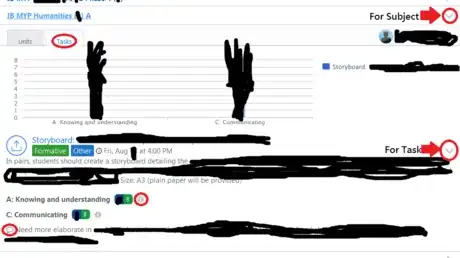
3View your scores. Go to the academics profile tab. Expand the subject you want to view. Be sure that you are on the tasks tab, not the units tab. Each task and assessment is given its own colour (but not always) in the column graphs. Click the task label next to the column graph to hide specific columns. Enlarge a specific task tab to get more details such as date, information, and scores. You can also see the teacher's comment for you. Place your mouse over the i button next to your score to view the rubric for the score.
-
4View past scores. A drop-down box showing the current term or semester of the scores will be above the subject tabs. You could select what year and semester that you want to view your scores. After selecting a term or semester, the page will reload and you will see past results when expanding the lesson tabs. You can only see the scores for the classes that aren't archived and the classes that you join.
-
5View your IB MYP progress. Scroll down to the bottom of the page and there you will see your progress of your community project, service as action, and personal project.
-
6View your portfolio. Go to the top of the page and click the Portfolio tab. As said before, the portfolio is divided into categories. So if you submitted a task that is in English Language and Literature and another for Second-Language Language and Literature, then the work that you submitted for those two subjects will be grouped together into the Language and Literature category. Don't forget that you could add files and photos and link videos and websites. Also don't forget that you could write your own journal to keep track of your work and to keep your thoughts and ideas.
-
7Write goals and reflections. Click the reflections tab and type in your goals and reflections. Make your goals that are smart: specific, measurable, attainable, relevant, time-bound.
-
8View your reports. Your reports can be viewed in the reports tab. Your reports will talk about your overall grades for each subject. There will also be comments from teachers. Don't forget that you will also be judged on your behaviour.
Advertisement
Part 4
Part 4 of 14:
IB Manager
-
1Get an overview of your IB Manager. It is divided into 9 parts:
- Overview - This is mainly the 6 latest activities on the ManageBac IB Manager. You post a new message or view the full calendar.
- Plan - You can view your personal information and subject levels for the diploma programme here although it is not needed since you are only using the MYP. Here you can change your full name as well as date of birth and gender.
- SA - In this page, you can view your SA worksheet, documents, and even post notes or interview your supervisor.
- Personal Project - This is the page to do your personal project stuff and whatnot.
- Community Project - Here is where you work on your community project stuff.
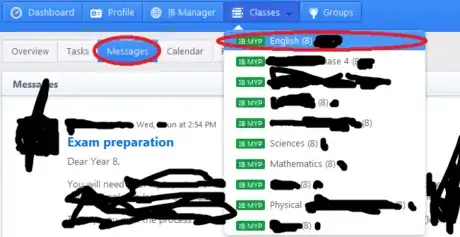
- Messages - To view all messages from your teachers and classmates, go here.
- Calendar - You can view all events and activities that are related to the school or your year level.
- Files - View all files or upload them here.
- Members - View all members of your year level grouped into their homeroom advisers.
-
2
-
3
Advertisement
Part 5
Part 5 of 14:
IB Manager: SA Activity
-
1Add an S&A activity. Click the button at the top right of the page that says Add SA Activity. After that, you will have to set your activity name, location, start date and end date, your supervisor, and your targeted learning outcomes. If you selected an activity from a group, the supervisor information will fill itself automatically. Then save the SA Activity by going to the bottom of the page and clicking Add SA activity.
-
2View your SA activity statistics and progress. At the top of your worksheet, there will be three buttons: timeline, outcomes, and hours. You can click each of them to view statistics and progress.
-
3Upload SA documents. Go to the section below the statistics to upload documents. Click Upload SA Document and then click Browse to look for the document that you want to upload. Once you've found the document to upload, click Upload Document which is in a green background. Accidentally uploaded the wrong document? Chill. There is a trash can button for you to delete your uploaded document.
-
4Post a note for your SA activity. Scroll down to the next section and type in your note. An email will alert your supervisor of your note.
Advertisement
Part 6
Part 6 of 14:
IB Manager: Personal Project
-
1Know what a personal project is. The page will explain what a personal project is. It will also guide you in your personal project so don't worry. If you can't find help from the page, you can find it from your supervisor.
-
2Edit your personal project proposal. There is a button in red titled Edit Personal Project Proposal on the top right of the worksheet. Clicking it will automatically bring you to editing your personal project proposal. You will need to choose your topic, set your goal, select your global context(s), make your inquiry question, set your criteria, and select your project supervisor. Click Save Project after you've finished with editing your personal project proposal.
-
3Add reflections and evidence. To the right of the worksheet, there will be two tabs: Worksheet and Process Journal. Click Process Journal to add reflections and evidence. You are able to add journals, websites, YouTube videos, photos, and files. A process journal guide will be there at your disposal to read at the bottom of the page.
Advertisement
Part 7
Part 7 of 14:
IB Manager: Community Project
-
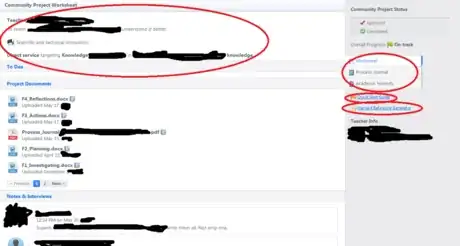
1Set your community project. You need to choose a topic for your community project. The community project worksheet is similar to the SA worksheet. You will need to set your topic, your target, supervisor, etcetera.
-
2Make to-do notes. To-do notes help you to keep track and remind you of different activities you do. You can add to-do notes below the community project proposal.
-
3Upload files and post messages. Doing this is similar to the one in the SA worksheet.
- Note: If your supervisor has marked your community project complete, then you won't be able to edit your proposal, add to-do notes, upload files, and post messages.
-
4Add a new entry in your process journal. There are three tabs that you can see to the right. There is the worksheet, process journal, and academic honesty. Click process journal then click Add New Entry at the top. This will bring you to a page similar to the process journal in the SA worksheet. As said before, you can add a journal (like a diary), a website, a YouTube video, photos, and files. Photos and files can give evidence.
-
5Export your process journal into a PDF. Click the Process Journal tab and you will see a button that says Export to PDF. This will export all your process journal entries into a PDF and will automatically upload the PDF into your project files in your worksheet.
-
6Deal with Academic Honesty. You can view the academic honesty by clicking the Academic Honesty tab.
Advertisement
Part 8
Part 8 of 14:
Classes
-
1Join classes. Click on Classes in the navigation bar. To the right of the page, you will be able to filter classes. Choose the classes that you want. For example, select the MYP program. If you are grade 9, check grade 9 only. Then select the subjects that you want to filter. Click Filter below and the classes will pop up. Find the right classes for you and click Join Class. By default, a maximum of 10 classes will appear in a drop-down box when you hover the mouse on Classes, allowing you quick access to those classes. But of course, you can join more than 10 classes, it actually depends on your grade level and your school.
-
2Leave classes. After clicking Classes in the navigation bar, the page will be able to show your classes. Just simple click Show my classes. After that, you could click leave class.
-
3Get to know your class. Select one class. This will bring you to the class overview. Each class will be divided into 6 parts:
- Overview - This page is the class homepage and shows the top 6 latest activities in the class including messages and tasks.
- Tasks - You can view all your completed and upcoming tasks, scores, etcetera here.
- Messages - View all recent messages of the class here.
- Calendar - View deadlines and upcoming events class-related here.
- Files - You can view all files related to the class here.
- Students - All students in the class are listed here.
-
4Use the dropbox to submit files and documents online. Select a task. Select the Dropbox tab. Click Browse to search your computer for the document or file that you want to upload. Remember, files should be less than 500 Megabytes. You can upload multiple files by clicking Add another file. If you want to upload a new file or document after the deadline, it will be marked late. Click Upload Files and the files would be uploaded.
- You can delete submitted work if it is before the due date. If the due date is passed, you can delete your submitted work.
-
5View assessment criteria. Assessment criteria help guide you and tell you what score you will get for your work and effort. You can view these by going to the task in question and scrolling down to see the assessments. Look for the criteria for how to earn the maximum score so that you could try your best with it.
-
6Annotate documents. You and your teacher can annotate the files that you upload. Annotation only works on Word Documents and won't work on Powerpoints, Excel Spreadsheets, etcetera. Your teacher might give you comments in the annotations so be sure to check for comments. You can see if your teacher has annotated the document by hovering on the annotated symbol.
-
7Get to know TurnItIn. TurnItIn is a program that compares uploaded work to other students' work and the information found on the internet. TurnItIn is a great way for teachers to check on the academic honesty of students of not plagiarizing other people's work. The TurnItIn similarity index will show the percentage of similarity of your work compared to others' work.
Advertisement
Part 9
Part 9 of 14:
Groups
-
1Join groups. Groups could be afterschool activities, home-groups, year level groups, and etcetera. Click Groups in the navigation bar. Joining groups and leaving groups is similar to doing it with classes. You can also see your own groups and the groups that you don't join. Unlike classes, there is no filter in groups. You can only manually search for the groups or type in the name of the group.
- If there is a locked sign next to do group, then it means that students can't join or leave the group by themselves. To join these groups, you have to notify the advisor so that the advisor can add you into the group.
-
2Get started with groups. Each group is divided into 5 sections:
- Overview - This page shows the latest 6 activities. You can also add new events, files, and messages.
- Messages - This page shows all messages along with the files that go along with it.
- Calendar - This page shows all events and deadlines in calendar form for the specific group.
- Files - This page shows all files. You can upload files, and find them through filtering categories, authors, name, file size, and modification date.
- Members - This page shows all members. You can add members into the group if it is allowed and you could also export the files into excel.
-
3Discuss things in groups. You can send messages and comments back and forth so that there could be communication and clarification. Scroll down to learn more about posting messages and comments.
Advertisement
Part 10
Part 10 of 14:
Full Calendar
-
1
-
2Filter events or deadlines by category. All events and deadlines would have a category. There are tests, presentations, tasks, creative writing, projects, and many more. You can click which category or categories that you want to filter on the top right side of the worksheet.
-
3Switch between months and weeks. You can view your calendar by month or by week. To switch between viewing these two aspects, there are two buttons labeled Month and Week. You can view each individual half-hour in week mode but only individual days in month mode.
-
4Go to the month/week before or after. To the top left side of the calendar, there will be two arrows. Click the left arrow to go to the month or week before and the right arrow to go to the month or week after.
-
5Go to today. Next to the two arrows, there will be a button labeled Today. If you are viewing another week or month that does not include today's date, then the button will be available to click. Clicking the button will bring you to the month or week that includes today. Today's day will be highlighted with a pale orange colour.
Advertisement
Part 11
Part 11 of 14:
Messages and Comments
-
1Go to where you want to post a new message or comment. You can post messages and comments in classes and groups. To get started with posting messages and comments, go to the class or group that you want to start with and go to Messages. Here you can view all newer messages.
-
2Post a new message. A Post New Message button will be on the top right corner of the worksheet. Click this button to post a message. You will need to do these things to proceed to posting a message:
- Enter the Subject - This will like the headline of your message so make it simple such as "Help with Math HW" or "Reason for Late Submission".
- Fill in the Message - Under message subject, you will need to type in your message that explains your problem or whatsoever.
- Notify the Class or Group via Email - A check-box will be to the right of the message subject and checking it would mean that you want to notify the whole class (students and teachers) via email.
- Attach Files - Click Browse button to browse through your computer for the files or documents that you want to attach. Files should be less than 500 Megabytes. You can add multiple files by clicking Add another file.
- Post the Message - Once you're done with typing up your message and attaching files, you can click Post Message to post the message to the rest of the class.
-
3Edit or delete messages. If you accidentally posted a message, you can delete it by viewing the message board in the class or group and placing your mouse over the message that you posted. To the left of the message, there will an Edit button and a rubbish bin. Click the rubbish bin to delete your message. Click Edit to edit your message.
-
4Post comments. Comments are made to messages. They are much simpler to handle but you can only add text or links with comments. You cannot attach files. To post comments, you first have to go to the message you want to comment on. Scroll down the message and you will be able to add a comment. Once you're finished with typing the comment, you should click Add comment only once. If you click it 5 times, chances are that 5 comments will appear. Also, ManageBac will notify the class or group of the new comment. So posting 5 comments will send 5 messages.
-
5Edit or delete comments. You can edit and delete comments in the same way as you can edit and delete messages except that you have to go to the message itself to delete the comments itself.
Advertisement
Part 12
Part 12 of 14:
Changing Your ManageBac Password and Notifications
-
1Change your ManageBac password. Click your name at the top of the page. You will be able to change your email address and also your password. To change your password, type in your new password then confirm it by typing it again.
-
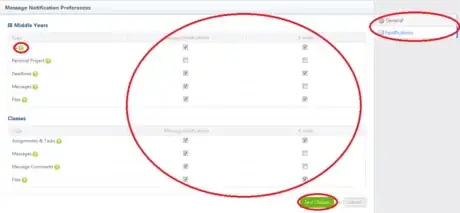
2Change your ManageBac notifications. To the right of the worksheet, you will be able to see two tabs: General and Notifications. Click Notifications. Now in this page, you can select whether or not you want to receive message notifications for specific things such as class files, class messages, and etcetera. You can also select whether or not you want to receive an email concerning the specific thing. If you are confused as to what a specific thing is, you can place your mouse over the question mark that is next to the specific thing to find out what it is. Click Save Changes after you're done.
-
3Decide what ManageBac notifications you won't need. For example, you don't need email notifications if you constantly check ManageBac. Some notifications might just annoy you in email and then you would consider it spam, so to turn it off, turn off the notification settings.
Advertisement
Part 13
Part 13 of 14:
Message Box
-
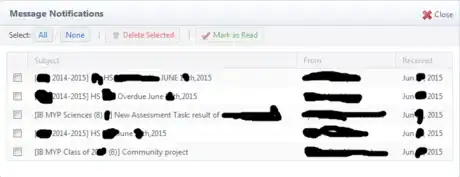
1Be familiar with the message box. The message box is at the top right corner of the ManageBac page. If you get a new message, a little number will show on the top right corner of the message box. After clicking it, a dialogue box will appear which will show you all your message notifications.
-
2Select messages that you want to delete or mark as read. Check-boxes will be to the left of each message. You can easily select all messages by clicking All at the top of the message box. Just as you can easily select all messages, you are also able to select no messages by just clicking None.
- Note: The selection only applies to the current message box page you are viewing.
-
3
-
4
-
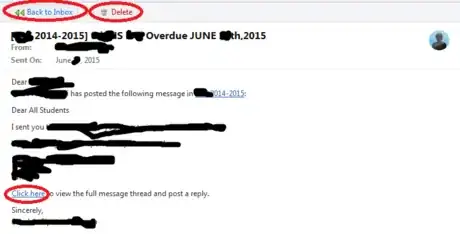
5View messages. Click a message to view its content. The message will tell you who sent it and when it was sent. In messages, you can only see the text and links posted by the sender. To view the files, you have to go to the message itself by clicking Click here at the bottom of the message. This will open a new tab in your internet browser and redirect you to the whole message. You can go back to your message inbox by clicking Back to Inbox or you can delete the message by clicking Delete which will also let you go back to your inbox.
-
6
Advertisement
Part 14
Part 14 of 14:
Personal Events
-
1Go to your dashboard. Remember that your dashboard is your homepage and you can view and do lots of stuff here. One of those things is adding an event. By adding events, you can view personal deadlines and events. Since these are personal, no one else can view these events that you add.
-
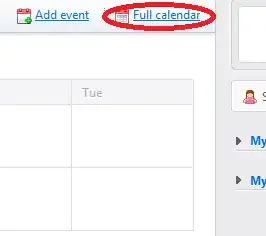
2Add a personal event. Click Add event. This button is next to the Full calendar button. To continue adding an event, type in the name of the event. For example, "Cross Country". You can choose whether or not to add a location and notes but the name of the event is a must.
-
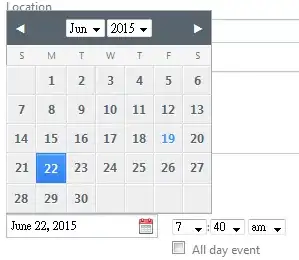
3Choose the date and time of the event. Pick the date of the event from the calendar. Then select the time of the event and whether or not it is am or pm. You can also choose whether or not the event is an all-day event. This means that the time doesn't matter. For example, a school carnival would be an all-day event but a cross country race wouldn't be an all-day event because it only lasts for 2 or 3 hours. Once you're done, click Add Event.
-
4Edit or delete personal events. Click or go to the event that you added. At the top right corner of the event page, you can see two buttons: Edit Event and Delete. You know what to do. Click Edit Event to edit the event and similarly, click Delete to delete the event. Have fun with ManageBac!
Advertisement
Community Q&A
-
QuestionI changed my password but it will not allow me access.
 Community AnswerTry sending Managebac an email request. Otherwise, check with the person in your school who is in charge of the Managebac systems.
 -
QuestionCan you delete a file you uploaded to dropbox?
 Community AnswerYes, but only if it is before the due date. If the due date already passed, the file will stay although I think that the teacher can delete it manually. If the due date passed, then you have three options: 1. Do nothing. 2. Submit another work that has the "(New Version)" somewhere in the document's title. 3. Ask the teacher for an extension. Then you could delete your file and submit another one.
 -
QuestionWhat do I do if my Managebac page has no Classes tab?
 TechnistCommunity AnswerThat's up to the person in your School in charge of Managebac. Your school should have a reason for it. Some schools don't have the IB Manager tab because they choose not to do any CAS or Personal Projects on Managebac.
Advertisement
Warnings
- All messages get deleted after two weeks. Remember to read any important messages so that you won't miss them.⧼thumbs_response⧽
- Sometimes, ManageBac will have maintenance periods. Be prepared for these.⧼thumbs_response⧽
Advertisement
About This Article
Advertisement
