This article was co-authored by wikiHow staff writer, Jessica Gibson. Jessica Gibson is a Writer and Editor who's been with wikiHow since 2014. After completing a year of art studies at the Emily Carr University in Vancouver, she graduated from Columbia College with a BA in History. Jessica also completed an MA in History from The University of Oregon in 2013.
There are 8 references cited in this article, which can be found at the bottom of the page.
The wikiHow Video Team also followed the article's instructions and verified that they work.
This article has been viewed 45,487 times.
Learn more...
Everyone should have a few basic sewing skills and the straight stitch might be the best to learn. You don't need a sewing machine if you're stitching by hand. Instead, practice with a scrap of fabric, a sewing needle, and thread. Play around with sewing straight stitches that are different lengths before you try sewing a straight line. Your new skills will come in handy the next time you need to sew on a button, join a few pieces of fabric, or make a decorative border.
Steps
Making Straight Stitches
-
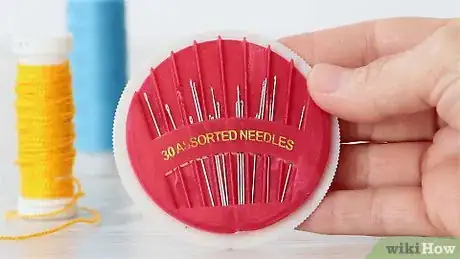
1Choose a sewing needle and thread that matches the color of your fabric. If you can't find matching thread, use a slightly darker color so it doesn't stand out. You should be fine using a standard sharp sewing needle for most projects. Sharp needles are medium length and have a round eye which makes it easy to thread.[1]
- Although sharp sewing needles work for most projects, you can use embroidery, beading, or tapestry needles depending on your project.
-
2Thread the needle and tie a knot in the thread. Cut an 18 to 30 in (46 to 76 cm) length of thread and push 1 end through the eye of your sewing needle. Then, make a basic knot at the opposite end of the thread. You can knot it a few times if you want your thread to be more secure.[2]
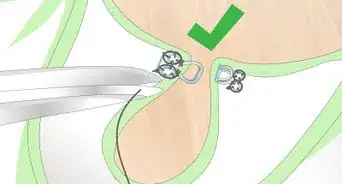
- If you struggle to thread the sewing needle, buy a needle threader. Push the pointed wire end of the threader into the eye of your needle and insert the thread through the gap. Then, pull the threader away from the needle so the thread works into the eye.
Advertisement -
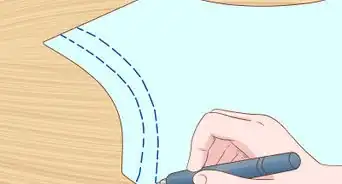
3Use a ruler and chalk to draw a guideline for a perfectly straight line. To help you sew straight stitches, lay a ruler on your fabric where you want to create your stitch line. Then, run chalk along the edge to make a faint guideline that you can sew along.[3]
- You could also use a tailor's pencil or sewing pencil. Both of these have sharpened points that make marking simple and the markings are easy to get out of the fabric when you're done.
- Pat the chalk marks off of the fabric with your hand or wash the material to remove tailor's pencil marks.
-
4Bring the needle up from the bottom of the fabric. Hold your threaded needle on the wrong side of the fabric right where you want to make your straight stitch. Push the point of the needle up through the fabric. Keep pulling it straight up until the knot catches on the back of the fabric.[4]
- Pull the thread slowly through the fabric. If you pull it quickly, the thread can tangle and make a knot.
- Don't pull too tightly when you feel the knot or you might accidentally pull the knot through the fabric.
-
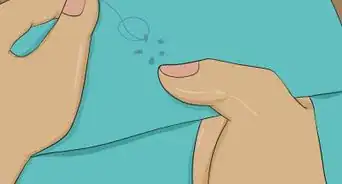
5Push the needle down to make 1 straight stitch about 1⁄4 in (0.64 cm) long. You can make your straight stitch any size you like. Try making stitches that are 1⁄4 inch (0.64 cm) long for practice. Place the point of the needle on the surface of your fabric and push it through to the underside. Pull the needle underneath to draw all of the thread back down and make your straight stitch.[5]
- If you leave a short space between your starting point, you'll get a tiny, strong stitch. If you make a long stitch, it will be quick to sew but won't be as sturdy as a short stitch. Long stitches are great for joining edges or making a noticeably dashed line.
- Stitch length is completely customizable. Create a lot of short stitches if you want a secure line of stitches for embroidery or edges or make your stitches up to 1⁄4 inch (0.64 cm) long.
-
6Bring the needle back up to make another stitch that's the same length. Once you've made a straight stitch, push the needle back up through the fabric at the end of the stitch. Push your needle down through the fabric to make the next stitch just as long as the first stitch. Repeat the stitch as many times as you want.[6]
- Straight stitches are great for sewing edges of fabric together or making an outline for embroidery.
Customizing Your Straight Stitches
-
1Work the running stitch to make a dashed line. Make a straight stitch that's as long as you want and leave a space that's the same size as the stitch. Then, bring your needle up and sew another stitch that's the same size as your first stitch. This creates a few straight stitches with a gap in between them.[7]
- Remember that you're stitching up and down to make the running stitch. Don't sew over the edge of your fabric or embroidery hoop or the thread will catch.
-
2Make backstitches to create a strong, straight line of stitches. If you'd like a bold line of stitches that are all connected, make 1 straight stitch. Then, push your needle up through the fabric so it's the same distance from the first stitch and bring the needle back and down through the end of the first stitch. Keep bringing the needle forward and back through the stitches.[8]
- The backstitch looks like the straight stitch that sewing machines make. It's great for outlining solid embroidery shapes or sewing words.
-
3Create vertical straight stitches for the satin stitch. If you're filling an embroidered shape, make a short vertical stitch. Then, make another vertical stitch right next to the first stitch. Keep sewing the stitches so the edges overlap and create a smooth embroidered surface.[9]
- Keep your satin stitches less than 1⁄2 inch (1.3 cm) wide or the stitches could snag.
Warnings
- Be careful not to poke your fingers with the sharp needle. If you frequently stick yourself, put a thimble onto your index finger when you sew.⧼thumbs_response⧽
Things You'll Need
- Thread
- Sewing needle
- Scissors
- Fabric
- Chalk or tailor's pencil, optional
- Ruler, optional
- Needle threader, optional
References
- ↑ https://sewguide.com/hand-sewing-embroidery-needles/
- ↑ https://sewguide.com/easy-hand-stitches/
- ↑ https://youtu.be/mJx4a67e3Pk?t=102
- ↑ https://youtu.be/bAmC5JNgK-s?t=264
- ↑ https://onstead.cvad.unt.edu/sites/default/files/1.2.7_sewing_doc_hand-sewing_seams.pdf
- ↑ https://youtu.be/bAmC5JNgK-s?t=301
- ↑ https://youtu.be/bAmC5JNgK-s?t=309
- ↑ https://sewguide.com/easy-hand-stitches/
- ↑ https://youtu.be/go89e8xpVYs?t=233
