This article was co-authored by Patrick Johns. Patrick Johns is a Home Improvement Specialist and the Owner of CatchAll Handyman Services. With more than 28 years of experience, he has worked on a variety of home improvement projects, such as carpentry, plumbing, and door and window installations in both commercial and residential properties.
There are 9 references cited in this article, which can be found at the bottom of the page.
This article has been viewed 201,841 times.
A running toilet isn’t just a minor annoyance—all that wasted water trickling down the drain might as well be your hard-earned money. That’s why it’s so important to replace your toilet’s flapper as soon as it fails. Start by shutting off the water to the toilet and draining the tank to access the flushing mechanism. Remove the flapper from its seat on the overflow valve and discard it, then fit a new one in its place. Secure the new flapper on the valve and adjust the chain to the appropriate length to ensure a proper seal. You can then say goodbye to slow leaks and phantom flushes.
Steps
Removing the Old Flapper
-
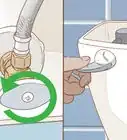
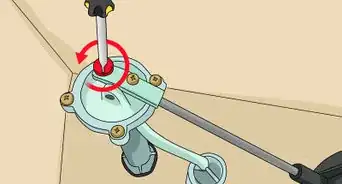
1Turn off the water to your toilet. Before you can replace a faulty flush valve seal, you’ll need to stop the flow of water to the tank. Locate the shutoff valve on the lower part of the wall behind or beside the toilet. Turn the dial clockwise until it stops moving.[1]
- If the valve does not turn by hand, spray it with a lubricant like WD-40 and let it sit for 5 minutes. Twist the valve back and forth to loosen it. Avoid using a pair of pliers since this could damage the valve and cause a water leak.
- You may still hear a trickling sound after shutting off the water. This is the stored water escaping from the tank, not fresh water being pumped in.
- If you’re unable to find a shutoff valve in your bathroom, you may have to disable the water to the house.
-
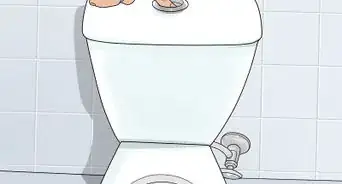
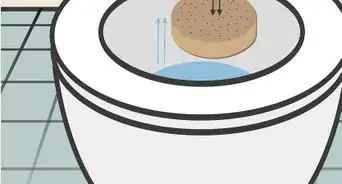
2Empty the tank. Lift off the toilet tank lid and set it aside carefully. Then, flush the toilet. This will drain the water in the tank, allowing you to work unobstructed.
- Note the movement of the flapper when you flush the toilet. It will tell you whether the problem is a weak seal or something more innocuous, like a chain that’s pulled too tight.
- A functioning flapper will raise and lower smoothly and settle back over the flush valve without creating gaps.
Advertisement -
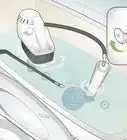
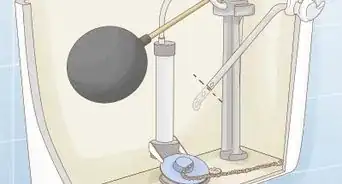
3Disconnect the bad flapper valve. The flapper is a large semicircular sheet of rubber that sits over the hole that releases the water from the tank into the toilet. It connects in 2 places—the tiny pegs on either side of the tubular overflow valve and a chain attached to the toilet handle lever. Unclip the chain first, then pull the edges of the flapper free from the pegs to remove it.
- Be careful when taking out the flapper. Prolonged exposure to hard water can make the submerged components brittle, which could cause them to break into pieces if you handle them too roughly.
- Most new flappers will come with a chain attached. If your new one has a chain, disconnect the existing chain from the flush lever.


Installing the New Flapper
-
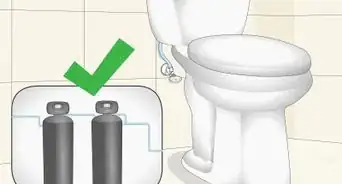
1Purchase a new flush valve seal. Bring the old flapper with you when shopping for a new one. That way, you’ll be able to compare different styles to find one with the appropriate specifications. Make sure the new flapper is the right size to cover your toilet’s flush valve and uses the same points of connection.[2]
- Toilet flappers come in different sizes, designs, and materials. Your best bet for a home bathroom is a standard rubber flapper, which offers a little bit of flex to provide a secure seal.[3]
- If you have any questions regarding toilet flappers or their function, don’t hesitate to ask one of the home improvement specialists on staff for assistance.
-
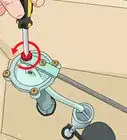
2Connect the new flapper to the flush valve. Slide the holes on either side of the rubber seal over the pegs on the valve, then clip the lift chain to the lower end of the toilet handle lever. Lower the flapper to confirm that it sits squarely over the flush valve and provides total coverage.[4]
- Double check that each of the connection sites is secure so the flapper doesn’t accidentally come loose after a few flushes.
- Use a fine-grit sandpaper to clean the valve seal so your new flapper is watertight.
-
3Adjust the chain length. There should be enough tension in the chain connecting the flapper to the toilet handle lever to open the valve easily when the toilet is flushed, but not so much that it pulls or weakens the seal. Give the handle a push and see how the action feels. You may need to change the position of the chain a few times to get a perfect flush.
- A good rule of thumb is that the ring on the end of the lift chain should be touching or hovering just above the bottom of the tank.
- Keep in mind that more force will be required to depress the handle when the tank is full. Right now, you’re just feeling for a comfortable range of motion.
- Don’t let the chain have enough slack where it would be pulled under the flapper when you flush the toilet.
-
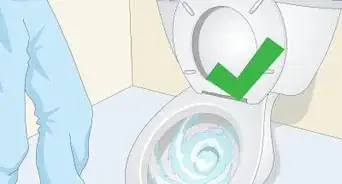
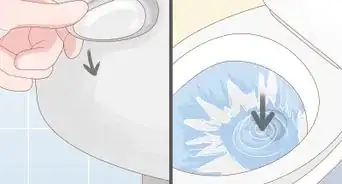
4Test out the new flapper. Turn the water shutoff valve counterclockwise to restore the water and refill the tank. Wait a few moments for the water level to rise well above the flush valve, then press the handle. The toilet should flush forcefully and immediately, and refill within about 30-45 seconds.[5]
- Listen for the faint sound of running water between flushes to know whether the new flapper did the trick.
- Don’t forget to replace the toilet tank lid when you’re satisfied with the toilet’s performance.


Keeping Your Toilet's Flapper in Good Working Condition
-
1Replace your toilet flapper at the first sign of failure. In order to avoid throwing away money, it’s a good idea to stop running toilets and resolve other water flow issues as soon as you notice them. More often than not, there will be a simple and inexpensive fix, so there’s really no reason not to take care of it right away. You’ll be glad you did when you get your next utility bill.
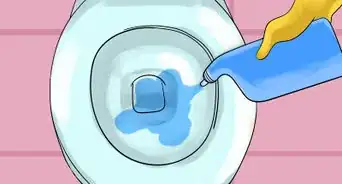
- Some tell-tale signs of a failing flapper are a soft hissing sound (this is the tank refilling itself constantly), low flushing power, or rippling water in the bowl. You may also have to jiggle the handle to get the toilet to stop running after flushing.[6]
- Be prepared to change out your toilet flapper every 2-3 years, or more frequently as needed.
-
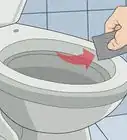
2Take a look at the valve seal seat. Sometimes, it’s not the flapper itself that’s to blame for a running toilet, but the circular lip on which it sits. If your toilet’s valve seal seat appears to be worn, split, or peeling, it may be necessary to put in a new one along with the flapper. A seat will help the flapper form a tighter seal and prevent unnecessary water loss.[7]
- Look for a valve seal repair kit at your local home improvement store. One of these kits will contain a flexible replacement seat that can fit over the old one using waterproof adhesive.[8]
- Don’t underestimate the importance of a working valve seal seat. Without it, your new flapper won’t work properly, and your toilet will still be prone to leaks.
-
3Hire a professional for difficult repairs. If you’ve done everything you know to do to correct a slow leak and you’re still at a loss as to the cause, call in a plumber. They’re specially trained to diagnose and deal with water-related complications that prove baffling to the average homeowner. It shouldn’t cost more than about $50 to retain the services of a qualified plumber, even if they end up having to install a brand new flush valve.[9]
- A thorough inspection eye may even turn up more serious problems that you wouldn’t have caught yourself.
- Whatever you pay out of pocket will be worth it if it means dodging more extensive repairs plumbing repairs later on.


Expert Q&A
-
QuestionHow do you fix a toilet flapper that won't close?
 Patrick JohnsPatrick Johns is a Home Improvement Specialist and the Owner of CatchAll Handyman Services. With more than 28 years of experience, he has worked on a variety of home improvement projects, such as carpentry, plumbing, and door and window installations in both commercial and residential properties.
Home Improvement SpecialistAdjust the chain—you always want to make sure there's nothing obstructing it. Check where it opens up and wipe that down to make sure there's no sediment that got stuck. Also, make sure that the chain is not catching on anything. -
QuestionI can't unhook the old flapper. It's a very old toilet and seems to be screwed on. Any suggestions?
 Nathan FlanneryCommunity AnswerMaybe a lubricant will help. But you don't want to be rough with an old flapper, since it could crumble into pieces and then the pieces might fall down the pipe and probably clog it.
 -
QuestionWhat if the water is turned on and the tank does not refill?Nathan FlanneryCommunity AnswerIt is likely that you need a new fill valve. What is probably happening is that the water isn't getting sufficient force, so it won't go to the pipe where it fills the toilet.


References
- ↑ https://www.youtube.com/watch?v=8hYeZd67z64&feature=youtu.be&t=35
- ↑ https://www.thisoldhouse.com/ideas/fixing-running-toilets-and-dripping-faucets
- ↑ https://www.fluidmaster.com/toilet-problems/choosing-right-flapper-toilet/
- ↑ https://www.youtube.com/watch?v=bN__bV2unNI&feature=youtu.be&t=92
- ↑ https://www.familyhandyman.com/plumbing/toilet-repair/fix-a-running-toilet/
- ↑ https://www.thisoldhouse.com/plumbing/21017792/fixing-running-toilets-and-dripping-faucets
- ↑ https://www.familyhandyman.com/plumbing/toilet-repair/fix-a-running-toilet/
- ↑ https://www.angieslist.com/articles/how-to-replace-toilet-flush-valve-seal.htm
- ↑ http://porch.com/advice/diy-your-own-plumbing-or-hire-a-pro/
About This Article

To replace a toilet flapper, start by turning off the water supply and flushing the toilet to empty the tank so that you can access the flapper. Next, unclip the lift chain from the flapper and remove the flapper by pulling it free from the pegs. After that, you'll need to connect the new flapper by sliding the holes on the rubber seal over the pegs and reattaching the lift chain. Finally, adjust the chain to the right length, turn the water back on, and flush the toilet to make sure it flushes immediately and refills within 45 seconds. For tips on how to tell when you should replace the valve seal seat on your toilet, read on!