This article was co-authored by Mike Katona and by wikiHow staff writer, Eric McClure. Mike Katona is a DIY Home Improvement Specialist and the Co-founder of ShabbyChicHouse. With experience dating back to the early 2000s, he specializes in building new homes, home design, and decor. Mike has been featured in publications such as Real Homes and MSN Lifestyle. He has also been named one of Feedspot's Top 100 Home Improvement Bloggers.
This article has been viewed 23,022 times.
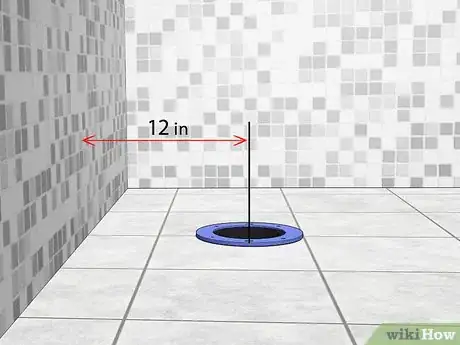
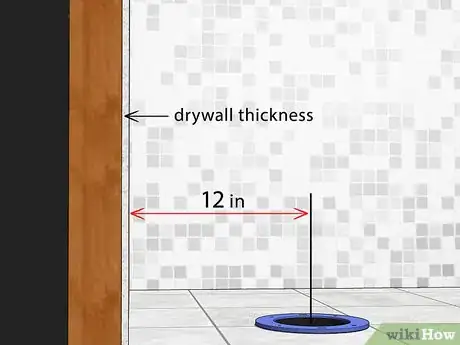
Toilet rough in refers to the amount of room available behind a toilet.[1] It can also refer generally to the overall clearance for a tank and seat on all sides of the drainpipe. It is important to measure the rough in before you install a new toilet because toilets come in a variety of sizes. Accurately measuring the rough in will ensure that a toilet fits your drainpipe and that your bathroom is comfortable and up to code. The standard rough in behind the drainpipe is 12 inches (30 cm), but your rough in may be a little bigger or smaller. You also need to make sure that you have at least 15 inches (38 cm) of clearance to the left and right of the pipe, and 21 inches (53 cm) in front of your toilet’s base.
Steps
Measuring Clearance Behind the Toilet
-
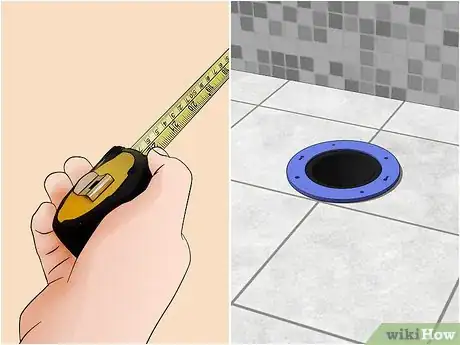
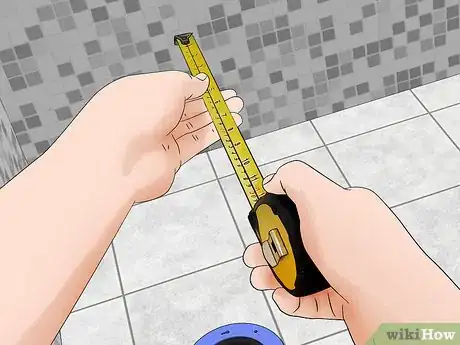
1Get a measuring tape and find your drainpipe’s flange. Get a retractable measuring tape with a flat metal hook at the end. Take it to your bathroom and find the flange on the floor by looking for a flat plastic or metal rim around the opening of a pipe on the ground.[2]
- A flange covers the rim of your drainage pipe and is used to keep an airtight connection between the toilet and the drain.
-
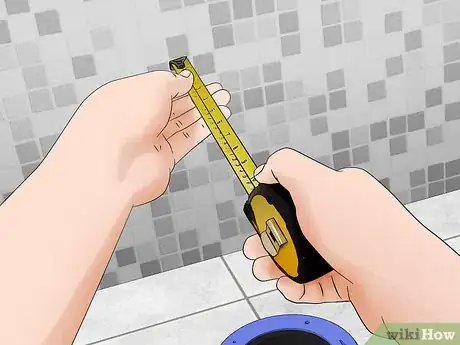
2Place the hook of your measuring tape against the wall behind the flange. Pull a length of your measuring tape out and stick the hook flush against the bottom of the wall behind the flange. If there is a baseboard or trim at the bottom of the wall, raise the hook until it is on the drywall. Hold the hook steady with your nondominant hand.[3]
- If the wall is unfinished, stick the hook against the joist at the bottom of the wall.
Tip: If the flange is in the corner of a room, you may be confused by which wall is technically behind it. Look for the supply line for the water. It is a small knob sticking out of the wall 2–10 inches (5.1–25.4 cm) about the ground. The wall with this knob on it will be the back wall.
Advertisement -
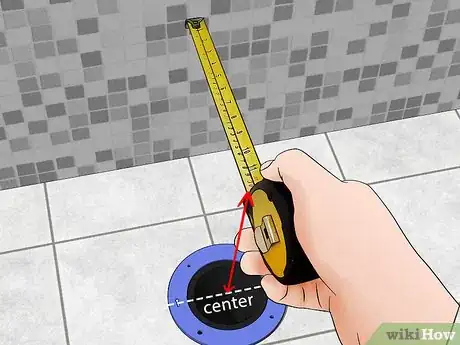
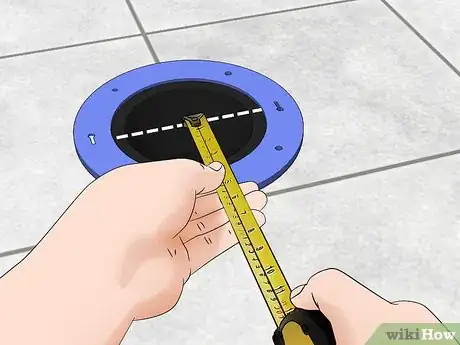
3Stretch your measuring tape out through the center of your flange. Use your dominant hand to pull the case of the measuring tape out. Lay the tape across the flange and line it up so that the edge is running through the center of the flange. Keep the hook still while you do this.[4]
- Don’t worry if it isn’t perfectly straight. Rough in measurements come in 2 in (5.1 cm) increments, so if you’re off by a few millimeters it won’t keep you from determining the rough in.
-
4Measure your rough in based on the distance from the wall to the center of the flange. Identify the distance from your hook to the center of the flange by finding the center of the flange on your measuring tape. This is your rough in. The measurement should be 10, 12, or 14 inches (25.4, 30.5, or 35.6 cm) from the wall to the center of the flange.[5]
- If your rough in isn’t 10, 12, or 14 inches, you’ll need to replace the current flange with an offset flange before you install your toilet. An offset flange can move the opening of the pipe from 11 inches to 10 or 12 inches, for example.
- Toilets that are designed for 10 or 14 inch rough ins tend to cost a little more. You typically find 10 and 14 inch clearances in older buildings.
-
5Add the thickness of your drywall if you’re measuring in an unfinished room. If you are measuring the rough in before the walls are finished, subtract the thickness of the drywall from your measurement. For example, if you measure the rough in to be 13 inches (33 cm), but you know that the drywall is going to be 1 in (2.5 cm) thick, your rough in is actually 12 inches (30 cm).[6]
- Ignore baseboards or trim. Toilets never sit flush against the corner near the baseboard unless they’re commercial toilets. Even then, calculations for rough in ignore obstacles at the bottom of your wall.
Determining the Clearance on the Left and Right
-
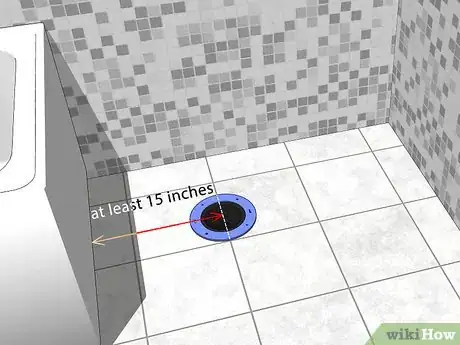
1Place your measuring tape’s hook flush against an adjacent wall. Line the hook of your measuring tape up against the wall near the floor. Adjust your measuring tape so that it is perpendicular to the flange. Hold the hook in place with your nondominant hand.[7]
- If there is a tub or vanity blocking the path to the wall, place the hook on that instead of the wall.
- It doesn’t matter if you start on the left or right side.
-
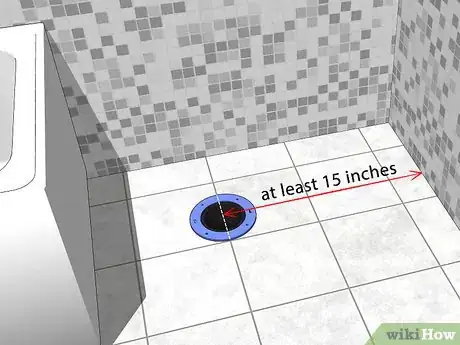
2Check for 15 in (38 cm) of clearance by pulling the measuring tape across the flange. Pull the case of your measuring tape out across the center of the flange. If you have at least 15 inches (38 cm) between the wall and the center of the flange, you have enough space.[8]
- The National Kitchen and Bath Association actually recommends that you have 16 inches (41 cm) of clearance to the left and right, but 15 inches is the bare minimum when it comes to fitting a toilet. Most building codes set the minimum at 15 inches as well.
Tip: If you don’t have enough space and there is a vanity or tub in the way, you either have to move your drain pipe, or move the tub or vanity. The vanity will be the easiest to move, followed by the drain pipe. A tub will be the most difficult piece to reinstall.
-
3Repeat this process on the other adjacent wall. Place the hook of your measuring tape against the wall on the opposite side and check for 15 inches (38 cm) of clearance from the center of the flange to the wall. As long as you have at least 15 inches (38 cm) on both sides of the flange, you have enough room to install a toilet.[9]
- 15 inches is the minimum because it’s typically impossible to properly install a toilet in a space any smaller. Not only are most toilets going to be too big, but you need to maneuver the base of a toilet to the left and right in order to properly seal it on top of the pipe.
- Depending on where you live, it may be illegal to even attempt to install a toilet on a wall with less than 30 inches (76 cm) of clearance.[10]
Checking the Space in Front of Your Toilet
-
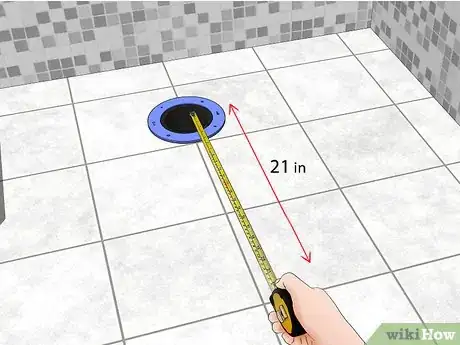
1Place the hook of your measuring tape in the center of the flange. To measure clearance in front of a toilet, start in the center of the flange. The measurement in front is less important than the left, right, or back side of the toilet, so you only need to check to make sure that you’re leaving enough room to sit.[11]
-
2Pull it out until you reach 21 inches (53 cm) on your measuring tape. Start your measurement by pulling your tape 21 inches out from the center of the flange. The minimum amount of room that you need for the average person to sit comfortably on a toilet is 21 inches (53 cm). Depending on where you live, it is also typically against building codes to install a toilet with less than 21 inches of clearance in the front.[12]
Tip: You can manipulate the clearance in front of a toilet by buying a toilet with a smaller base.
-
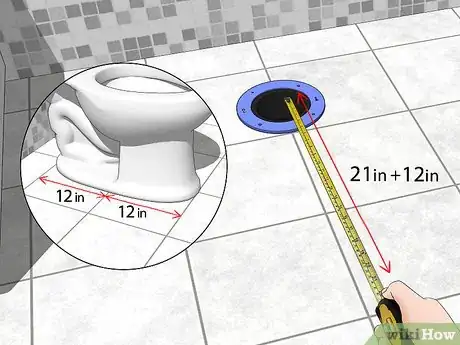
3Add half of your toilet’s base to the 21 inches (53 cm) on your tape. Most toilet bases are between 12–24 inches (30–61 cm), although your base may be different. Divide the length of the base in half and add it to your measurement to make sure that you have at least 21 inches of clearance in front of the toilet.[13]
- For example, if the length of your toilet base is 14 inches (36 cm), you divide 14 by 2 to get 7 inches (18 cm). Pull out 21 inches (53 cm) from the center of the flange and then add 7 inches (18 cm) to get 28 inches (71 cm).
References
- ↑ Mike Katona. DIY Home Improvement Specialist. Expert Interview. 25 August 2021.
- ↑ https://www.hammerpedia.com/toilet-rough-in/
- ↑ https://www.hammerpedia.com/toilet-rough-in/
- ↑ https://www.hammerpedia.com/toilet-rough-in/
- ↑ https://www.thisoldhouse.com/ideas/big-help-small-bathrooms
- ↑ https://www.hammerpedia.com/toilet-rough-in/
- ↑ https://www.hammerpedia.com/toilet-rough-in/
- ↑ https://www.thisoldhouse.com/ideas/big-help-small-bathrooms
- ↑ https://www.thisoldhouse.com/ideas/big-help-small-bathrooms

