X
wikiHow is a “wiki,” similar to Wikipedia, which means that many of our articles are co-written by multiple authors. To create this article, 10 people, some anonymous, worked to edit and improve it over time.
This article has been viewed 49,736 times.
Learn more...
If the flush valve on your toilet stops working properly or you have a leak, it can be time to replace the flush valve. Although plumbing work can seem like a job best left to the experts, you can replace the flush valve on your toilet with minimal hassle by following some simple steps.
Steps
Part 1
Part 1 of 3:
Removing the Tank and Old Flush Valve
-
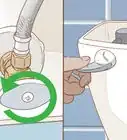
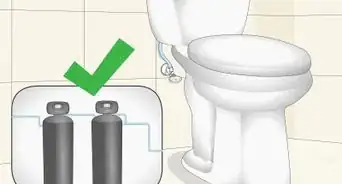
1Shut off the water to the toilet. Before beginning any installation, shut off the water source leading to your toilet or the toilet will flood the bathroom.[1]
- The valve is usually located on the pipes running into your toilet from the wall.
- Shut off the water by turning the valve clockwise until you feel resistance.
-
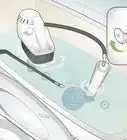
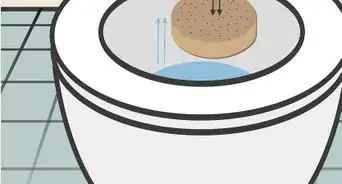
2Remove any remaining water from the toilet. Flushing the toilet will drain most of the remaining water from the toilet, allowing you to access the its internal parts more easily.[2]
- This will also prevent any remaining water from spilling out of the toilet and all over the floor.
- Soak up any remaining water with a sponge and bucket.
Advertisement -
3Remove the tank. Next, look at the bottom of the toilet and find the one hose attached to it, the supply hose, and remove it. Then, remove the nuts and bolts from the hose with your adjustable wrench, and lift up the tank.[3]
- Lift up the tank carefully, and it will come off the bottom portion of the toilet.
- Turn the tank upside down, resting it on the toilet seat.
-
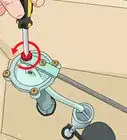
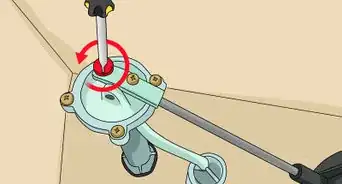
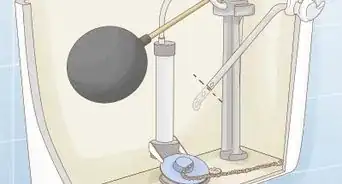
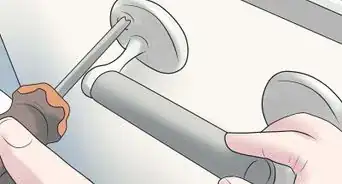
4Locate and remove the flush valve. Locate the thick, conical rubber gasket and remove it. Underneath the gasket you’ll see a large plastic nut. Loosen and remove the plastic nut to remove the flush valve.[4]
- Start to loosen the nut by turning it counterclockwise with your pliers.
- The flush valve will come right off.
- Undo the clip (looks like a paper clip) attaching the hose by pushing it off. This clip connects the flush valve to the filler valve.
-
5Clean the area on both sides of the flush valve. Use 409 or a similar cleaning product and Clorox with bleach to clean the surfaces that touch the flush valve.
- This will prevent any debris or residue from interfering with the flush valve's seal, ensuring that you do not get leaks.
- Use a rag and cleaning product.


Advertisement
Part 2
Part 2 of 3:
Installing the New Flush Valve
-
1Install the new valve. The new valve will go in the same way the old valve came out. Push the new valve through the bottom of the tank. Take the valve with the threaded side up and slowly direct it through the hole so your hand is in the tank. Be careful not to attach it too tightly, or it might cause the tank to crack.[5]
- Make sure the black tube, extending from the top of the new valve, is one inch below the toilet lever or handle on the left side of the toilet tank.
- Cut the tube to the correct height, before putting the hose back on. The manufacturer's instructions will specify what that height is. For example, with a Fluidmaster 507A/B/D flush valve, you'll want to cut the overflow pipe so it's at least one inch below the hole in the tank where the flush lever is mounted.
-
2Attach a new rubber gasket. Once the flush valve is in the hole, attach a new thick rubber gasket (the same type as you removed). Then, hold the valve steady and replace the attaching nut, screwing it tight with your hands.
-
3Replace the hose attached to the flush valve. Replace the hose, attaching it to the black plastic tube extending from the top of the flush valve.
-
4Put the toilet tank back on the toilet. Turn the toilet tank right side up, and put it back on the toilet carefully, in order to avoid damaging any of your recently installed parts.[6]
- Put the old nuts back on to make the tank sits snug on the toilet.
- If you have purchased a toilet kit, use the new screws it includes.
-
5Connect the flapper chain.
-
6Reattach the supply hose. The supply hose located on the bottom of the toilet tank should be reattached to the toilet at this point, to restore water flow. It has a plastic nut on the end with threads.[7]
- Connect it to the filler valve (looks like a little white tube) by threading the nut and bolt by hand.
- Then, use a wrench to tighten the nut a quarter of a turn. Do not overtighten.


Advertisement
Part 3
Part 3 of 3:
Testing and Troubleshooting
-
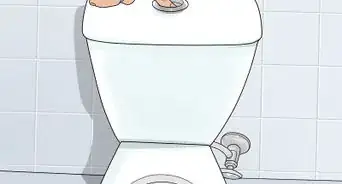
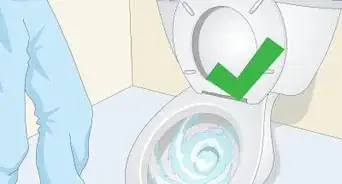
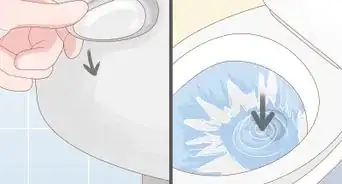
1Make sure the toilet is not leaky. Flush the toilet a few times to check for potential leaks that may have developed. If the toilet has a leak, it will leak immediately.
- Get under the toilet with a flashlight and see if the toilet is dripping.
- Identify where the leak is coming from. Generally, water could be coming from the supply line or from a leaky gasket.
- Shut off the water to check over the conical gasket and the supply line attachment.
- Inspect and tighten the connections to address leaks.
-
2Check to make sure that the water rises to the water mark. The water level should usually line up with the water mark on the inside of the toilet bowl. If water does not rise to the right level in the toilet, adjust the filler valve.
- You can adjust the filler valve dramatically by moving the entire valve up or down. For minor adjustments, use the filler valve's screw.
-
3Listen for a whistling noise or self-flushing sound. If you hear a whistle or noise that sounds like air leaving a balloon, then the flapper valve is not closing. Make an adjustment to slightly raise or lower the valve. The screw for the flapper valve is usually found on the float that looks like a little barrel that moves up and down with the water level.
- Use a screwdriver to adjust the flapper valve's screw, tightening or loosening until the noise ceases.


Advertisement


References
- ↑ https://youtu.be/hwOXKvlAk2Q?t=47
- ↑ https://youtu.be/tLlgmWtrysI?t=27
- ↑ https://youtu.be/hwOXKvlAk2Q?t=75
- ↑ http://www.planitdiy.com/how-to/plumbing/how-to-replace-a-flush-valve/
- ↑ http://www.planitdiy.com/how-to/plumbing/how-to-replace-a-flush-valve/
- ↑ https://youtu.be/tLlgmWtrysI?t=138
- ↑ https://www.angieslist.com/articles/how-to-replace-toilet-flush-valve-seal.htm
About This Article
Advertisement