This article was co-authored by Mitchell Newman. Mitchell Newman is the Principal at Habitar Design and its sister company Stratagem Construction in Chicago, Illinois. He has 20 years of experience in construction, interior design and real estate development.
There are 7 references cited in this article, which can be found at the bottom of the page.
This article has been viewed 35,726 times.
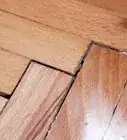
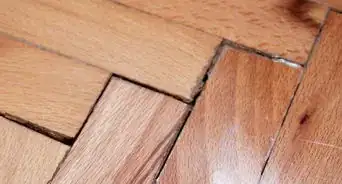
Hardwood floors can last a long time, but eventually they need to be replaced. Luckily, it's a pretty straightforward process! Use a circular saw to cut the old hardwood into pieces, then remove the old flooring. Prepare your subflooring so that it's clean and perfectly level. After that, choose your replacement flooring and follow the process for installing that particular type of hardwood!
Steps
Removing the Old Hardwood
-
1Put on gloves, knee pads, and protective eye glasses. You'll be working diligently on your hands and knees for hours to complete this project, especially if you're doing a large space. Invest in a good pair of knee pads to protect your knees. Sturdy work gloves will protect your hands from splinters, and goggles will prevent sawdust and other debris from getting into your eyes.[1]
-
2Measure the thickness of the current hardwood. Pry up a loose board in the floor so you can measure the thickness of the wooden plank. You need to know the wood thickness before you can start sawing into the floor to prevent your circular saw from damaging the subflooring underneath.[2]
- Hardwood thickness will usually be between .5 inches (1.3 cm) and 1 inch (2.5 cm), but it's important to measure it rather than guess.
- Once your know the floor thickness, set your circular saw blade to that depth.
Advertisement -
3Make cuts perpendicular to the direction the wood is laying. Using a circular saw, make single cuts straight across the flooring that are about 1 foot (30 cm) to 2 feet (61 cm) apart. Be sure your cuts are perpendicular to the direction of the wood. Start on 1 side of the room and work your way systematically to the other side, spacing each cut about 1 foot (30 cm) to 2 feet (61 cm) apart.[3]
- Always keep your hands away from the blade of a circular saw.
- Wear goggles over your eyes when operating the saw to protect them from debris.
-
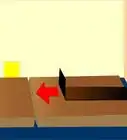
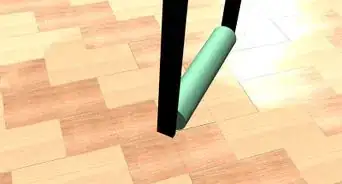
4Pry up the the first hardwood plank using a pry bar and mallet. Wedge the pry bar into 1 of the cuts. Tap the end of it with a rubber mallet to drive the bar more deeply into the cut. Use the bar to pry the first piece of hardwood out of the floor. Be forceful if necessary.
- It doesn't matter where you start in the room.
- Start a discard pile for the removed planks.
-
5Remove the remaining planks. Now that you've broken through the flooring, the rest of the job is much easier. Wedge the pry bar under the next board, then gently strike the head of the pry bar with a mallet to wedge it even deeper. Pry up the plank and add it to the pile of discarded wood.
- If some of the pieces come out easily, you can even pull it out with your hands, as long as you’re wearing gloves.


Preparing the Subflooring
-
1Remove all nails and staples in the subflooring. Use a nail claw and curved vice grips to pull up the many nails and staples you'll find lodged into the subflooring once the hardwood planks are removed. It's important to remove all of the nails and staples from the subfloor so you can start with a clean slate.
- Pulling up the nails and staples will leave you with a lot of metal debris littered all over the floor. The easiest way to pick it up is with a large magnet! Just glide it over the floor.[4]
-
2Sand off any paint or adhesive on the subfloor (if necessary). How pristine your subfloor needs to be depends on what kind of replacement flooring you're installing. If you plan to glue your new hardwood flooring down, sand away any paint or adhesive stuck to the subfloor with an electric sander. If you're installing nail-down, floating, or locking hardwood, you don't need to sand the subfloor.[5]
-
3Check the flatness of the subfloor. Use a straight piece of lumber that is between 8 and 10 feet in length to find any areas of the subfloor that aren't level. Simply lay down the plank and look for dips beneath it or raised humps. Mark any problem spots you find. Move the plank across the floor 1 way, then turn it diagonally and go across the surface again.[6]
- It's important that your subfloor is as flat as possible before installing new flooring over it.
-
4Eliminate any problem spots to make the subfloor level. Sand minor humps down with a hand-held or orbital sander to make the subfloor level. To fill any dips or low spots, use a leveling compound (also known as floor patch). Mix up the compound according to package directions, fill in the dips, then pull your straight piece of lumber back and forth over the spot to flatten and level it with the rest of the subfloor.[7]
-
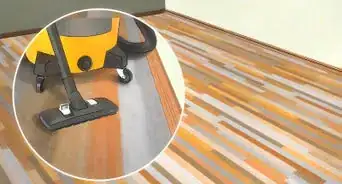
5Vacuum the subfloor and surrounding area thoroughly. Use a shop vac to suck up all of the sawdust and small wooden chunks left behind after hardwood removal. Be sure you clean up the metal debris before you pull out the shop vac, since these vacuums will not handle metal debris well and be damaged by it.[8]


Installing the Replacement Flooring
-
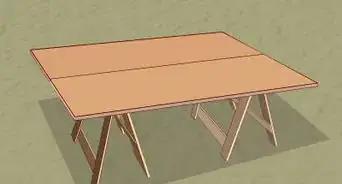
1Choose your replacement hardwood flooring. You don't have to replace your old floor with the exact same wood or flooring type that you just removed! You can glue your new hardwood flooring into place if you like. You can also install nail-down, floating (or locking) hardwood flooring as a replacement. The choice is up to you and what your budget allows.
- Each type of flooring calls for a different installation process.
-
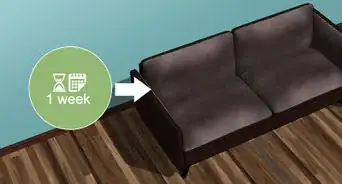
2Let the new flooring of your choice acclimate for 3 days. Stack your new planks in the room where they're going to be installed and leave them for about 3 days. Wood shrinks and expands depending on the humidity level in your home. It's crucial that you let your new wood acclimate to it's new environment before you install it.[9]
- If shrinking and swelling occur after installation, you'll be left with gaps in the finished flooring, among other serious issues.
-
3Nail down solid or engineered replacement flooring. Solid and engineered wood flooring are both great replacement options. They provide a beautiful finish that will last for many years. Nailing down the flooring is usually the longest lasting and sturdiest option. It's also fairly time consuming.[10]
-
4Glue down engineered hardwood, alternatively. If you don't want to nail down the boards, you do have the option of using adhesive to put engineered hardwood in place. It's a good choice, but won't last as long or be as sturdy as nailed down hardwood. The procedure is very similar to the nail-down process. Follow the adhesive manufacturer's instructions for installation and drying times.[11]
-
5Install a floating hardwood floor. Floating hardwood flooring doesn't have to be glued or nailed down. Instead, the planks interlock together firmly using a tongue and groove mechanism. The flooring is generally pre-finished, so once it's in place, you won't need to do any sanding or staining.


Completing the Installation
-
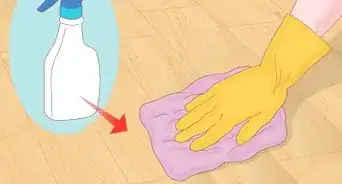
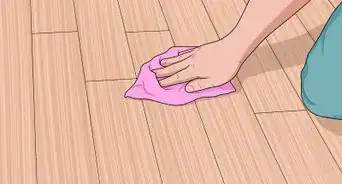
1Clean and vacuum the area thoroughly. Wipe up any excess glue with a rag. Vacuum up any sawdust that’s been left behind. Store or discard any pieces of wood that you didn’t use. Put away nails and tools.
-
2Weigh down the new boards for 24 hours if you used glue. Glue can expand after it dries, which can lift the replacement boards and make them uneven with the original ones. To prevent the new boards from rising, cover them with heavy objects like books, potted plants, or tools. After 24 hours, remove the objects and enjoy your level floor.[12]
-
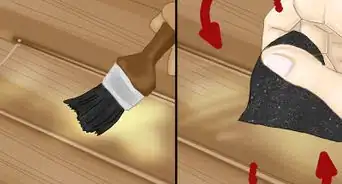
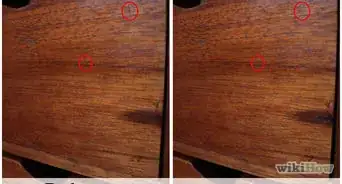
3Fill in any holes with wood filler if you used nails. Purchase a can or tube of wood filler from a hardware store and follow the instructions on the package. Usually you will simply need to apply the filler to any holes you’ve left behind and then stain it so that the filler blends in.[13]
-
4Reinstall moldings and install transition pieces, as needed. Always nail your moldings into the wall when reinstalling them. Do not nail them into the floor. Follow up by installing any transition pieces (if required) like reducers, T-moldings, and stair nosing.[14]
-
5


Expert Q&A
-
QuestionHow do I remove tongue and groove flooring?
 Mitchell NewmanMitchell Newman is the Principal at Habitar Design and its sister company Stratagem Construction in Chicago, Illinois. He has 20 years of experience in construction, interior design and real estate development.
Construction ProfessionalYou pry it up with a crowbar. It's not super hard, but it can be a little physically tiring if you aren't used to this kind of thing. You could use a saw if you want, but that's usually only necessary if the floor is glued down. -
QuestionHow much does laminate flooring cost if I'm going hardwood to laminate?Mitchell NewmanMitchell Newman is the Principal at Habitar Design and its sister company Stratagem Construction in Chicago, Illinois. He has 20 years of experience in construction, interior design and real estate development.
Construction ProfessionalIt totally depends on the kind of laminate you're going for. The cheaper stuff costs 80-90 cents a square foot, but depending on the quality and style, it can cost as much as $2-3.
Things You’ll Need
- New floorboards
- Circular Saw
- Pry bar
- Rubber mallet
- Chisel
- Carpenter’s glue
- Brad nails
- Hammer
- Wood filler
- Wood stain
- Polyurethane sealer


References
- ↑ https://www.makeit-loveit.com/home-improvement-how-to-remove-hardwood-floors/
- ↑ https://www.makeit-loveit.com/home-improvement-how-to-remove-hardwood-floors/
- ↑ https://www.makeit-loveit.com/home-improvement-how-to-remove-hardwood-floors/
- ↑ https://www.makeit-loveit.com/home-improvement-how-to-remove-hardwood-floors/
- ↑ https://www.builddirect.com/learning-center/flooring/install-hardwood-flooring/
- ↑ https://www.builddirect.com/learning-center/flooring/install-hardwood-flooring/
- ↑ https://www.builddirect.com/learning-center/flooring/install-hardwood-flooring/preparing-wood-sub-floor/
- ↑ http://thecraftsmanblog.com/how-to-repair-hardwood-floors/
- ↑ https://www.builddirect.com/learning-center/hardwood-flooring/installing-hardwood-floors-nail-down/
- ↑ https://www.builddirect.com/learning-center/hardwood-flooring/installing-hardwood-floors-nail-down/
- ↑ https://www.builddirect.com/learning-center/hardwood-flooring/installing-hardwood-floors-glue-down/
- ↑ https://www.thisoldhouse.com/ideas/patching-damaged-wood-floors
- ↑ https://www.thisoldhouse.com/ideas/patching-damaged-wood-floors
- ↑ https://www.builddirect.com/learning-center/hardwood-flooring/installing-hardwood-floors-nail-down/
- ↑ https://www.builddirect.com/learning-center/hardwood-flooring/installing-hardwood-floors-glue-down/
About This Article

To replace hardwood floor, start by cutting and prying up the old hardwood planks using a circular saw, pry bar, and mallet. Then, remove any nails and staples in the subflooring, and sand off any paint or adhesive. Next, buy replacement flooring, and let it acclimate in the room for 3 days so it doesn't shrink or expand after you install it. Finally, lay down the new flooring using nails or glue, depending on the type of flooring you purchased. To learn how to level uneven subflooring before laying down new hardwood, scroll down!