This article was co-authored by wikiHow Staff. Our trained team of editors and researchers validate articles for accuracy and comprehensiveness. wikiHow's Content Management Team carefully monitors the work from our editorial staff to ensure that each article is backed by trusted research and meets our high quality standards.
This article has been viewed 52,009 times.
Learn more...
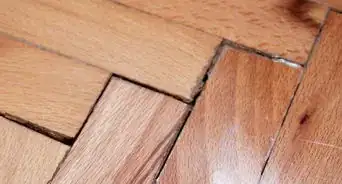
Pine can serve as a beautiful softwood flooring in any home, whether you’ve just installed it yourself or had it professionally done. Unlike hardwood flooring, though, softwood does not come pre-finished. You’ll need to finish your own pine flooring using stain, varnish, or oil. For maximum protection and durability, give the floor 2 coats of stain or varnish and wait 24 hours for the floor to dry. Then apply a final coat of stain, varnish, or oil.
Steps
Cleaning and Sanding the Pine Floor
-
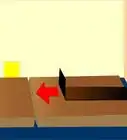
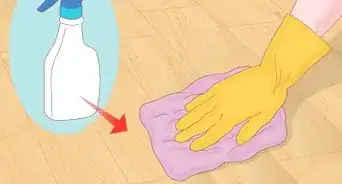
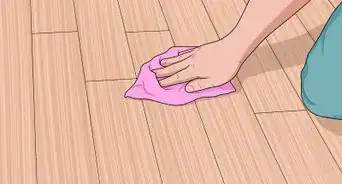
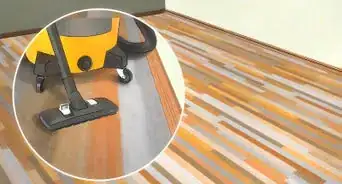
1Clean all dust and debris from the floor. The pine flooring should be completely clean of all dust, dirt, and small rocks. Depending on the size of your flooring, run a damp mop or a rag over the surface of the floor. Make sure to clean in the corners of the room and remove dust from any nooks or crannies.
- If your floor has just been installed, it won’t be covered in outside dirt. Instead, you’ll need to mop off leftover sawdust from the installation process.
-
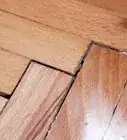
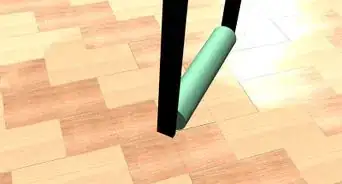
2Fill countersunk nail holes with hardening putty. Your pine flooring will have many nails driven into each of the wooden planks. Use one corner of the putty knife to scoop a fingernail-sized dollop of putty out of the jar. Apply the putty into the countersunk nail hole, and use the flat edge of the putty knife to smooth the hole flush with the flooring.[1] The filled holes will level the floor and provide a uniform stained finish.
- You can purchase both a putty knife and the hardening putty at a local hardware store. If the store offers different colors of hardening putty, select the color that most closely matches your floor.
Advertisement -
3Give the putty 3 or 4 hours to dry. Wait until the putty is fully dry before you begin to sand and finish the flooring. Gently press on the filled countersunk nail holes to make sure that the putty is firm.[2]
-
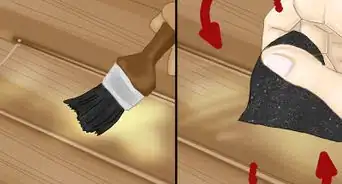
4Sand the pine flooring with 120-grit sandpaper. Whether your flooring is freshly installed or has been in place for years, it’s bound to have minor scuffs, marks, and scratches on it. Clear these unwanted marks by sanding the entire floor. Sand on your hands and knees using broad, straight strokes. Sand along the lines of the wood grain. Coarse 120-grit sandpaper will remove unwanted marks without adding scratches to the pine wood.[3]
- If you’re sanding a large area of flooring and prefer not to sand on your hands and knees, you can rent a sanding machine from a local hardware store.
- To protect your lungs from the sawdust produced by sanding, wear a bandana or protective face mask over your mouth.
-
5Clean the floor with a damp rag or mop after sanding. After you’ve sanded the floor, it will be covered with tiny pieces of wood dust. Remove these by dampening your mop and running it over the floor.
- Alternately, you could dampen a clean, lint-free rag and use it to clean up the floor.


Selecting a Finish
-
1Ventilate your working area. Fumes from stain or varnish can be harmful to breathe. If the room you’re working in has external windows, open these as wide as possible. If you’d like to take a further safety precaution, rent a vapor-rated respirator and wear it while you’re staining the pine floor.[4]
- You can rent a vapor-rated respirator at a local hardware or home supply store.
- Since you’ll be working with the windows open, it’s advisable to finish the pine flooring on a warm, rain-free day.
-
2Choose a color of stain if you’d like to darken the pine floor. If you are not impressed with the natural color of the pine flooring and would like to darken it, you can purchase a stain to seal and darken the pine. Visit your local paint store and ask to peruse their stain selection.
- Speak with the sales staff to determine which brand and variety of stain is best for your flooring, considering its location in your house and the amount of use it will receive.
-
3Select a clear varnish if you prefer not to alter the pine’s coloring. The major difference between stain and varnish is that varnish will dry clear while stain will darken the color of your flooring. So, if you prefer the natural color of the pine flooring and just want to seal it to protect against moisture and scratches, opt for a varnish.
- Unlike oil, varnish adheres to the top of the wood without soaking deep into the grain. Consequently, you can remove varnish if you decide to. Oil cannot be removed from wood.
-
4Apply a colorless oil to preserve the pine’s natural color. Oils are a traditional softwood finish that will penetrate deep into the pine flooring. Oil finishes—unlike many varnishes—won’t peel or flake, and often look better with age. Types of oil commonly used to finish pine floors include:
- Tung oil, which has a relatively low level of sheen. This leaves the pine with a more “natural” appearance.
- Linseed oil, which is tarry and so brings out the grain of the pine.
- Lemon or walnut oil, which are considered specialty oils and may be more expensive.
-
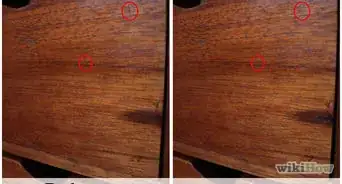
5Test the stain out on a small corner of flooring. Before you stain the entire floor, test the stain in an inconspicuous are to make sure that you like the color. Apply the stain using a 3 in (7.6 cm) paintbrush. Let the stain dry for 24 hours.[5]
- If you like the appearance of the stained sample patch, you can proceed with staining the entire floor.
- If you don’t like the appearance of the stained wood, select a different colored stain. Or, if you realize that you prefer the natural color of unstained pine, opt for a clear varnish instead.


Applying the Finish
-
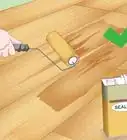
1Roll on a thick coat of stain, varnish, or oil. Pour the stain, varnish, or oil into a horizontal paint tray. Select either a wool paint roller or a paint roller with a medium nap. Apply a heavy layer of stain, varnish, or oil to your pine flooring. Roll the paint onto the flooring using long, even strokes.[6]
- Ensure that you apply a heavy coat by letting the roller brush absorb a generous amount of stain, varnish, or oil from the paint tray.
-
2Wait 15 minutes for the stain, varnish, or oil to dry. Waiting will give the stain, varnish, or oil enough time to be absorbed by the wood.[7] Stay out of the room while you wait. Otherwise, you may end up with an unsightly footprint on your finished flooring.
-
3Apply a second, lighter coat of stain, varnish, or oil and wait 15 more minutes. Once 15 minutes have passed, apply a second coat of stain, varnish, or oil on top of the first. This coat should be lighter, since the pine won’t absorb as much new stain. Barely dip the roller brush head into the stain, varnish, or oil.[8]
- If the material absorbs too much stain, press the roller brush lightly against the back of the paint tray to squeeze some stain out of the absorbent material.
- Wait another 15 minutes after applying this coat. This will give the second coat time to dry.
- Although the coat is lighter, the wood will already have absorbed the product, and will need time to soak up the second coating.
-
4Wipe the floor dry with a clean rag. After the second 15-minute period has passed, take a clean, dry, lint-free rag and wipe the entirety of the pine flooring. Soak up any lingering puddles of stain, varnish, or oil.[9] If you spot any irregular or obvious lines from roller-brush strokes, use the rag to rub over and obscure these.
- When you’re finished wiping the floor, it should be completely dry.
-
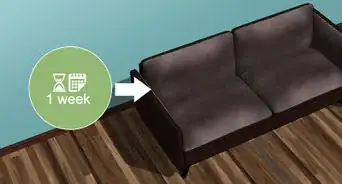
5Let the flooring dry for 24 hours. Give the pine floor a full day to absorb stain, varnish, or oil.[10] During this time, the stain, varnish, or oil will fully saturate the flooring. If it’s possible, stay out of the room during this time. Set up a gate or shut the door so that small children and animals cannot enter the room.
- If the weather remains pleasant and dry, leave the windows open for the full 24 hours to ensure good ventilation.
-
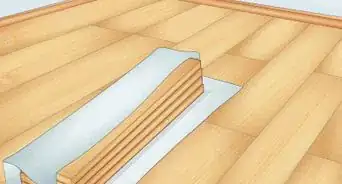
6Buff the dried floor with 150-grit sandpaper. This texture will be slightly finer than the 120-grit sandpaper you used to smooth out the floor initially. You don’t need to sand rigorously; you’re only trying to smooth the surface of the finished wood. Lightly buff until the floor is a uniform color and texture.[11]
- As before, you’ll need to sand on your hands and knees. Buff along the wood grain, and apply only a gentle amount of pressure as you make long strokes with the sandpaper.
- If you rented a sanding machine for the initial sanding, use the machine again at this point.
-
7Wipe the floor with a damp rag or mop after sanding. Dampen your mop or another lint-free rag, and wipe down the entire surface of the pine flooring to remove the sanding dust. If you do not clean off the floor after sanding it, you’ll end up applying the final coat of stain, varnish, or oil directly on top of this dust.
- After you finish wiping the floor, wait 10 minutes for the pine to dry.
-
8Apply a final light coat of stain, varnish, or oil. Pour a small amount of stain, varnish, or oil into the paint tray, and dip in the head of the roller brush. Push the roller brush into the paint tray until it soaks up only a light coating. Apply this coat evenly across the entire pine floor.[12]
-
9Let the stain, varnish, or oil dry for 15 minutes before wiping it down. Leave the room while the stain, varnish, or oil dries. Then use the last of your clean, lint-free rags to blot and wipe the surface of the floor. Make sure to absorb and smooth over any lingering puddles of stain, varnish, or oil.[13]
- At this point, the floor is ready for use.


Expert Q&A
-
QuestionDoes pine need to be sanded before staining?
 Ryaan TuttleRyaan Tuttle is a Home Improvement Specialist and the CEO of Best Handyman, Inc. in Boston, Massachusetts. With over 17 years of experience, he specializes in building home service businesses, focusing on creating scalable and efficient brands. With the help of his global team, the companies have achieved over 10+ million in sales and received recognition through magazine features, and enjoy partnerships with wikiHow and Jobber field service software. Boston Magazine and LocalBest.com have named Best Handyman Boston the Best Handyman in Boston. Ryaan holds Construction Supervisor and Home Improvement Contractor Licenses.
Home Improvement SpecialistDefinitely! Start by sanding the pine with 150-grit sandpaper before switching to 220-grit sandpaper. Then, use a tack cloth or cheese cloth to wipe off all the dust. From there, take a damp cloth and wipe the pine to open up the pores. You're now ready to apply the stain!
Things You’ll Need
- Stain, varnish, or oil
- Vapor-rated respirator (optional)
- Mop (optional)
- Lint-free rags
- 120-grit and 150-grit sandpaper
- Orbital sander (optional)
- 3 in (7.6 cm) paintbrush
- Hardening putty
- Putty knife
- Paint tray
- Paint roller with medium nap or wool head
Warnings
- Stain- or oil-soaked rags are highly combustible. Once you’re finished staining your floor, dry the rags outside, away from any flammable material or open flames.[15]⧼thumbs_response⧽


References
- ↑ https://www.familyhandyman.com/floor/wood-floor-installation/how-to-install-pine-floors/view-all/
- ↑ https://www.familyhandyman.com/floor/wood-floor-installation/how-to-install-pine-floors/view-all/
- ↑ https://www.familyhandyman.com/floor/wood-floor-installation/how-to-install-pine-floors/view-all/
- ↑ https://www.familyhandyman.com/floor/wood-floor-installation/how-to-install-pine-floors/view-all/
- ↑ https://www.familyhandyman.com/floor/wood-floor-installation/how-to-install-pine-floors/view-all/
- ↑ https://www.familyhandyman.com/floor/wood-floor-installation/how-to-install-pine-floors/view-all/
- ↑ https://www.familyhandyman.com/floor/wood-floor-installation/how-to-install-pine-floors/view-all/
- ↑ https://www.familyhandyman.com/floor/wood-floor-installation/how-to-install-pine-floors/view-all/
- ↑ https://www.familyhandyman.com/floor/wood-floor-installation/how-to-install-pine-floors/view-all/
- ↑ https://www.familyhandyman.com/floor/wood-floor-installation/how-to-install-pine-floors/view-all/
- ↑ https://www.familyhandyman.com/floor/wood-floor-installation/how-to-install-pine-floors/view-all/
- ↑ https://www.familyhandyman.com/floor/wood-floor-installation/how-to-install-pine-floors/view-all/
- ↑ https://www.familyhandyman.com/floor/wood-floor-installation/how-to-install-pine-floors/view-all/
- ↑ https://www.bobvila.com/articles/the-pros-and-cons-of-softwood-flooring/
- ↑ https://www.familyhandyman.com/floor/wood-floor-installation/how-to-install-pine-floors/view-all/
About This Article