This article was co-authored by Norman Raverty. Norman Raverty is the owner of San Mateo Handyman, a handyman service in the San Francisco Bay Area. With over 27 years of experience, Norman has expertise in all five of the general building trades (carpentry, ceramic tile, drywall, electrical, plumbing).
This article has been viewed 502,015 times.
Drywall is very easy to damage. You can damage it by drilling, hammering a nail, or if something falls into it. Smaller holes in drywall can be easily fixed using spackle, a compound specifically made to cover cracks and holes in walls. Use a putty knife to cover the hole in the drywall with spackle. Once you've applied the spackle, you can paint over it, making the wall look as good as new and like it was never damaged.
Steps
Preparing the Drywall Area
-
1Use spackle to repair holes less than 4 inches (10 cm) in diameter. Spackle can be used to repair holes up to the size of your hand. You will have to use a support like mesh or wire to repair holes larger than 4 inches (10 cm) in diameter.[1]
-
2Buy light spackle at the local hardware store. Spackle can be bought in different weights and sizes. You can use light spackle for small drywall holes.[2]Advertisement
-
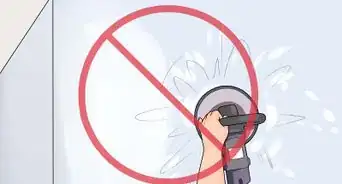
3Use 150-grit sandpaper on the drywall around the hole. Drywall is made from a combination of gypsum, facer paper, and backer paper. When drywall is damaged, these materials cause the drywall to splinter and some smaller fragments will stick out from the wall. If you leave these fragments untouched, the putty won't stick to the wall properly. Using 150-grit sandpaper will smooth the area around the hole if it's badly splintered.[3]
- Place the sandpaper over the hole and rotate it back and forth between clockwise and counterclockwise a few times. This keeps your repair area smaller than sanding from side to side.
- You can use 100-grit sandpaper if the drywall isn't badly damaged.
- If you're patching a small area, like a nail hole, you can simply push the drywall in with your thumb or the base of a screwdriver, then spackle over the indent you make.
-
4Scrape the area around the hole with a putty knife so it's smooth. After sanding, gently scrape around the hole to remove any other fragments or splinters. Angle the putty knife into the wall and scrape up and down. Be careful and make sure you don't make the hole in the drywall bigger when using the putty knife.[4]
- Don't worry about removing paint around the hole. You'll be painting over the area again later on.


Applying the Spackle
-
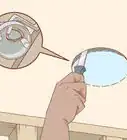
1Place some spackle onto your putty knife and scrape it over the hole. The amount of spackle you use depends on the size of the hole. It should comfortably cover the hole and you should have extra to scrape around the surrounding area.[5]
- Use a smooth, feathering motion to apply the spackle to the wall.
- You can use 2 putty knives if you want. Use 1 with a thin blade and another with a wide blade. Use the wider knife to remove the spackle from the tub and use the thinner knife to apply the spackle. The wider knife can act as a palette.
- You can also use an old plastic credit card or used gift card if you don't have an appropriately-sized putty knife on hand.
- Always close the spackle tub after you've removed the spackle you need. If the spackle dries out, it'll be useless.
-
2Let the spackle dry for 4-5 hours. The amount of time it will take your spackle to dry depends on the size of the hole, how much spackle you applied, and the brand of spackle you used. Once your spackle is dry, sand it down before applying your second layer.[6]
- Test the spackle with your finger to see if it's dry.
-
3Scrape on another layer of spackle. You might need to apply a few layers of spackle before the job is done. Once the first layer is dry, use a similar amount of spackle for the second layer. Use your putty knife to cover the hole and scrape the spackle around the surrounding area.[7]
- Give the second layer another 4 to 5 hours to dry before you apply the next layer.
-
4Apply a third layer of spackle after the second layer has dried. Generally, 3 layers of spackle will be enough to cover the hole in your drywall. By this stage, the spackle should be very solid and the hole should be completely covered.[8]
- You can always apply a fourth layer if you think the drywall needs it. However, 3 layers should be enough. You don't want to overdo it and end up with a small lump in your wall from all of the spackle.
- If your drywall is textured, dab a sponge on the last layer of wet spackle to match the texture of the repair to the texture of the rest of the wall.
-
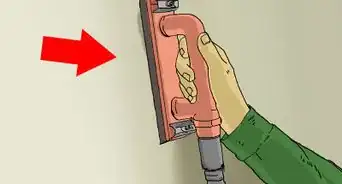
5Remove excess spackle with a putty knife and sandpaper. Once you've applied all your layers of spackle, use the putty knife to scrape the excess spackle from the drywall. Place your knife at an angle to the wall at the edge of the spackle layer and scrape it across the wall to remove any excess spackle and create an even surface. This will make it easier to prime and paint over the spackle.[9]
- If there's still too much spackle on the wall, don't overdo it with the putty knife. Use fine-grit sandpaper to sand the spackle until it's level with the wall again.


Painting and Priming the Spackle and Drywall
-
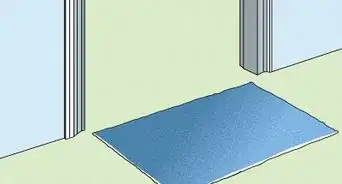
1Place a sheet on the floor before you start painting. Before you start painting, place a sheet on the floor to catch any drops of paint. Move any furniture near the area away or cover it with a sheet as well.[10]
- Cover baseboards, door hinges, and the ceiling border with painter's tape if necessary.
-
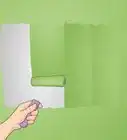
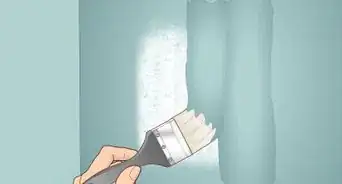
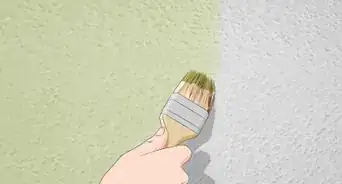
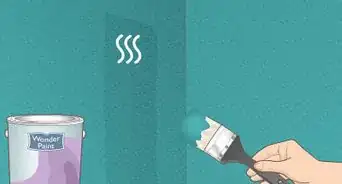
2Apply a primer to the wall after the spackle has fully dried. If the hole in the drywall was small, there's probably no need to repaint the entire wall. If you had a few different holes spread around the wall, it might be a good idea to paint the whole wall. Use a roller or paintbrush to apply the primer to your desired section of the wall.[11]
- If you're painting the whole wall, sand your spackle down well. Apply one coat of paint to the spackled areas and allow it to dry completely, then proceed with painting your wall. You won't need primer unless you're changing the color of your wall.
- Use even, measured strokes with the roller or the paintbrush to apply the primer.
-
3Give the primer 3 hours to fully dry. Primer tends to feel dry to the touch within an hour of applying it. However, this does not mean it's ready to be painted over. It will take around 3 hours for the entire layer of primer to fully dry.[12]
- If it's cool or very humid, it might take an extra hour or so for the primer to dry.
-
4Match the paint color if you're not repainting the whole wall. You don't want to have to repaint the entire wall if you only covered a small hole. Check your garage or shed to see if you still have the paint you used originally on the wall. If you don't have it, go to your local painting store or home center and ask for help to find a matching color.
- You can take paint chips home from the store and hold them up to the wall to find the color that's an exact match.
- If you can't find an exact match, you'll probably need to repaint the whole wall.
-
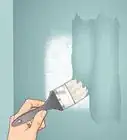
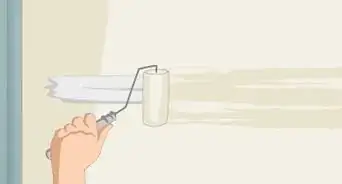
5Apply the first coat of paint to the drywall. Once the primer is dry, use a paintbrush or roller to apply the first coat of paint to the wall. Use a flat or tapered paintbrush and paint with measured, even strokes. A roller will be much easier to use if you're painting the entire wall.[13]
- If you're only painting the small section you applied spackle to, you can use a small paintbrush or a sponge paintbrush to dab your paint onto the patch.
-
6Let the first coat of paint dry for 4 to 5 hours. It's important to let paint dry fully before applying the next coat so the paint adheres properly. Paint takes a little longer to dry than primer. You can check if the paint is dry by dabbing it with a tissue. Look at the tissue after dabbing the paint. If there's no paint on the tissue, the paint is dry.[14]
- You can also leave the paint dry overnight. This will ensure that the paint is completely dry before you paint the second coat.
-
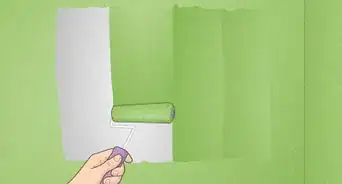
7Paint the second coat on the wall. Once the first coat is dry, use even and measured strokes on the wall again to apply the second coat. By the time you finish the second coat, you should be able to tell if another coat is needed. You might need to apply another coat to completely cover the spackle.[15]
- If applying another coat, give the second coat 4 to 5 hours to dry first.


How Can I Fill Nail Holes?
Expert Q&A
Did you know you can get expert answers for this article?
Unlock expert answers by supporting wikiHow
-
QuestionWhat household items can I use to patch a small hole in the wall?
 Norman RavertyNorman Raverty is the owner of San Mateo Handyman, a handyman service in the San Francisco Bay Area. With over 27 years of experience, Norman has expertise in all five of the general building trades (carpentry, ceramic tile, drywall, electrical, plumbing).
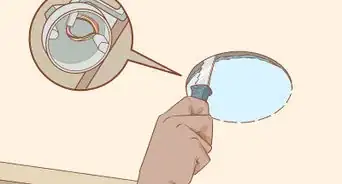
Home Repair SpecialistIf you don't have sandpaper, you can use the rougher side of a dampened sponge. It will catch all the falling dust and keep a mess from forming.
Support wikiHow by unlocking this expert answer.
Warnings
- Make sure you use spackle and not similar products like caulk.⧼thumbs_response⧽
- Wash your spackle knife promptly as spackle dries quickly. Never use a dirty spackle knife or one that has been bent or is out of shape.⧼thumbs_response⧽
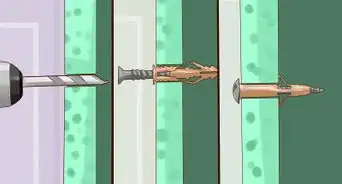
- Very large holes or missing pieces of wallboard will need to be replaced using new wallboard and mud compound.⧼thumbs_response⧽
Things You'll Need
- Putty knife
- Spackle
- 150-grit sandpaper
- Sheets
- Painter's tape
- Primer
- Flat or tapered paintbrush or roller
- Sponge paintbrush
- Paint

References
- ↑ https://www.bobvila.com/articles/how-to-spackle/
- ↑ https://www.thesawguy.com/how-to-spackle-wall/
- ↑ https://www.thesawguy.com/how-to-spackle-wall/
- ↑ https://www.thesawguy.com/how-to-spackle-wall/
- ↑ https://www.doityourself.com/stry/how-to-properly-use-spackling-compound
- ↑ https://www.doityourself.com/stry/how-to-properly-use-spackling-compound
- ↑ https://www.doityourself.com/stry/how-to-properly-use-spackling-compound
- ↑ https://www.todayshomeowner.com/how-to-repair-small-holes-in-drywall/
- ↑ https://www.doityourself.com/stry/how-to-properly-use-spackling-compound
- ↑ https://www.bobvila.com/articles/how-to-spackle/
- ↑ https://www.bobvila.com/articles/how-to-spackle/
- ↑ https://www.todayshomeowner.com/how-to-repair-small-holes-in-drywall/
- ↑ https://www.bobvila.com/articles/how-to-spackle/
- ↑ https://www.thesawguy.com/how-to-spackle-wall/
- ↑ https://www.thesawguy.com/how-to-spackle-wall/
About This Article

To repair small holes in drywall with spackle, start by smoothing the damaged area with 150-grit sandpaper. After sanding, use a putty knife to gently scrape around the hole to remove any other fragments or splinters. Next, put some spackle on your putty knife and scrape it over the hole. Let the spackle dry for 4 to 5 hours, then sand it down with sandpaper. Apply a second coat of spackle and let it dry completely. Finally, apply a third coat. If there’s excess spackle on your wall, scrape it off with your putty knife or use fine-grit sandpaper to sand the area down. To learn how to paint over your newly spackled area, keep reading!