This article was co-authored by Sam Adams. Sam Adams is the owner of Cherry Design + Build, a residential design and construction firm, which has been operating in the Greater Seattle Area for over 13 years. A former architect, Sam is now a full-service contractor, specializing in residential remodels and additions.
There are 7 references cited in this article, which can be found at the bottom of the page.
This article has been viewed 34,046 times.
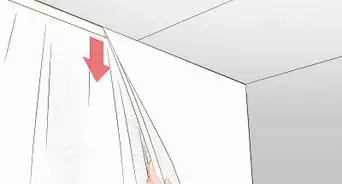
Oh no! You’ve just painted your wall and now that it’s dry, you can see the drywall tape showing through it. Chances are, if you can see the tape, mistakes were made when the paint was originally applied. Fortunately, it’s not the end of the world. If you’ve got a smooth wall and you used paper drywall tape, you can actually cover and paint over it so it’s no longer visible. And it’s not as difficult as you might think. With the right supplies and approach, you can easily knock it out and finish with a pristine and smooth wall.
Steps
Skim-Coating over the Tape
-
1Add water to thin out some joint compound. Choose a ready-mixed joint compound and pour some into a container or a paint tray. Add a little bit of water at a time and mix it together until the compound is thin, but not so thin that it’s runny. Aim for the consistency of pancake batter.[1]
- You want the compound thin so it creates a light coating over the drywall tape.
- If you add too much water and it gets too runny, just add a little bit more compound to thicken it back up.
-
2Spread a thin layer of the compound over the tape. Use a putty knife that’s at least 6 inches (15 cm) wide so you can more easily spread a thin layer. Scoop out some of the compound and apply it directly to the drywall tape.[2]
- A putty knife is flexible and bendy enough to apply a thin layer without damaging your wall.
- Use a wide putty knife so you can more easily spread the compound.
- Make sure that you're applying the joint compound in an even layer.[3]
Advertisement -
3Remove the excess compound by skimming it with your putty knife. As soon as you apply compound to the drywall tape, take the edge of the putty knife and scrape it over the surface to remove the excess. Run the edge of the putty knife over the seam created by the drywall tape so it’s covered with as thin of a layer as possible.[4]
- A thin layer will conceal the edges of the tape without making the wall look raised or bumpy.
-
4Allow the compound to fully dry. Check the packaging of the joint compound for specific drying times. Wait for the recommended time to pass and then carefully touch the compound just to be sure it’s fully dry.[5]
- It may take up to a full day for the compound to completely dry.
- It’s very important that the compound is fully dry! If you try to sand or paint over it while it’s still wet it could look lumpy or misshapen.
-
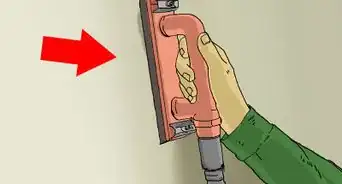
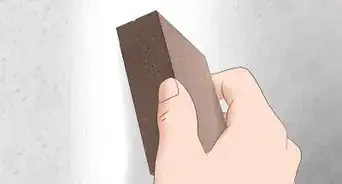
5Sand over the seam with 150-grit sandpaper. Take a sheet or block of sandpaper and gently rub over the joint compound using circular motions to smooth it out. Make sure you sand the seam lightly and don’t over do it or it could look uneven. For finer details, break out a sanding sponge, which is even more gentle than sandpaper.[6]
- Sanding will both prepare the surface for painting and make the seam look less noticeable after you paint over it.
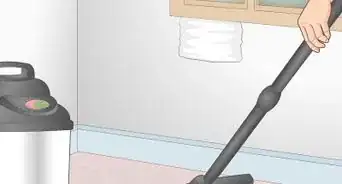
- Always dust the drywall off after sanding it.[7]


Painting over the Tape
-
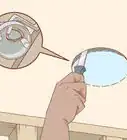
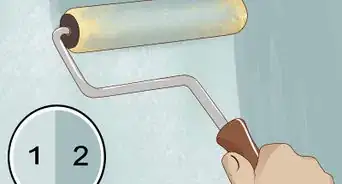
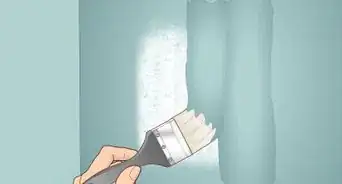
1Apply a layer of primer and let it dry.[8] Choose a latex primer for drywall so it makes the surface look even.[9] Add some of the primer to a paint tray and dip a paintbrush into it. Scrape off the excess primer and apply a thin layer over the joint compound covering the drywall tape. Add enough primer to completely cover the tape and then wait for it to fully dry.[10]
- Check the packaging for specific drying times.
- Oil-based primers can raise the grain of the drywall and make it look uneven.
- You can use PVA primer if you're painting over new drywall—it's a lot cheaper than your standard drywall.[11]
-
2Add a second layer of primer if you want to be sure the tape is hidden. If you can still see a little bit of the tape through the first layer of primer, a second layer should do the trick. Use your paintbrush to add another thin layer over the tape and let it fully dry.[12]
-
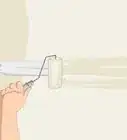
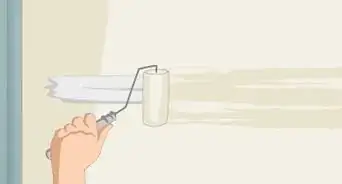
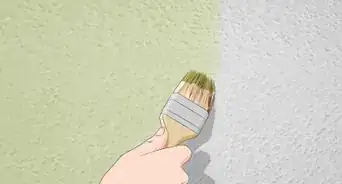
3Paint over the area with the same paint as the surrounding wall. Use the same paint that you used to paint the rest of the wall. If you don’t have the same color, bring a paint chip to a paint supply store to match it. Pour some into a paint tray and use a paintbrush to apply a thin layer over the dry layer of primer.[13]
- Sometimes, 1 coat of paint may be enough to fully conceal the primer and drywall tape.
- Dark matte paint may conceal the paint more effectively, so it could be a good option for you to use.
-
4Wait for the paint to dry and then add a second layer. Check the recommended drying time on the can and allow the paint to fully dry. If the primer and tape is still slightly visible, follow up with another thin layer of paint. That should fully cover the drywall tape and blend evenly into the rest of your wall so it’s no longer noticeable.[14]


Expert Q&A
-
QuestionDo you need to prime drywall after removing wallpaper?
 Sam AdamsSam Adams is the owner of Cherry Design + Build, a residential design and construction firm, which has been operating in the Greater Seattle Area for over 13 years. A former architect, Sam is now a full-service contractor, specializing in residential remodels and additions.
Professional ContractorIf the wallpaper had been applied over unfinished plaster, you’ll definitely want to prime it. Also, if the wallpaper leaves a fair amount of the backing of the wallpaper on there, you'll want to sand it until smooth, and then hit it with a coat of primer.
Things You’ll Need
- Joint compound
- Wide putty knife
- 150-grit sandpaper
- Primer
- Paint
- Paint tray
- Paintbrush
References
- ↑ https://www.finehomebuilding.com/project-guides/drywall/skim-coating
- ↑ https://homelyville.com/drywall-tape-issues/
- ↑ Sam Adams. Professional Contractor. Expert Interview. 4 June 2019.
- ↑ https://youtu.be/RB46se6weX0?t=13
- ↑ https://homelyville.com/drywall-tape-issues/
- ↑ https://www.yourownarchitect.com/10-clever-ways-to-hide-drywall-seams/
- ↑ Sam Adams. Professional Contractor. Expert Interview. 4 June 2019.
- ↑ Sam Adams. Professional Contractor. Expert Interview. 4 June 2019.
- ↑ https://www.bobvila.com/articles/best-paint-primer/
- ↑ https://www.yourownarchitect.com/10-clever-ways-to-hide-drywall-seams/
- ↑ Sam Adams. Professional Contractor. Expert Interview. 4 June 2019.
- ↑ https://homelyville.com/drywall-tape-issues/
- ↑ https://homelyville.com/drywall-tape-issues/
- ↑ https://peppershomeandgarden.com/hide-drywall-seams-paint/
About This Article