This article was co-authored by Barry Zakar and by wikiHow staff writer, Janice Tieperman. Barry Zakar is a professional handyman and the founder of Little Red Truck Home Services based in the San Francisco Bay Area. With over ten years of experience, Barry specializes in a variety of carpentry projects. He is skilled at constructing decks, railings, fences, gates, and various pieces of furniture. Barry also holds his MBA from John F. Kennedy University.
There are 15 references cited in this article, which can be found at the bottom of the page.
This article has been viewed 45,240 times.
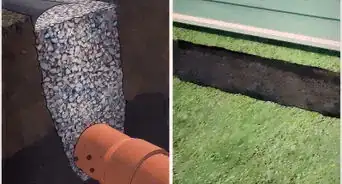
Leaky or damaged gutters can be a big pain, especially if they’re causing water damage around your home.[1] Thankfully, gutters are pretty easy to troubleshoot, though you may want to contact a professional if you don’t have a lot of experience with outdoor repairs. Try to identify your gutter’s main issue to see if it’s broken, clogged, or sagging. Once you’ve pinpointed the problem and put on a pair of sturdy gloves, you can get to the repairs!
Steps
Fixing Clogs and Holes in Your Gutter
-
1Put on durable work gloves before making any repairs. Find a pair of thick gardening or work gloves that keep your hands clean and protected while you make repairs. If you don’t have any sturdy gloves on hand, pick up a pair at your local hardware or home improvement store.[2]
-
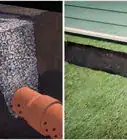
2Clear away any leaves, dirt, and water from the gutter.[3] Set up a ladder beneath your gutter and climb up so you can see inside. Scoop out any leaves and debris with your hands, moving them to an empty bucket as you go.[4] If needed, go over stubborn patches of dirt and grime with a wire brush.[5]
- You can also clean out the gutter with a wet vacuum or leaf blower, if you want.[6]
Advertisement -
3Rinse out the gutter and dry it off. Dump a small bucket of water into the gutter to wash out any leftover dirt and grime. Keep flushing out the gutter with more clean water until it starts draining the excess water properly.[7] Once you’re finished cleaning, dry out the gutter with a clean cloth or paper towel.[8]
- If you’re in a rush, feel free to clean out your gutter with a power washer or a garden hose with a plumber’s snake attachment.
-
4Fill small holes with a layer of plastic roofing cement. Place a blueberry-sized amount of roofing cement on a putty knife and spread it over the hole. Go over the cement with the putty knife again until it’s spread in a thin, consistent layer.[9]
- Small holes are generally pea-sized or smaller, and can easily be filled with roofing cement.
-
5Patch large holes with flashing and roofing cement. Squeeze a line of roofing cement around the edge of the hole. Cut out a small square or rectangle of flashing with your tin snips, then center it over the hole. Press over the flashing with your fingers to hold it in place.[10]
-
6Smooth out the patched section with roofing cement. Apply a line of roofing cement along the outside of the flashing patch. Spread and feather the cement into a thin layer around the edges of the flashing with a putty knife or another flashing square to create a smooth, flat layer.[11]
- Read the label on your roofing cement to see the recommended drying or curing time.


Repairing a Leaking Downspout
-
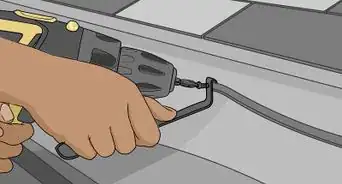
1Unscrew any screws or hardware to remove a leaking section of the downspout. Remove any screws from the side of the downspout with an electric drill, along with any connecting fasteners. Pull the sections of downspout apart with your hands once you’ve taken out the screws.[12]
- Set these screws and fasteners aside in a safe place so you can reinstall them later.
- Depending on your home’s setup, you may need to use a ladder for this.
-
2Brush off any leftover caulk on the joints of your downspout. Go over the edges of each downspout segment with a wire brush. Clear off any leftover caulk or cement, so it’ll be easier to put your downspout back together.[13]
-
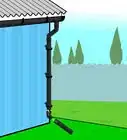
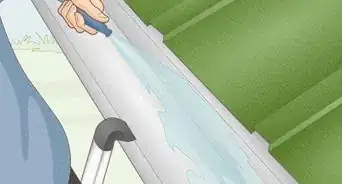
3Clean out the downspout with a gutter brush. Attach or tape a gutter brush to an extension pole, which will help you clean out the entire gutter. Stick and rotate the brush in the downspout to clear away any debris that’s stuck in the piping.[14]
- You can find gutter brushes at most home improvement stores.
-
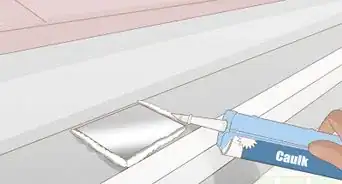
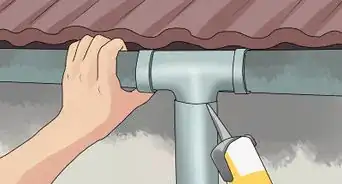
4Reattach your downspout with a small line of caulk. Spread a thin line caulk around the outer edge of 1 of the downspout pieces. Slide the other downspout piece into place until both segments are securely overlapping and connected.[15]
- Don’t worry about caulk drying time—the caulk will dry over time after you finish reinstalling the downspout.
-
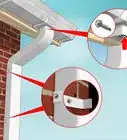
5Reinstall your downspout with the proper screws and hardware. Secure the screws and fasteners back along the downspout with an electric drill. At this point, double-check that the downspout is securely attached to the side of your home, and that it’s not sagging or wobbling.[16]


Saving a Sagging Gutter
-
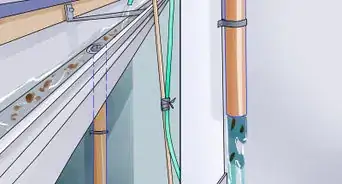
1Remove half of your flimsy gutter hangers with an electric drill. Look for any metal brackets that are connecting your gutter to the side of your roof and home. Pull out the screws and fasteners from your gutter and throw them away. Start by removing half of the current hangers so your gutter doesn’t fall off completely.[17]
- If your gutter looks like it’s sagging off the side of your roof, you probably need to replace the hangers.
-
2Screw in 2-3 Philip’s screws and remove the other hangers. Find the center point of your gutter and secure a support screw in place along the central edge. Attach additional screws along the left or right edge of the gutter so the structure doesn’t shift or separate from your roof entirely. At this point, the rest of the original gutter hangers until only the support screws are left.[18]
- You need a minimum of 2 support screws to hold your gutter in place. Any kind will work for this, like a 7/64 or 9/64 diameter screw.
-
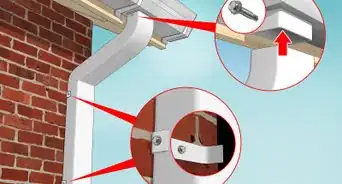
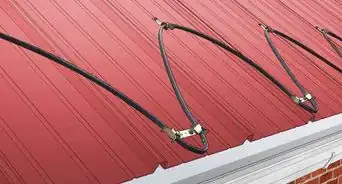
3Install a supportive gutter hanger so your gutter doesn’t sag. Visit your local hardware or home improvement store for gutter hangers that hook beneath the inner groove of the gutter and attach to your roof. Position your first gutter hanger along the center of the gutter so the entire structure is supported. Screw the hanger into place with an electric drill so the gutter is firmly reattached to the side of your home.[19]
- For reference, one end of the gutter hanger hooks under the gutter groove while the other side of the hanger drills directly through the gutter into the side of your home.
-
4Repeat this process along your gutter so the fasteners are 4 in (10 cm) or so apart. Add other hangers to your gutter, continuing to screw them with an electric drill. Install hangers along the entire length of your gutter so the structure stays upright and secure without sagging.[20]


Warnings
- If you don’t feel comfortable fixing your gutters on your own, ask a repair professional for help.[21]⧼thumbs_response⧽
Things You’ll Need
Fixing Holes in Your Gutter
- Gloves
- Ladder
- Scoop
- Bucket
- Hose
- Towels
- Roofing cement
- Putty knife
- Flashing
- Tin snips
Repairing a Leaking Downspout
- Gloves
- Ladder
- Electric drill
- Wire brush
- Caulk
Saving a Sagging Gutter
- Gloves
- Ladder
- Electric drill
- 2-3 screws
- Gutter hangers


References
- ↑ https://www.popularmechanics.com/home/outdoor-projects/a25907576/gutter-repair/
- ↑ https://www.bobvila.com/articles/how-to-clean-gutters/
- ↑ Barry Zakar. Handyman. Expert Interview. 16 July 2020.
- ↑ https://www.popularmechanics.com/home/outdoor-projects/a25907576/gutter-repair/
- ↑ https://m.youtube.com/watch?v=Hb_2o9qNL2k&t=0m35s
- ↑ https://www.bobvila.com/articles/how-to-clean-gutters/
- ↑ https://www.bobvila.com/articles/how-to-clean-gutters/
- ↑ https://m.youtube.com/watch?v=Hb_2o9qNL2k&t=0m35s
- ↑ https://m.youtube.com/watch?v=Hb_2o9qNL2k&t=0m44s
- ↑ https://m.youtube.com/watch?v=Hb_2o9qNL2k&t=0m50s
- ↑ https://m.youtube.com/watch?v=Hb_2o9qNL2k&t=1m2s
- ↑ https://m.youtube.com/watch?v=Hb_2o9qNL2k&t=1m10s
- ↑ https://m.youtube.com/watch?v=Hb_2o9qNL2k&t=1m14s
- ↑ https://www.popularmechanics.com/home/outdoor-projects/a25907576/gutter-repair/
- ↑ https://m.youtube.com/watch?v=Hb_2o9qNL2k&t=1m22s
- ↑ https://m.youtube.com/watch?v=Hb_2o9qNL2k&t=1m28s
- ↑ https://m.youtube.com/watch?v=kXWyujQXb-s&t=1m23s
- ↑ https://m.youtube.com/watch?v=kXWyujQXb-s&t=1m57s
- ↑ https://m.youtube.com/watch?v=kXWyujQXb-s&t=2m46s
- ↑ https://m.youtube.com/watch?v=kXWyujQXb-s&t=2m54s
- ↑ Barry Zakar. Handyman. Expert Interview. 16 July 2020.
About This Article