This article was co-authored by wikiHow staff writer, Darlene Antonelli, MA. Darlene Antonelli is a Technology Writer and Editor for wikiHow. Darlene has experience teaching college courses, writing technology-related articles, and working hands-on in the technology field. She earned an MA in Writing from Rowan University in 2012 and wrote her thesis on online communities and the personalities curated in such communities.
This article has been viewed 1,631 times.
Learn more...
Do you want to record audio from Discord? Maybe you're making a podcast and Discord is the only option available, so how do you record that audio? Or maybe you're creating a tutorial and need to capture the sounds from Discord. First, be aware that recording conversations without consent or knowledge from everyone involved could be illegal in your area. Second, know that there are several different ways that you can record audio in Discord using your computer or phone. This wikiHow article teaches you the best and easiest ways you can record Discord audio whether you're on your computer or phone.
Things You Should Know
- Using Craig, if you're a server owner or admin, is the easiest and best way to record audio on Discord whether you're on a computer or a phone.
- If you aren't an owner or the admin of a server, you can use OBS to record audio from Discord on a computer.
- For light-weight and easy recording, try Audacity (which only records your mic) and Windows Xbox Gaming Bar.
Steps
Craig Bot
-
1Get the Craig Bot for your server. You have to be the creator or an admin of the server that you want to record audio from.
- This is the best method for recording audio in Discord that you can use with a few text commands. When Craig is active on your server, you'll see a visible warning displayed on your screen that a channel is being recorded, so there are no immoral recordings. You'll also see each speaker recorded on a different track, so you'll be able to edit out certain speakers if you need to.
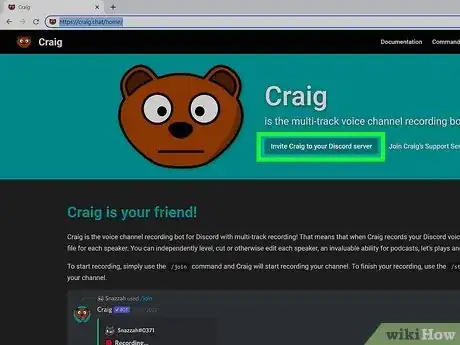
- Go to https://craig.chat/home/ and click Invite Craig to Your Discord Server. While you can use Craig in Discord on your phone, you'll first need to invite the bot from your computer.
-
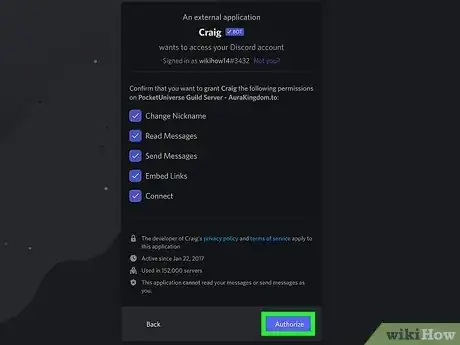
2Authorize Craig to access your server. After you click the website link on your computer, you'll see a pop-up page where you need to give the bot manager permissions before you can continue.
- Select your server from the drop-down menu under "Add Bot to:" then click Authorize.
- Craig will join your server, and you should see a message that the bot has joined. Once the bot is added to your server, you can record conversations in channels from your Mac, Windows, Android, or iPhone.
Advertisement -
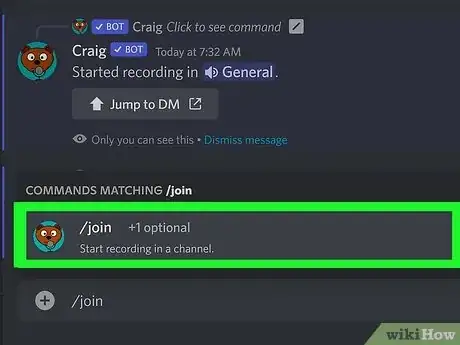
3Go to the channel you want to record and enter the following command for Craig. Once everyone in the channel gives permission to be recorded (if that's a legal issue for your area), you can enter a text message for the bot that you can use on Mac, Windows, Android, or iPhone:
- "/join"[1]
- Craig will join your channel and immediately begin recording. When you're done, type "/stop" and Craig will stop recording and leave.
- If the slash command does not work, try ":craig;,join" and ":craig:, stop".
-
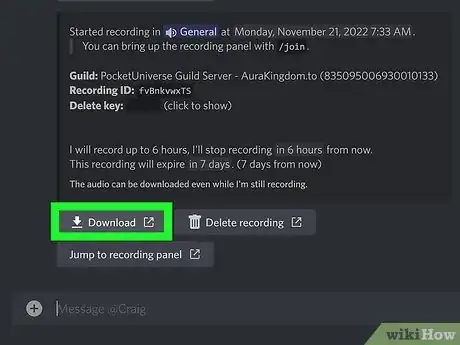
4Click the download link. When you're done recording, you'll get a private message from the bot with your audio files to download. These files are available in a variety of formats including AAC or FLAC as well as saving to your Google Drive.
OBS
-
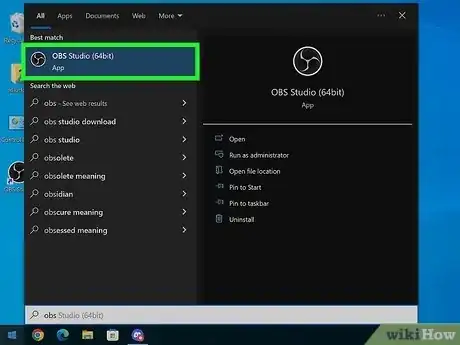
1Open OBS. If you don't have the program, download it for free.
- This is the best method to record audio on Discord if you don't own the server. This software is popular for streaming gameplay.
-
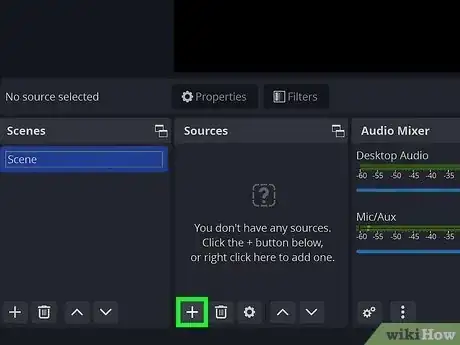
2Click + in the "Sources" panel. This plus sign is usually at the bottom of the "Sources" panel and will open a menu.
-
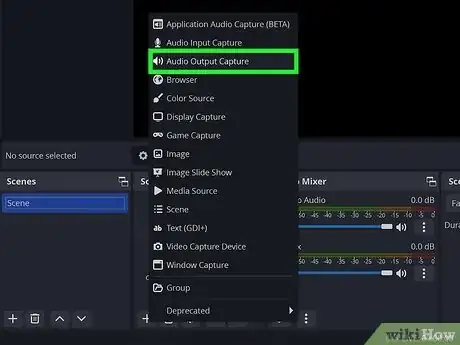
3Click Audio Output Capture. It's usually the second option with an icon of a speaker.
- This will let you configure the program to record the sound that's coming from your speakers.
-
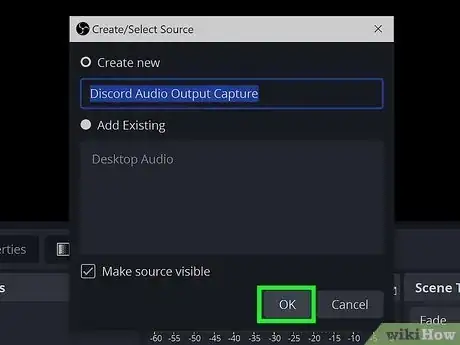
4Name your audio source and click OK. In the "Create/Select Source" window, name the source so you'll recognize it (something like "Audio Output" would work).
-
5Select if you're using Speakers or Headphones then click OK. You'll need to specify where the sound is coming from that you want to record. So if you have headphones on that your Discord outputs to, choose those in the drop-down in the "Properties" window.
-
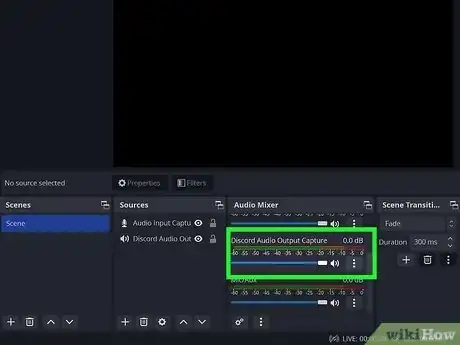
6Make sure you have your settings correct. Under the "Audio Mixer" panel, you'll see multiple sliders that should move if they are picking up sound in OBS. If you want to test this, play music on your computer through your headphones and see if the slider under "Audio Output" moves. If it does, you've set it up correctly. You can also adjust the blue slider to change the volume of the output as well.
- You'll also see a "Mic/Aux" slider that will be there by default. This line ensures that your voice is recorded as well as your audio output.
- If "Mic/Aux" isn't there, click + > Audio Input Capture and add your microphone.
-
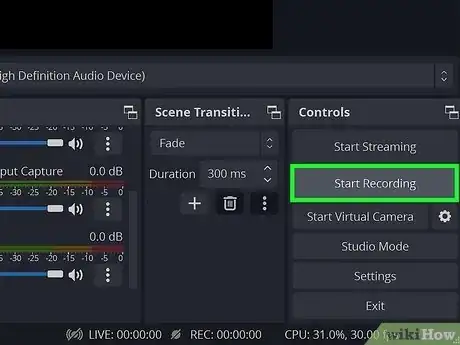
7Click Start Recording. It's in the panel on the lower right side of the window labeled, "Controls."
- By default, the audio files are saved as blank video files in MKV format. Click Settings under "Controls" to change the file format.
- The Start Recording button will change to Stop Recording so you can click that again to stop recording.
-
8Find your files. To do this, go to File > Show Recordings and you'll see all the recordings you've saved.[2]
Audacity
-
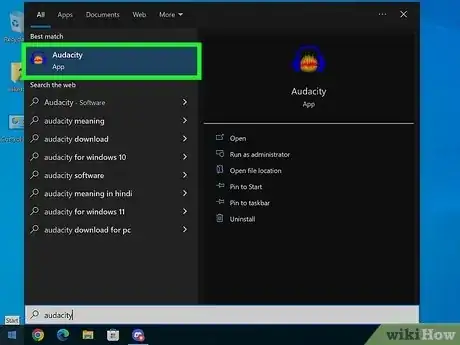
1Open Audacity. If you don't have this program, you can get it for free for Mac, Windows, and Linux.
- Using Audacity isn't recommended for recording multiple speakers or multiple audio sources, but this is a pretty good platform if it's just you speaking.
-
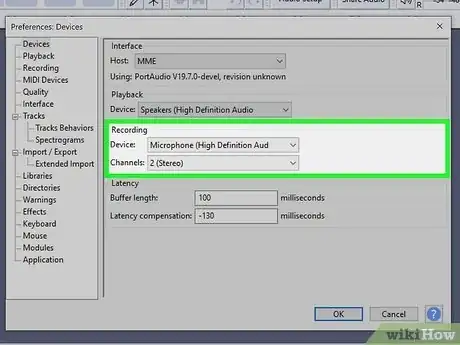
2Set your microphone as the recording device. To do this, go to Edit > Preferences > Devices and select your microphone under "Recording."
- If you're not already in the Discord channel that you want to record yourself in, get in it now!
- If you want to record the sound from other people in Discord, you shouldn't be wearing headphones, but allow the voices to play through your speakers. In that case, you want your mic to pick up the audio coming through your speakers so it's recorded.
-
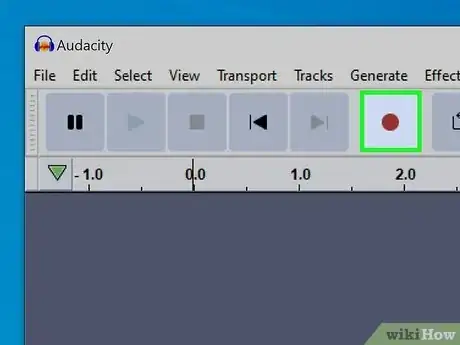
3Click the red button to start recording. You'll see the recording button at the top of the Audacity window.
-
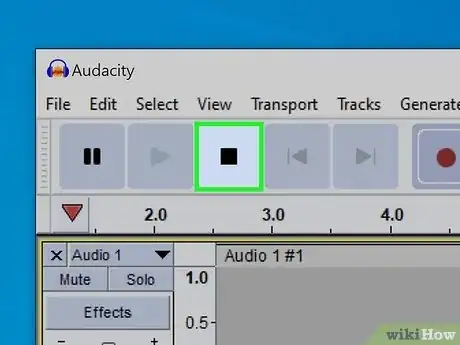
4Click the black square to stop recording. You'll see the stop button at the top of the Audacity window.
-
5Export your file. Go to File > Export and pick a file format to save your recording.
Windows Xbox Game Bar
-
1Press ⊞ Win+G. This only works for Windows 10 and 11 computers with an active Xbox account.
-
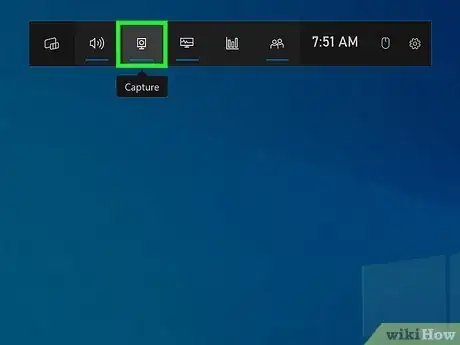
2Click the "Capture" icon. It's in your Xbox bar at the top of your screen and looks like an external speaker icon.
- If you don't see it to the left of the monitor icon for "Performance," click the leftmost icon called the "Widget Menu" and select Capture.
-
3
-
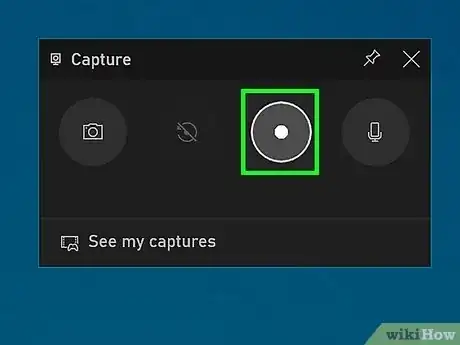
4Click the circle icon. This will capture your screen, any sound output, and your mic.
-
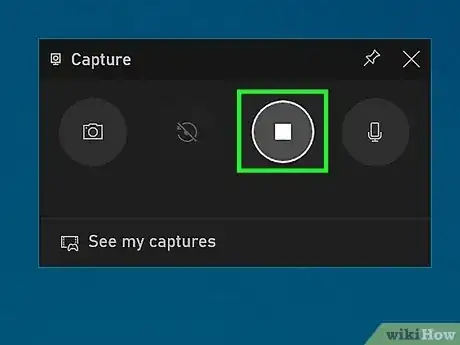
5Click the square icon. This will end the recording.
- You can also press Win + Alt + R to start and stop recording.
-
6Find your files. You should see a notification on your screen that the recording has been saved. Click it to re-watch the video file. You can also click See my captures from the "Capture" window to see and share your files.
- These are video and audio files that are saved in MP4 format.








-Step-8-Version-2.webp)






-Step-8-Version-2.webp)
