This article was co-authored by Maggie Moran. Maggie Moran is a Professional Gardener in Pennsylvania.
wikiHow marks an article as reader-approved once it receives enough positive feedback. In this case, 95% of readers who voted found the article helpful, earning it our reader-approved status.
This article has been viewed 73,844 times.
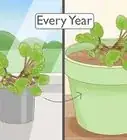
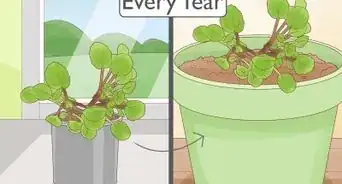
While the African Violet may be native to Tanzania, it has become a common household plant across the world. These lovely plants, with colors ranging from lilac to deep violet, are most often grown in pots on kitchen windowsills and on tables near indirect light sources. By creating an African Violet trimming from an existing plant, replanting your leaf stem, and later splitting up your plants, you can successfully propagate these gorgeous plants.
Steps
Creating an African Violet Trimming
-
1Prepare the potting medium. Purchase a commercial potting mix that contains vermiculite and perlite soil conditioners. Add this to a small plastic pot until it is 3/4 of the way full. Add just enough water to the potting mix to dampen it.
- Vermiculite and perlite help your soil retain moisture.
- Your pot should be 3–6 inches (7.6–15.2 cm) in diameter, with drainage holes in the bottom.
-
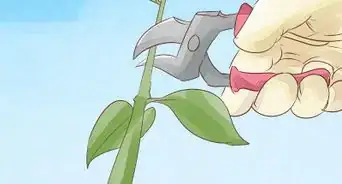
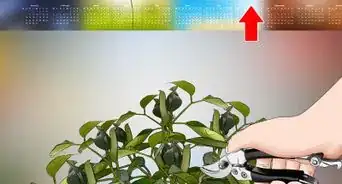
2Take an African Violet cutting from a host plant. Locate a healthy, mature leaf that is growing close to the base of an existing African violet. Cut off the leaf stem with a sharp, clean knife.
- A healthy host plant with have a green stem without brown patches.
- A mature leaf should be 2–3 inches (5.1–7.6 cm) in length. Look for a healthy green leaf.
- The cutting needs to be 1–1.5 inches (2.5–3.8 cm). Trim it down as necessary.
Advertisement -
3Coat the stem with rooting hormone. Carefully dip the tip of your cutting into the rooting hormone. You will want to plant your cutting right away.[1]
- Rooting hormone is a natural or synthetic hormone that stimulates root growth in plants.
- It can be purchased at most garden centers.


Planting Your Stem Leaf
-
1Place the cutting into the prepared soil. Make a small hole in the middle of the damp potting mix, about 1 inch (2.5 cm) deep. Plant the leaf in the hole firmly, and cover the bottom (where you applied the rooting hormone) with soil.[2]
- Be sure that the top of your cutting is sticking out of the soil.
-
2Cover the pot with a plastic grocery bag. Place the pot into a clear plastic grocery bag and tie it at the top. This bag will create a greenhouse effect, enabling your young plant to stay warm and grow.
- You can use a clear resealable plastic bag or a plastic lettuce container in place of a grocery bag.
-
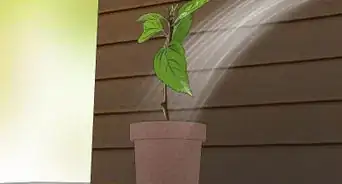
3Place the covered pot in an area that gets plenty of indirect sunlight. Your plant is going to need 12 or more hours of indirect sunlight each day. Find a suitable location for your plant. If you are planning to place it near a window, make sure there are no cold drafts.[3]
- If you have fluorescent lights, you can use these as a light source for your plant.
-
4Water the plant with tepid water every 3-4 days, as needed. Every 3-4 days, open your bag and place a finger in the soil. If it is dry, add 0.5 cups (120 ml) of water to the plant. If you notice that the interior of the bag has become wet with humidity, take the bag off for 2-3 hours to allow the plant to dry. Dry off the inside of the bag before placing it back on the plant.[4]
- If the water from your faucet is too cold, allow to it warm up to room temperature.
-
5Wait 2-3 months for shoots to appear. Maintain this routine with the plant inside the bag until you see small plant shoots appearing at the base of your stem leaf. Once you notice the shoots, you can remove your plant from the plastic bag.


Splitting Up Your Plants
-
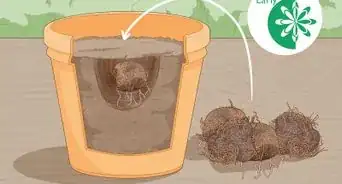
1Remove the leaf stem from the potting mixture. Carefully wiggle the original leaf stem loose from the soil, making sure not to damage the roots. As you remove the leaf stem, you should see the beginnings of small plants growing from the bottom.
- Wait until the leaves of the small plants are at least the size of a dime before you separate them.
- Hold the leaf stem at its base to reduce the risk of breaking it off.
-
2Cut the individual plants away from the leaf stem, maintaining their roots. Wiggle the plants apart from one another, and use a knife to separate them completely. Make sure each individual plant maintains some of the roots.[5]
-
3Plant each small plant in a pot with potting soil. Just as you did with your first leaf stem, plant each of these tiny plants in a pot with commercial potting soil. Water each plant until it is just moist.[6]
- Since these tiny plants should already have roots, you do not need to apply rooting hormone. However, you can add a 20-20-20 fertilizer to the soil to help the plants grow faster.
-
4Put a plastic bag back over each of the plants for 2 weeks. Use a plastic grocery bag to cover each plant and place it where it can receive copious indirect sunlight. After about 2 weeks, your plants should be ready to survive outside of their “greenhouse” bags.
- Make sure your plants receive 12 hours of indirect sunlight.
- Open the bags every 3-4 days to provide water and make sure it is not too humid inside the bag.
-
5Monitor the plants for disease or pests. African violets are susceptible to fungal infections and pests like mealybugs, thrips, and mites. Examine your plants weekly and treat any diseases or pests as soon as possible so they don't spread.[7]
- For fungal infections, cover the leaves of your plants with sulfur. After several days, brush the sulfur off the leaves.
- For mealybugs, thrips, and mites, spray your plants with an insecticide.


Expert Q&A
-
QuestionWhy are my African violets not blooming?
 Maggie MoranMaggie Moran is a Professional Gardener in Pennsylvania.
Home & Garden SpecialistThere could be many reasons why your violets are not blooming. Be sure the violet is receiving adequate light, such as on a windowsill. Also ensure that the soil is draining properly and the violets are receiving adequate food, water, and fertilizer. -
QuestionCan you root an African violet in water?Maggie MoranMaggie Moran is a Professional Gardener in Pennsylvania.
Home & Garden SpecialistYes, plain water works just fine, however, you may want to boil it ahead of time to remove any microorganisms. -
QuestionHow do you start an African violet from a leaf?Maggie MoranMaggie Moran is a Professional Gardener in Pennsylvania.
Home & Garden SpecialistYou can propagate violets from cuttings by simply removing the cutting with the roots intact, then placing it 2-4 inches deep in potting soil. Cover the plant with a plastic bag for two weeks.
Things You'll Need
- Plastic pots
- Knife
- Plastic bag
- Rooting hormone
- Potting mix with vermiculite and perlite
- African Violet plant


References
- ↑ https://gardenerspath.com/how-to/propagation/cloning-african-violets/
- ↑ https://www.apieceofrainbow.com/grow-african-violet/
- ↑ https://www.agardenforthehouse.com/my-african-violet-growing-guide/
- ↑ https://www.agardenforthehouse.com/my-african-violet-growing-guide/
- ↑ https://www.apieceofrainbow.com/grow-african-violet/
- ↑ https://www.apieceofrainbow.com/grow-african-violet/
- ↑ https://www.avsc.ca/htm/pests&diseases.htm
About This Article

To propagate African violets, start by cutting a leaf from an existing plant and coating the tip where you made the cut with rooting hormone. Next, plant the cutting into a small plastic pot filled ¾ of the way full with potting mix and seal the pot inside a clear plastic grocery bag. Place the pot in an area that gets plenty of indirect sunlight, and water the plant every few days for 2 to 3 months. Once you see shoots appearing at the base of the cutting, separate the shoots from the leaf stem and plant them individual pots filled with potting mix. For more advice from our Horticultural reviewer, including how to monitor your new plants for disease or pests, keep reading!