wikiHow is a “wiki,” similar to Wikipedia, which means that many of our articles are co-written by multiple authors. To create this article, volunteer authors worked to edit and improve it over time.
There are 9 references cited in this article, which can be found at the bottom of the page.
The wikiHow Culinary Team also followed the article's instructions and verified that they work.
This article has been viewed 230,766 times.
Learn more...
The best way to preserve a pumpkin will depend on what sort of pumpkin you want to preserve and why. You can preserve a carved pumpkin by keeping it sanitized and moist, but a decorative whole pumpkin needs to be dried out in order to last. If you plan on preserving a sugar pumpkin for culinary purposes, you will need to cook it and freeze it. Continue reading to learn more about each method of pumpkin preservation.
Steps
Preserving a Carved Pumpkin
-
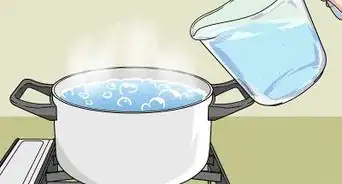
1Soak the pumpkin in a bleach solution. Mix together 1 tsp (5 mL) of bleach and 1 gallon (4 L) of water. Let the pumpkin soak in this solution for at least 1 hour.[1]
- The water is intended to hydrate the pumpkin flesh and prevent it from drying out too quickly. The bleach is an antimicrobial agent that will kill most of the surface bacteria and mold spores on the pumpkin.
- You can soak the pumpkin up to 8 hours, but soaking it too long can actually infuse the flesh with too much moisture, making it more prone to rot.
-
2Wipe the pumpkin dry. Use a clean rag or paper towels to remove most of the moisture puddled inside the pumpkin. Dry the outside of the pumpkin, as well.
- Leaving too much moisture puddled inside can actually cause the pumpkin to rot.
Advertisement -
3Spray with additional bleach. Combine 1 Tbsp (15 mL) of bleach with 1 quart (1 L) of water in a spray bottle. Douse the exposed flesh with this stronger bleach solution.[2]
- The bleach used in the soaking solution was a small amount only intended to stop the growth of surface bacteria. Using too much bleach in the soaking solution can weaken the pumpkin. By spraying the pumpkin with a stronger bleach solution after soaking it, you can sanitize it further without weakening the structure of the pumpkin.
-
4Continue drying the pumpkin upside-down. Prevent puddles of moisture from sitting inside the pumpkin by inverting it onto a clean, dry rag and letting it dry completely.
- Give the pumpkin at least 20 minutes to dry. You could let it sit up to 1 hour if desired, though.
-
5Coat the cut areas with petroleum jelly. Rub all of the exposed flesh with a fine coating of petroleum jelly.
- The petroleum jelly will lock in moisture, preventing the pumpkin from dehydrating as quickly as it might do otherwise. It will also block out new bacteria and mold.
- Do not use petroleum jelly without first using bleach. The bleach is needed in order to kill bacteria and mold already on the pumpkin. If you skip this step and go straight to the petroleum jelly, you will actually trap preexisting bacteria and mold on the surface of the pumpkin, thereby speeding the decay process.
- Vegetable oil or a vegetable oil spray could also be used instead of petroleum jelly.
-
6Wipe away the excess. If you got excess petroleum jelly on the non-carved portions of the pumpkin, wipe it away with a clean rag or paper towel.
- Note that this is more for the sake of appearance rather than necessity.
-
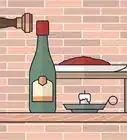
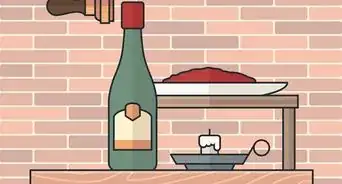
7Keep the pumpkin cool and moist. Display your pumpkin in a spot that does not receive direct sunlight. A shaded area works best.[3]
- Heat will speed the decay process and placing it in a dry area will cause the flesh to dehydrate.
- When not in use, consider storing the pumpkin in a refrigerator or draping a damp towel over it.


Preserving a Decorative Whole Pumpkin
-
1Select a pumpkin with a long stem. The best option is a freshly harvested pumpkin with at least 2 inches (5 cm) of stem.
- A long stem is important because it helps wick away moisture from the pumpkin. A pumpkin with no stem or a very short stem is more likely to retain moisture.
-
2Clean the pumpkin with soap and water. Combine 1 to 2 Tbsp (15 to 30 mL) of mild dish detergent with 1 gallon (4 L) warm water in a large bucket. Wash the pumpkin in this solution to remove surface bacteria.
- Use a mild liquid dish soap instead of a harsh cleanser. Harsh cleansers can be too abrasive.
- Rinse the soapy solution off the pumpkin once finished.
-
3Wipe the pumpkin dry. Use a clean rag or clean paper towels to dry the pumpkin completely.
- This preservation method aims to dry the pumpkin out rather than keeping it moist. As such, you should manually remove as much of the moisture as possible by wiping it away.
-
4Spray the pumpkin with rubbing alcohol. Pour a little rubbing alcohol into a spray bottle and mist the surface of the pumpkin, coating it completely without drenching it.[4]
- You could also spray the pumpkin with a household cleaner.
- Rubbing alcohol and household cleaners are both used to protect the surface from new bacteria and mold spores.
- Do not drench the pumpkin. Too much rubbing alcohol can be abrasive and might cause damage to the pumpkin. Too much could also cause moisture to build.
-
5Dry the pumpkin out over several weeks. Place the pumpkin on several layers of newspaper in a dark, warm, dry area. Let it dry out for several weeks until the pumpkin feels notably lighter.
- Make sure that the area you choose has good ventilation. Otherwise, the air can become stagnant, causing moisture to build up as a result. Moisture can cause the pumpkin to rot.
- Warmth speeds up the drying process and darkness preserves the color. You could also place the pumpkins beneath an electric fan to speed the drying process further.
- Change the newspaper every few days. As it absorbs the moisture of the pumpkin, it will become damp. This dampness can cause your pumpkin to rot if it is not removed.
- In addition to feeling lighter, you should also be able to hear seeds rattling around inside the pumpkin when you pick it up.
-
6Seal the surface of the pumpkin. After the pumpkin has dried out completely, apply a coat of paste wax over the surface to seal it and protect it against bacteria.
- Clear shellac can also be used instead of paste wax.


Preserving a Cooking Pumpkin
-
1Use a fully ripe pumpkin. The pumpkin should be a deep orange color on the outside, and its flesh should have a fine texture.[5]
- Avoid using pumpkins with stringy or dry flesh.
- A pumpkin of higher quality will last longer and better than one of low quality.
- This method preserves the pumpkin by freezing it. Freezing is the easiest way to preserve pumpkins and is also thought to produce the best quality product.[6]
-
2Wash the pumpkin. Rinse the pumpkin under lukewarm running water.
- If necessary, gently scrub the pumpkin with a vegetable brush to remove dirt and debris from the surface.
- Soap is not necessary, nor is it advised.
-
3Cut the pumpkin into chunks. Use a large serrated knife to cut the pumpkin in half. Then, cut each half into 2- to 3-inch (5- to 7.6-cm) chunks.[7]
- A serrated knife is recommended. A smooth blade is more likely to slip against the tough skin of the pumpkin, which could cause you to accidentally cut yourself.
- You could peel the pumpkin chunks before boiling them, but waiting until after the pumpkin has been cooked will be easier.
-
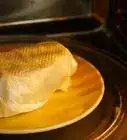
4Boil the pumpkin until soft. Place the pumpkin chunks in a medium saucepan and cover them with water. Boil the pumpkin for about 25 to 30 minutes, or until the flesh feels tender.
- You could also bake the pumpkin. Cut the pumpkin in half and place each half, face-down, in a baking dish. Cover with foil and cook in an oven preheated to 375 degrees Fahrenheit (190 degrees Celsius) for 1.5 hours.[8]
-
5Remove the pulp. Let the cooked pumpkin cool enough for you to handle it. Scrape the pulp from rind and transfer it to a medium bowl.
- Use a metal spoon or similarly rigid utensil to dig out the flesh.
- Once cooked, the flesh should separate from the skin with relative ease.
-
6Mash the pulp. Use a potato masher to mash the already soft pulp into a puree.
- You could also accomplish this task with a hand-held immersion blender or a food processor.
-
7Cool the pumpkin. Place the bowl or pan containing the pumpkin in cold water until the pumpkin puree cools to room temperature.
- Do not allow excess water to get into the mashed pumpkin.
- Stir the mashed pumpkin occasionally as it cools.
-
8Pack the pumpkin into rigid containers. Use containers made from non-reactive materials like plastic or glass. Make sure that the containers are approved for freezer use.
- Leave at least 1 inch (2.5 cm) of empty headspace in between the top of the pumpkin and the top of container. This will allow the pumpkin to expand as it freezes.
- Tightly seal the containers before freezing them.
-
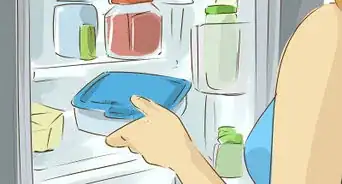
9Freeze the pumpkin until ready to use. The pumpkin should last about 3 to 6 months without developing any change in flavor or texture. At best, you may even be able to keep the pumpkin for over a year.[9]

Community Q&A
-
QuestionCan I preserve a small, white pumpkin forever?
 Community AnswerNot forever, but you could preserve it for a long time using these methods. Buying a plastic pumpkin would be ideal if you wanted one to keep forever.
 -
QuestionCan I eat a pumpkin after it has been preserved in bleach?
 Community AnswerNo, do not eat pumpkin that has been preserved in bleach.
 -
QuestionCan I put the carved pumpkin in the refrigerator?
 Community AnswerNo, because if you do that the carved pumpkin would become soggy from the inside to the outside. It'll fall in on itself in a few days!
Things You'll Need
Method One: Preserving a Carved Pumpkin
- Bleach
- Water
- Large bucket
- Spray bottle
- Clean rags or paper towels
- Petroleum jelly or vegetable oil
- Damp towel
- Refrigerator
Method Two: Preserving a Decorative Whole Pumpkin
- Mild liquid dish soap
- Water
- Bucket
- Clean rags or paper towels
- Spray bottle
- Rubbing alcohol or household cleaner
- Newspaper
- Electric fan
- Paste wax or clear shellac
Method Three: Preserving a Cooking Pumpkin
- Vegetable brush
- Serrated knife
- Medium to large saucepan
- Water
- Baking pan and aluminum foil (optional)
- Metal spoon
- Potato masher, food processor, or immersion blender
- Rigid, freezer-safe container


References
- ↑ https://plantcaretoday.com/preserve-pumpkin.html
- ↑ https://www.today.com/home/preserve-your-pumpkin-make-it-last-long-I389846
- ↑ http://whatscookingamerica.net/Q-A/PresPumpkin.htm
- ↑ https://plantcaretoday.com/preserve-pumpkin.html
- ↑ https://www.canr.msu.edu/news/how_to_choose_the_right_pumpkin
- ↑ http://nchfp.uga.edu/tips/fall/pumpkins.html
- ↑ https://www.healthier.qld.gov.au/guide/how-to-chop-a-pumpkin/
- ↑ http://allrecipes.com/howto/baking-with-fresh-pumpkin/
- ↑ https://www.eatbydate.com/fruits/fresh/how-long-does-pumpkin-last/
About This Article
To preserve a pumpkin, start by washing the surface of the pumpkin with mild dish soap and warm water to remove any bacteria. Then, dry the pumpkin completely with a rag before spraying it with rubbing alcohol so it's completely covered but not drenched. After you spray the pumpkin, put it on some newspaper in a warm, dry area and let it dry out for several weeks, changing out the newspaper every few days so it's not too moist. Finally, after the pumpkin has dried out, cover it with a coat of paste wax or clear shellac to protect it from bacteria. To learn how to preserve a carved pumpkin, keep reading!