This article was co-authored by wikiHow Staff. Our trained team of editors and researchers validate articles for accuracy and comprehensiveness. wikiHow's Content Management Team carefully monitors the work from our editorial staff to ensure that each article is backed by trusted research and meets our high quality standards.
This article has been viewed 83,212 times.
Learn more...
Pearls are always an elegant accessory. But over the course of time, the line holding your pearls together will likely break at some point, causing your pearls to scatter. Or it might be the case that you've discovered an envelope full of the loose pearls of a loved one that had come unstrung and been forgotten about. In either case, restringing your pearls and restoring your necklace to its former glory is a matter of having the right materials and using the correct technique.
Steps
Readying the Line for Your Pearl Necklace
-
1Choose a suitably thick line for your pearls. Pearls come in many shapes and sizes, so you'll have to choose your line accordingly. Silk line is the traditional choice for pearls and comes in widths ranging from thin (#0) to thick (#16). If you prefer not to use silk, a nylon line will work just as well and may hold up better over time. [1]
- If you have smaller pearls, you'll likely want to use a #2 thickness silk, average pearls will likely fit size #4, and larger pearls should fit on size #6.
-
2Measure out and use scissors to cut your silk line. Silk is the traditional choice used in stringing pearl necklaces. Due to the fact that silk stretches, you'll want to gently pull your thread taut to pre-stretch it after you snip your length free from its spool. This will prevent your necklace from stretching longer than you intend.
- For the purposes of providing a guided example, a 5-foot (1.524 m) length of silk thread will be used. This length is sufficient for a 16 to 20 inch (40.64 to 152.4 cm) knotted strand.
- Generally, necklace lengths are broken down accordingly:
12 - 13 inches (30.5 - 33 cm): collar length. This necklace will lay across the middle of the neck without much loose line.
14 - 16 inches (35.6 - 38.1 cm): choker length. A classic style that encircles the neck comfortably.
17 - 19 inches (43.2 - 48.3 cm): princess necklace length. One of the most common lengths, well suited for plunging necklines.
26 - 36 inches (66 - 91.4 cm): opera necklace length. A lower hanging length of pearls that will hang about to your sternum.
Advertisement -
3Safeguard your silk line from deterioration with wax. Silk is a resilient fiber, but over time the oil from your skin, residue from soap, and other environmental factors will cause your line to weaken. To prevent this from happening, you should coat your line with beeswax.
- Rub a small amount of beeswax along the entire length of silk thread, then stretch the silk thread once more after applying the beeswax.
-
4Strengthen your string by doubling it. Fold the silk thread in half and tie a knot connecting the loose ends together. You might also use a bead clamp to fasten the ends together.[2]
-
5Lay down a towel or bead mat to prevent spills. Scattered pearls can be easily lost in the nooks and crannies of your home. You should count your pearls beforehand so you know the total number in case a spill happens. Then, lay a towel down where you are working so that the pearls nest in it instead of rolling away.
- Beading mats and trays are specialty tools used by serious beaders, but these can also make your pearl necklace making experience more efficient.


Stringing Your Pearls
-
1Thread your needle and string your pearls. You'll want to use a thin wire needle, which should fit easily through your pearl holes, to string pearls one at a time onto your thread. If you have a special pearl you plan on placing centrally, or different varieties you plan on using in a pattern, remember that your pearls will be strung in reverse fashion - the first pearls on the line will be at one end of your line, and the last pearls at the other.
-
2Verify the thickness of your string against your pearls. You should check the width of your thread by passing the threaded wire needle through a pearl and then back again. If the needle can't pass through the hole, a smaller size thread would likely suit your situation best.
- The line is generally considered to be too small if a pearl can slip over an overhand knot.
-
3Thread your first clamshell tip. Thread your needle through one of your clamshell tips and string it all the way to the end knot connecting the loose ends of your line. Once your knot is nestled inside the clamshell tip, add a dab of glue and close the clamshell tip to close off that end of the line.
-
4Tie an overhand knot to separate your pearls from the tip. Pearls can deteriorate over time if rubbed against a hard surface, like your metal clamshell tips. By tying a knot between the clamshell tip and your pearls, you'll increase longevity.
-
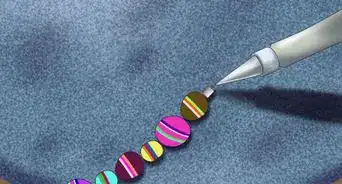
5String your pearls and knot in between. Take your threaded needle and, one by one, string your pearls on the silk line of your necklace. Knots are a good way of adding spacing to the pearls of your necklace, but these will also prevent wear and tear on your pearls from rubbing against each other. An overhand knot should do nicely for the purposes of spacing your pearls.[3]
- If you decide on using knots to space your pearls, be sure your knots are tied tightly. You should be able to cinch the knot tightly against the previously strung pearl by sliding it toward the pearl with your fingernail.
- For greater precision when tying the knots of your pearl necklace, you should use tweezers.
-
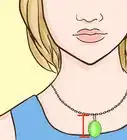
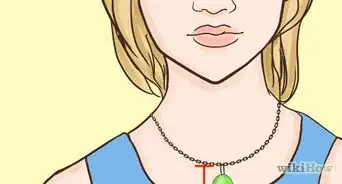
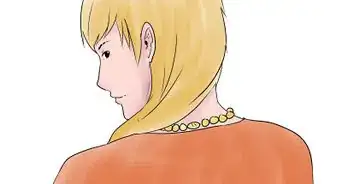
6Check length throughout the process. The way a necklace drapes across your neck will be different from how it looks sitting on the table. You should verify the length of your necklace as you string by pinching the loose end with one hand to keep pearls from falling off and holding the necklace against your neck.
-
7Attach a clamshell tip to the loose end. You should pull your line first through the side opposite where the line will be nested in the cup of the clamshell. Then knot your line securely and tuck this knot inside the hollow part of the clamshell tip. Place a bad of jewelry glue onto the knot and close the clamshell.
-
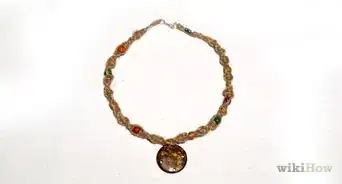
8Add a clasp and jump ring to complete the necklace. Take your pliers and bend your clamshell tips into an open position so you can link one tip to your claps and the other to your jump ring. Once the clasp and jump ring are in place, bend your clamshell tips closed and dab a small amount of glue where the clamshell tip end bends back in on itself to prevent it from coming loose.


Things You'll Need
- Bead clamp
- Beeswax
- Clamshell tip (2)
- Clasp
- Jewelry glue
- Jump ring
- Pearls
- Pliers (small, needle nose recommended)
- Silk thread
- Scissors
- Small twisted wire needle

References
About This Article

If you want to make a pearl necklace, thread a piece of waxed silk thread onto a needle. First, thread the needle through a clamshell clasp, then add a dab of glue and close the clamshell tip. Tie an overhand knot just against the clamshell, then pass the needle through the hole in your first pearl. Tie another knot on the outside of the pearl, then continue stringing pearls and adding knots all the way down the necklace. When you’re finished, attach a clamshell tip to the loose end, then add a clasp and a jump ring to finish the necklace. Read on to learn how to wax your silk thread!