This article was co-authored by wikiHow Staff. Our trained team of editors and researchers validate articles for accuracy and comprehensiveness. wikiHow's Content Management Team carefully monitors the work from our editorial staff to ensure that each article is backed by trusted research and meets our high quality standards.
There are 8 references cited in this article, which can be found at the bottom of the page.
The wikiHow Video Team also followed the article's instructions and verified that they work.
This article has been viewed 56,893 times.
Learn more...
A Jack in the Box is a fun toy that's been around for hundreds of years. While it may seem complex, a Jack in the Box actually works with very simple mechanics. Making your own can be a fun arts and crafts activity. With some cardboard, glue, magnets, a spring, and a few other parts, you can make your very own Jack in the Box.
Steps
Constructing the Box
-
1Find a sturdy piece of cardboard. You'll need a thick and sturdy piece of cardboard for the box to support itself. The kind from a large packing box should work well.[1]
- You'll be cutting out 6 squares that are each 6" x 6" (15 cm x 15 cm), so your piece of cardboard will need to be at least 18" x 12" (45 cm x 30). If you can't find a piece that big, then several pieces will work fine too.
-
2Draw six 6" X 6" (15 cm x 15 cm) boxes on the piece of cardboard. These six squares will form the walls, floor, and lid of your Jack in the Box. Use a ruler to measure and make sure your lines are straight.[2]
- Make sure you use a dark pen or marker. Otherwise, you may not be able to see your lines when you cut.
Advertisement -
3Cut out each box. Use a pair of sharp scissors or a box cutter. Carefully cut along the lines you drew so the cardboard squares are the right size. If you're using a box cutter, make sure the cardboard is placed on a solid surface.[3]
- Wear gloves during this step to prevent paper cuts or any injuries for the scissors or box cutter.
-
4Glue 4 of the squares together, making a cube with no top or bottom. Hot glue is the best choice for this step. White glue won't be strong enough to keep the box together. This forms the outside structure of the box.[4]
- Glue the edges of the cardboard together to form the cube. If the glue doesn't seem to be making a strong seal, you can use strips of tape to secure the cube while the glue hardens.
-
5Glue another square to the bottom of the cube. Line up the square perfectly with the rest of the cube or your box will be uneven. This will form the floor of the box.
- Lay the square down flat and put glue around the edge. Then slowly lower the box onto the square, making sure the glue makes contact with all edges of the box.
-
6Make a hinge with the final square. Don't glue the final square to the box, or your Jack in the Box won't open. Instead, rest the square on top of the box, making sure to line up all the sides. Then, use a strip of tape to fasten one side of the square to the box. This will form a simple hinge that allows your box to open.[5]
- Clear tape is the best choice here. Colored tape might throw off your designs when you decorate your box later on.

Sealing the Box
-
1Find 2 small magnets. There are lots of ways you could make the seal for your box, but a simple method uses magnets.[6] Start by finding 2 magnets. These should be square or circle and small, not more than 1 inch (2.5 cm) long.
- Craft or hardware stores usually have small magnets that are meant to hold boxes or cabinets closed. Looking for these should give you a good start.
- Remember to find out which sides of the magnets attract each other. Those are the two sides you'll line up when making your seal.
-
2Glue one magnet to the bottom of the box's lid. This should be on the opposite side where you placed the tape. On the edge of the lid and in the center, glue the first magnet.[7]
-
3Glue another magnet directly under the first magnet. The next magnet should be placed on the inside wall of the box so the two magnets touch each other when the lid is closed. In this position, they will attract each other and keep the box sealed.[8]
- To find the right position for the second magnet, start by closing the box slowly. This way you'll be able to see where the magnet will rest when the box is sealed. The best place for the second magnet is right under that point, so the two magnets touch when the lid is closed.
-
4Test out your seal. See if your seal is holding after you glue both magnets. Pull up slightly to see how tight the seal is. Flip the box upside down and see if it holds.
Making the Spring Puppet
-
1Glue a compression spring to the bottom of the box. Draw a circle in the middle of the box's floor to see where you'll place the spring. Then put glue on the bottom of the spring and place it over the circle you drew. Hold the spring down for a few seconds to make sure the glue seals.[9]
- Compression springs come in lots of sizes. For this project, you'll want one that's slightly taller than the box, or about 7 inches (18 cm). Your local craft store should have plenty of options.[10]
- Test the seal by making sure the box stays closed when the spring is in place. If the box doesn't stay closed, your spring is too big or your seal is too loose.
-
2Put a sock puppet on the spring. Your Jack in the Box needs a character to pop out! A sock puppet is perfect because it can fit snugly over the spring.[11]
- You could also draw and cut out a simple face from a piece of paper and glue it to the top of the spring for a simpler design.[12]
-
3Test your box. With all the pieces in place, it's time to make sure your box is working! Put it on a table and lift up the lid. Your puppet should pop out of the box when you do this.[13]
-
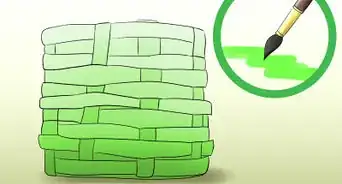
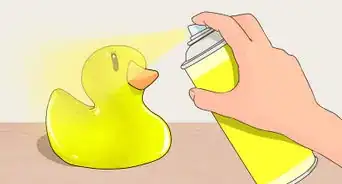
4Decorate your box. Now that your box is complete, you can decorate it however you want! Use markers to draw on its sides, glue sparkly paper over it, cover it with stickers--use your imagination!

Community Q&A
-
QuestionCan you use duct tape if you don't have clear tape?
 Sahasra Reddi _ Student - MillsParkESCommunity AnswerDuct tape will work, as long as it's clear. If you aren't planning to design yours, colored tape should be fine.
 -
QuestionCan you make one out of paper?
 Michael LevayCommunity AnswerYes, but it won't work well because of the paper 'spring'. I don't recommend paper for it, just for decorating.
Things You'll Need
- Cardboard
- Hot glue
- Scissors
- Ruler
- Clear tape
- Gloves
- Pen or marker
- Compression spring
- Magnets


References
- ↑ https://youtu.be/GeI9JwOEiBE?t=29
- ↑ https://youtu.be/GeI9JwOEiBE?t=29
- ↑ https://youtu.be/GeI9JwOEiBE?t=143
- ↑ https://www.ency123.com/2014/10/jack-in-box-how-to-make-jack-in-box-toy.html
- ↑ https://youtu.be/GeI9JwOEiBE?t=456
- ↑ https://www.instructables.com/id/Haunted-Jack-in-the-Box/
- ↑ https://www.instructables.com/id/Haunted-Jack-in-the-Box/
- ↑ https://www.instructables.com/id/Haunted-Jack-in-the-Box/
- ↑ https://www.popularmechanics.com/technology/a20809/how-jack-in-the-box-works/
About This Article