This article was co-authored by Catherine Palomino, MS. Catherine Palomino is a former Childcare Center Director in New York. She received her MS in Elementary Education from CUNY Brooklyn College in 2010.
This article has been viewed 345,069 times.
Before the age of disposable diapers, parents made cloth diapers at home--you can too! The price of diapers can really add up, straining your budget as a new parent. To save on the cost of diapering, you can try making your own prefold diapers using inexpensive sources of fabric like T-shirts and receiving blankets. You can also do this when caught unprepared or in an emergency. To avoid rashes, be sure to change these types of diapers frequently. Making homemade cloth diapers is simple and straightforward and doesn’t require sewing.
Steps
Folding a T-Shirt Diaper
-
1Use a shirt that is 100% cotton. Cotton is more absorbent than most synthetic fibers, so it makes a better material to use for a cloth diaper.
- Use a short sleeve or three-quarter-length sleeve for best results. A three-quarter length sleeve may make it easier to pin the diaper on larger babies and toddlers, but may be more material than you need for smaller babies.
- Choose a size based on the size of your child. An older baby or toddler may need a large or extra-large shirt, but a newborn would likely only need a small.
-
2Lay the shirt flat. You can do this on the floor or on any other large working surface. Lay it so the sleeves are at the top.Advertisement
-
3Fold one side of the shirt over. The bottom of the shirt should be folded over about 1/3 of the way, and the seam where the sleeve meets the body of the shirt should be just below the center of the neckline. Keep the sleeve of the shirt pointed outward.
-
4Fold the other side of the shirt over. This side should be identical to the fold made on the first side, so that the shirt is folded into thirds. Keep the sleeve pointed outwards. At this point, you should be left with a "t" or cross shape.
-
5Fold the top of the shirt down. Bring the part of the t-shirt extending above the sleeves down over the sleeves. The upper part of the lowercase "t" shape should be folded all the way over, creating a capital "T" shape.
-
6Fold the bottom of the shirt in half. Take the bottom portion of the shirt and draw it up to the bottom sleeve line. Essentially, you are making a fold that shortens the length of the shirt by half. You will still have a capital "T" shape, but it will be a shorter "T."
-
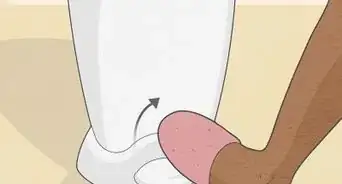
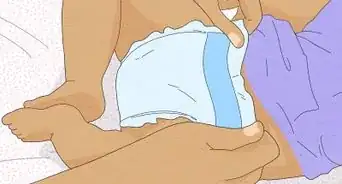
7Wrap the diaper around your baby. Sit the baby on the part of the shirt that starts just below the sleeves. Bring the bottom portion of the diaper up and over the front of your baby, and wrap the sleeves around the back and to the front. Secure the sleeves to the front using diaper pins or Velcro closures.[1]
-
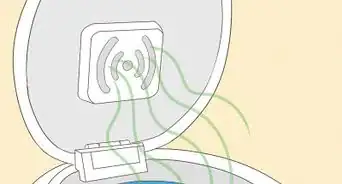
8Place a diaper cover over the diaper. A waterproof diaper cover is essential for preventing leaks. If you have one, add a diaper cover to increase the absorbency of the diaper. The fabric for these types of diapers are thin so they get soaked pretty quickly, and you need to plan to change them frequently.


Making a Receiving Blanket Diaper
-
1Use a 100% cotton receiving blanket. Receiving blankets are cheap, and cotton is fairly absorbent. You can also use other rectangles of fabric made from terry cloth, flannel, or other absorbent materials.
- Make sure you use a square receiving blanket.
- If you're using another fabric other than a receiving blanket, cut it into a square that's 34–36 inches (86–91 cm) on each side.
-
2Spread the blanket out flat. Use the floor or another large surface. Smooth out any wrinkles in the blanket.
-
3Fold the blanket in half. Take the two right-hand corners of the blanket and bring them to the two left-hand corners so that the blanket is folded in half.
-
4Fold the blanket in half again. This time, take the two top corners and bring them to the two bottom corners to fold the blanket in half again. You should now have a square shape again.
- Smooth out any wrinkles in the blanket after folding it.
-
5Fold one corner to make a triangle shape. Take the top layer of the bottom left corner and pull it towards the right. The corner should lie to the right of the rest of the blanket, and this should form a triangle shape. The blanket should now look like a wide triangle with a square layer underneath the left side.
-
6Flip it over. Grab hold of the bottom right and the top corner of the triangle shape and flip the entire blanket over so that the triangle points down instead of up. Flatten it smooth again.
-
7Fold the square part of the blanket. Grab the two edges on the left of the blanket that make up the square shape. Fold this into a rectangle that lies in the middle of the triangle by folding it over two or three times. This is your diaper shape.
-
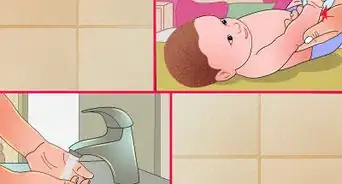
8Use the diaper. You use the diaper by laying your baby so that the wide edge of the triangle is lined up with their waist. Fold the bottom of the diaper up the baby's front side. Fold both sides of the triangle in to meet the front of the diaper and pin them all together over the baby's waist.[2] [3]
- Instead of using pins, you can sew buttons or attach Velcro closures to the diaper.
-
9Put a diaper cover over the blanket. To prevent leaks, use a waterproof diaper cover over the handmade diaper. The cotton blanket is rather thin, which means your child may soak through it quickly. Aim to change the diaper frequently.


Expert Q&A
Did you know you can get expert answers for this article?
Unlock expert answers by supporting wikiHow
-
QuestionWill this leak? Or will it hold waste?
 Catherine Palomino, MSCatherine Palomino is a former Childcare Center Director in New York. She received her MS in Elementary Education from CUNY Brooklyn College in 2010.
Master's Degree, Elementary Education, CUNY Brooklyn CollegeFabric homemade diapers such as T-shirt diapers or receiving blanket diapers are more likely to leak than diapers made with layered prefolds or disposables. To help increase absorbency, change often and add a waterproof plastic diaper cover.
Support wikiHow by unlocking this expert answer.
-
QuestionOf what are the pads made?
 Community AnswerCotton is in the inside, and a plastic wrap is on the outside.
 -
QuestionDo I need a diaper if l am 8?
 Community AnswerMost 8-year-olds don't need diapers. Some might use pull-ups. If you have bladder issues, you might need diapers, but you should talk about this with your parents and/or your doctor.
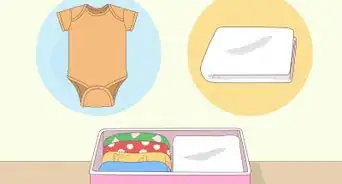
Things You’ll Need
Folding a T-Shirt Diaper
- T-shirt
- Diaper pins or Velcro closures
Making a Receiving Blanket Diaper
- Receiving Blanket
- Diaper pins or Velcro closures


References
About This Article

To make a homemade diaper out of a t-shirt, start by laying a 100 percent cotton short sleeve shirt flat on a surface and fold 1 side over ⅓ of the way. Then, take the other side and make an identical fold so the shirt is in thirds with the sleeves pointed outward in a “t” shape. From there, bring any fabric above the sleeve down over the sleeves and draw the bottom portion up to the bottom of the sleeves. Once the shirt looks like a smaller capital “t” shape, sit your baby just below the sleeves and wrap the sleeves around the back and to the front. To secure the diaper, use diaper pins or Velcro closures. Make sure to place a diaper cover over the top to prevent leaks. For more tips from our co-author, including how to make a diaper out of a receiving blanket, read on.