X
wikiHow is a “wiki,” similar to Wikipedia, which means that many of our articles are co-written by multiple authors. To create this article, volunteer authors worked to edit and improve it over time.
This article has been viewed 163,710 times.
Learn more...
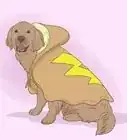
A good coat can keep your canine companion both dry and warm in harsh weather. Making your own dog coat can be somewhat time-consuming, but the process only requires a few supplies and some straightforward sewing.
Steps
Part 1
Part 1 of 6:
Taking Measurements
-
1Measure around the dog's neck. Wrap a soft cloth tape measure around the base of the dog's neck. Add 1 to 2 inches (2.5 to 5 cm) to this measurement to make space for the Velcro.
- Position the tape measure directly beneath the dog's collar, if your dog wears one. Otherwise, wrap the tape around the lowest part of the neck.
- Keep the tape measure fairly loose. You should be able to slide two fingers beneath the tape measure and the dog.
- Adding an extra 1 inch (2.5 cm) should work for most dogs, but if you have a very large dog or a dog that tends to wear down his collars, you might want to add 2 inches (5 cm) to allow for a larger piece of Velcro.
-
2Measure the dog's back. Get your dog to stand, sit, or lie with its back straight. Extend the tape measure from the base of the neck to the base of the tail.
- If your dog has a collar, start the measurement 1 inch (2.5 cm) beneath the collar.[1] Otherwise, start the measurement about 1 inch (2.5 cm) away from the point at which you measured your dog's neck circumference.
- Extend the tape measure to a point roughly 2 inches (5 cm) away from the dog's tail.
Advertisement -
3Measure around the dog's chest. Starting at the midpoint between your dog's shoulder blades, wrap the tape measure around the dog's back, sides, and chest.
- Keep the tape measure directly behind its front legs and perpendicular to the ground.
- Note that this measurement is easiest to obtain when your dog is standing straight.
-
4Measure the front of the dog's chest. Extend the tape measure down from the base of the dog's neck to the bottom of the chest. Keep the tape measure centered vertically along the dog's chest.
- If your dog wears a collar, start this measurement about 1 inch (2.5 cm) beneath the collar. Otherwise, start this measurement about 1 inch (2.5 cm) down from the initial neck circumference measurement.


Advertisement
Part 2
Part 2 of 6:
Drafting the Coat Pattern
-
1Sketch out half the neck circumference.[2] Divide the previously measured neck circumference in half, then draw a curved line matching this newly calculated length.
- Essentially, this line will be a quarter-oval shape; it should look like a tall half shirt collar. The start and end points of this line should not meet in the same place.
- Place this line near the top edge of the drafting paper, with the shorter, rounded portion facing away from the top edge.
-
2Add the back length line. Draw a straight line down the length of the paper matching the previously measured back length. This line should connect to the lower end point of the neck circumference line.
-
3Draw the front chest length line. Sketch a straight line across the top width of the paper matching the previously measured chest length. This line should connect to the upper end point of the neck circumference line.
-
4Match the back length line. Starting at the free end of the chest length line, draw a straight line down the length of the paper. It should run parallel to the back length line and end at the same point at the bottom of the paper.
- Note that you will not use the chest circumference measurement when drafting the coat pattern. You'll only use that measurement when drafting the pattern for the stomach strap.
-
5Round off the pattern. Draw a curved line from the bottom point of the back length line up to a point higher up along the parallel length line.
- This line will roughly follow the curve of the neck circumference, but the two won't be exactly parallel. Consider using a curved object, like a large dinner plate, to guide the direction of this line.
- The back length line should not be altered during this step, but the parallel length line will be.
-
6Add the seam allowance. Measure out 1/4 inch (6 mm) away from all sides of the coat pattern. Draw parallel lines around the entire perimeter at this distance, creating a seam allowance for the coat.
- Note that you should not add the seam allowance to the back length line. This line will sit on a fold in the fabric when you cut out your pieces.
-
7Cut out the pattern piece. Use sharp scissors to cut around the perimeter of the pattern piece along the outermost lines (the back length line and the seam allowance lines).


Advertisement
Part 3
Part 3 of 6:
Drafting the Stomach Strap Pattern
-
1Double the width of the coat pattern. Measure the distance between the back length line and the parallel length line on the coat pattern. Double this amount for use on the stomach strap.
- Note that you should use the original parallel length line and not the seam allowance line.
- This doubled value will indicate how much distance along your dogs back and sides the coat itself will cover. The remaining distance beneath your dog's torso will need to be covered by the length of the stomach strap.
-
2Subtract this new measurement from the chest circumference. Subtract the doubled width from the original chest circumference measurement taken previously. The difference will be the length of the stomach strap.
-
3Draw a rectangle according to the calculated length. Sketch a rectangular stomach strap pattern pieces on an unused portion of drafting paper. The length of this strap should match the newly calculated stomach strap length.
- Note that the width can vary by preference and the size of your dog. For a smaller dog, a width between 2 and 3 inches (5 and 7.5 cm) should suffice. For larger dogs, you may need a strap measuring 4 to 5 inches (10 to 12.5 cm) wide.
-
4Add the seam allowance. Sketch parallel lines around the entire perimeter of the stomach strap, positioning these lines 1/4 inch (6 mm) away from the existing edges. This will be your seam allowance.
-
5Cut out the pattern piece. Use sharp scissors to cut out the stomach strap pattern along the seam allowance line.
- While there's only one stomach strap pattern piece, you'll end up using this pattern piece twice when making the actual coat.


Advertisement
Part 4
Part 4 of 6:
Cutting the Material
-
1Trace the pattern onto excess paper. Before cutting into the material, it's a good idea to create a test pattern out of drafting paper or recycled paper bag material.
- Fold the paper in half and lay the coat pattern piece on top so that the back length line sits directly on the fold of the paper. Trace around the perimeter of the pattern, then cut out the double layer of paper, leaving the fold intact. Unfold the paper only after cutting it out.
- Open the remaining paper and trace two stomach strap rectangles onto the single layer. Cut these rectangles out.
- You should have three pieces: two stomach straps and a full coat body.
-
2Assemble and test the paper coat. Tape the width edge of one stomach strap on each side of unfolded coat piece, positioning the straps about halfway down the sides. Try the test coat on for size.
- The coat should fit comfortably over the back and sides of your dog, and the neck opening should close over the base of the dog's neck with a little overlap. The stomach straps should overlap beneath the dog's chest and sit comfortably behind the dog's front legs.
- Make any necessary adjustments to the placement of the stomach straps and to the size and shape of the overall coat. Once you're satisfied with the way the coat fits, take the tester off your dog. Use these adjusted pattern pieces when cutting out the fabric for the real coat.
-
3Choose water-repellant fabric for the outer coat. Oilcloth and other types of coated cotton work well, but you can also recycle a thick vinyl tablecloth.[3]
- If you plan to use this coat in wet weather, water-repellant fabrics are best for the outer portion of the coat. If your main concern is warmth, however, you could opt for something different. Popular options include cotton, wool, and fleece.
-
4Select warm, soft material for the inner lining. Thin to medium-thickness fleece is soft, warm, and easy to work with. You can buy new fleece or recycle an old fleece blanket.
- The purpose of this lining is to keep the dog warm. If you're mainly interested in keeping the dog dry without worrying about insulation, you could choose a thinner fabric, like a soft cotton. Make sure that this fabric will not be itchy or uncomfortable on your dog.
- If you chose fleece for the outer coat, you may not need to include an inner lining at all.
-
5Cut the pattern out of the outer fabric and inner lining. Use your altered pattern (if applicable) to cut out one body piece and two stomach strap pieces from the coated cotton; repeat with the fleece, as well.
- Follow the same method used when cutting out the paper pattern.
- Fold the fabric and lay the coat pattern on top, matching the fold to the back length line. Cut out the double layer and unfold the fabric when finished.
- Trace two stomach strap rectangles out of a single layer of fabric.
- Follow the same method used when cutting out the paper pattern.


Advertisement
Part 5
Part 5 of 6:
Assembling the Coat
-
1Pin the strap pieces together. For each strap piece, place the outer fleece on top of the inner lining, matching the edges evenly. Pin the two layers together.
- Keep the "right sides" together and the "wrong sides" facing out.
-
2Sew the strap layers together. Using a sewing machine, stitch around each strap piece using a 1/4 inch (6 mm) seam allowance. Sew both long sides and one short side closed; leave one short side open.
- Consider clipping the corners to help the finished straps lie flat.
-
3Turn the straps right-side out. Pull the strap material through the remaining opening so that they are now right-side out. Do this for both straps.
- Press the strap pieces flat using an iron.
- Do not sew the open end closed yet.
-
4Place the straps on the outer fabric. Position both straps over the outer fabric of the coat. Keep the right sides of the material together, and align the open end of each strap to the sides of the coat piece.
- Use the placement of your straps on the test coat to determine where to place the straps on the real coat.
- Pin the straps in place once you're satisfied with the arrangement.
-
5Pin the lining to the outer fabric. Place the inner lining on top of the outer fleece, keeping the edges evenly aligned. Note that the "right sides" of the fabrics should face each other.[4]
- Also note that the stomach straps will be sandwiched in between the two layers.
- Pin these layers in place when ready.
-
6Stitch the layers together. Working with a 1/4 inch (6 mm) seam allowance, sew around nearly the entire perimeter of the coat, stitching the lining and outer fabrics together.
- Leave a 3-inch (7.5-cm) opening at the bottom center of the coat. Do not stitch the layers completely closed.
- Note that you should also sew over the previously open ends of both strap pieces during this step, thereby securing them to the coat body.
- If desired, clip the corners of the material after you finish sewing the layers and before moving onto the next step.
-
7Turn the coat right-side out. Pull all of the material through the bottom opening of the coat so that the coat is right-side out again. The straps should also be on the outside of the coat.
- Press the edges flat using an iron before continuing.
-
8Close the opening. Fold the bottom opening under by 1/4 inch (6 mm) on both sides. Pin it in place, and stitch the opening closed.
- Completing this step should complete the coat assembly. You can topstitch the edges for added security, if desired, but doing so is not strictly necessary.


Advertisement
Part 6
Part 6 of 6:
Adding the Final Touches
-
1Attach Velcro to the neck. Lay the coat flat with the outer side facing up. Attach 1-inch (2.5-cm) wide Velcro to the horizontal edges surrounding the neck opening.[5]
- You can use self-adhesive or sew-in Velcro, depending on your personal preference. The Velcro should be about as wide as the overlap in the neck circumference, and the same length as the horizontal neck edge.
- Stitch the soft side to the inside left edge and the rough side to the outside right edge.
-
2Attach Velcro to the straps. Attach 1-inch or 2-inch (2.5-cm or 5-cm) Velcro to the stomach straps, centering them over the length of each strap piece.
- Use the same type of Velcro used for the neck portion.
- These strips of Velcro should be nearly as long as each strap piece.
- Place the soft side on the inside left strap and the rough side on the outside right strap.
-
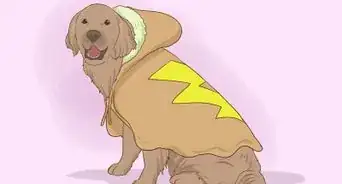
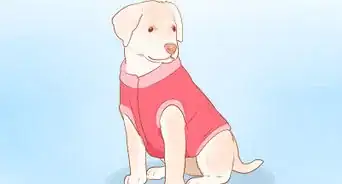
3Put the coat on your dog. Your dog's coat should be finished. Place the coat on your dog and secure the openings around the neck and beneath the stomach using the added Velcro.


Advertisement
Community Q&A
-
QuestionInstead of sewing it, can I use a hot glue gun or fabric glue?
 Community AnswerYes, just be mindful that if your dog consumes any of the glue, this will likely cause digestive issues.
 -
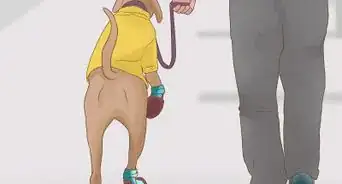
QuestionI have an Italian greyhound, and they are very sensitive to cold. What advice would you give me to make sure she stays warm?
 Community AnswerA dog coat would be great when you go outdoors. Make sure your dog has a warm bed for the cooler months.
 -
QuestionHow can I design this so that it has extra coverage for all four legs?
 EmilyCommunity AnswerI recommend using a stretchy and breathable material if you want to cover the legs. Your dog might have a hard time walking in it, though.
Advertisement
Things You’ll Need
- Soft cloth tape measure
- Drafting paper
- Recycled paper bag
- Pencil
- Scissors
- Tape
- Fabric pencil
- Fabric scissors
- 1 yd (1 m) fleece or other warm fabric
- 1 yd (1 m) coated cotton or other water-resistant fabric
- Straight pins
- Sewing machine
- Thread
- 1-inch (2.5-cm) Velcro, self-adhesive or sew-in
References
- ↑ http://makezine.com/2009/07/21/how-to_country_gent_tweed_coat/
- ↑ http://www.sewdoggystyle.com/2012/09/diy-pet-coat-pattern.html
- ↑ http://www.hgtv.com/design/make-and-celebrate/handmade/sew-a-dog-raincoat-and-collar
- ↑ https://www.pinterest.com/pin/178314466467526259/
- ↑ http://www.sewdoggystyle.com/2012/09/diy-pet-coat-pattern-sewing-it-together.html
About This Article
Advertisement