This article was co-authored by wikiHow Staff. Our trained team of editors and researchers validate articles for accuracy and comprehensiveness. wikiHow's Content Management Team carefully monitors the work from our editorial staff to ensure that each article is backed by trusted research and meets our high quality standards.
The wikiHow Video Team also followed the article's instructions and verified that they work.
This article has been viewed 164,668 times.
Learn more...
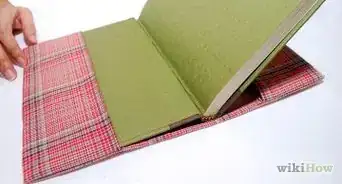
Bookmarks are a great way to mark your place in a book. They can get expensive, however, and the standard, rectangular-shaped ones can get pretty boring. Why not make your own bookmark? With a square sheet of paper, and a few minutes of your time, you can make a neat, triangular bookmark that fits right over the corner of your page. If you aren't comfortable with origami, then there are still other ways to make a bookmark!
Steps
Making an Origami Corner Bookmark
-
1Get some 6 by 6-inch origami paper. Origami paper is the best but if you don't have any origami paper, cut a 6 by 6-inch (15.24 by 15.24 centimeters) square out of thin paper, such as gift wrap, printer paper, or construction paper. Avoid using cardstock or similar material, it is too thick for this project. You can use smaller sizes as long as it is still a perfect square, but it will be smaller.
-
2Fold the paper in half diagonally to make a triangle. Take one of the corners, and fold it towards the opposite corner. Run your fingernail along the crease to make it nice and sharp.Advertisement
-
3Turn the triangle so that it is upright. The straight, folded edge should be facing you. The point tip should be facing away from you.
-
4Fold one of the pointy tips down towards the bottom fold. You'll notice that your triangle has two layers of paper. You are only folding one of those layers. When you are done folding, your paper should still be shaped like a triangle, but with a smaller, upside-down triangle inside it. This will create a "pocket" for your bookmark.
-
5Fold the bottom corners of the triangle up towards the top point. Take the left bottom corner, and fold it towards the top of the triangle. Make sure that the edges align, then run your fingernail along the crease to sharpen it. Repeat this step for the other side. You will end up with a diamond shape.
-
6Fold both corners back down towards the inside of the triangle. Take the first corner you just folded, and fold it half-way inside the triangle. Be sure to tuck it under the "pocket." Repeat this step for the other corner.[1]
-
7Decorate the bookmark, if desired. You can decorate it with stickers, or even draw a face on it to make it look lime a monster chomping down on the corner of your page. You colour use different colours to resemble different animals.
-
8Let the bookmark dry, if needed, before using it. If you just used stickers to decorate your bookmark, then you are good to go. If you used pens or markers to decorate it, however, you might want to let it dry a little so that the wet ink doesn't transfer onto your book.

Making a Simple Corner Bookmark
-
1Get some 6 by 6-inch (15.24 by 15.24 centimeters) origami paper. You can also use just about any other type of paper for this, including cardstock, construction paper, or even plain old printer paper. You can also make the square smaller, but it must be a perfect square.
-
2Fold paper in half diagonally to make a triangle, then unfold it. Take the bottom left corner, and fold it towards the top right corner. Run your fingernail along the crease to make it nice and sharp. Unfold the paper when you are done.
-
3Fold the paper in half diagonally the other way, and unfold it again. Take the bottom right corner, and fold it towards the upper left corner. Run your fingernail along the crease, then unfold the paper. You should now have an X in the middle of your paper.
-
4Cut out one of the triangles on your paper formed by the X. If you take a look at your paper, you'll see four triangles, all pointing towards the middle. Cut one of those triangles out, using the creases as a guide. You will now have a center triangle, and two side flaps.
-
5Fold down one of the side flaps. Take the left side flap, and fold it down onto the triangle, following the crease you made earlier.
-
6Put some glue or double-sided tape on top of the side flap you just folded down. A glue stick will be the least messy, but you can also use liquid glue if you are careful. If you are using double-sided tape, make sure that you put the tape all along the edges.
- If you are using liquid glue, consider brushing it on in a thin layer using a paintbrush.
-
7Fold other flap down on top of the glue or tape. You should now have a triangle shape. Run your finger over the triangle to seal the glue or tape. Then, run your fingernail all around the edges to sharpen them.
-
8Decorate your bookmark, if desired. You can leave your bookmark as is, or you can decorate it further with stickers. You can also write a meaningful message or quote on it, or even draw a picture.
-
9Let the bookmark dry, if needed, before using it. If you just used tape, then your bookmark is ready to go. If you used glue, paint, or markers to decorate it, however, you might want to give the bookmark a little time to dry. This way, you won't ruin the pages of your book.

Making a Duct Tape Corner Bookmark
-
1Cut two 2½ by 2½-inch (6.35 by 6.35 centimeters) squares out of a sheet of paper. Try to use a sturdy sheet of paper, such as cardstock or even an index card. If you absolutely can't get any, use regular printer paper.[2]
-
2Draw a diagonal line across one of those squares. The line should go from the bottom left corner to the top right corner. This will be your cutting line. Leave the other square blank.
-
3Cut along the line that you drew. You will end up with two triangles. Discard one of those triangles. You will only need one.
-
4Cover both sides of the blank square with duct tape, trimming off any excess tape. Place the square on a piece of duct tape, then trim off any excess tape. Flip the paper over, and repeat this step for the other side.
-
5Place the triangle on top of a 3½-inch (8.89 centimeters) long strip of duct tape, with the point touching the top edge. Cut a 3½-inch (8.89 centimeters) long strip of duct tape, and set it down in front of you, sticky-side-up. Carefully place the paper triangle on top of it, with the tip of the triangle touching the top edge of the tape. You will have some tape sticking out from under the triangle.[3]
- Make sure that you are putting the triangle right in the middle of the tape.
-
6Fold the excess tape at the bottom over onto the triangle. Make sure that the bottom edge of the triangle is in the crease of the tape. Be careful not to fold the paper.[4]
-
7Place the square on top of the triangle. Make sure that one of the corners of the square is aligned with the top point of the triangle. You should see a diamond shape with two flaps of tape sticking out to either side of it.
-
8Fold the flaps of tape down. Take the left flap of tape, and fold it down onto the square. Then, take the right flap, and fold it down onto the square as well.[5]
-
9Use your bookmark. Flip the bookmark over. You'll have a diamond shape with a pocket at top. You can now slide this pocket over the page you want to mark.

Community Q&A
-
QuestionCan origami paper be used for this method?
 Community AnswerYes, origami paper can be used.
 -
QuestionCan I use crayons instead of pens and markers?
 Community AnswerYes, you can.
 -
QuestionHow do I make the monster teeth for the first method?
 Community AnswerStick on little paper triangles in the pocket, make them stick out a little!
Things You'll Need
Making an Origami Corner Bookmark
- 6 by 6-inch (15.24 by 15.24 centimeters) origami paper
Making a Simple Corner Bookmark
- 6 by 6-inch (15.24 by 15.24 centimeters) origami paper
- Double-sided tape or glue stick
Making a Duct Tape Corner Bookmark
- Duct Tape
- Cardstock
- Scissors
- Pen or pencil
- Ruler
- Crafting Board


References
- ↑ http://onecreativemommy.com/quick-and-easy-minion-bookmark-craft-for-kids/
- ↑ http://duckbrand.com/craft-decor/activities/corner-bookmark
- ↑ http://duckbrand.com/craft-decor/activities/corner-bookmark
- ↑ http://duckbrand.com/craft-decor/activities/corner-bookmark
- ↑ http://duckbrand.com/craft-decor/activities/corner-bookmark
About This Article

To make a quick and easy corner bookmark, grab a 6-inch by 6-inch (15.24 x 15.24 cm) square of origami paper. Fold the paper in half from corner to corner to make a triangle, then unfold it. Fold it the other way and then unfold it again, so that there are creases running between each pair of corners in the shape of an X. Cut out one of the triangles of paper between the creases. Fold down one of the side flaps over the triangle opposite the one you cut out. Cover the flap you just folded down with double-sided tape or a thin layer of glue, then fold the other side flap down on top of it. Now you should have a triangular pouch that you can use as a corner bookmark. If you like, decorate it with drawings, stickers, or pretty calligraphy. To learn how to make a corner bookmark using index cards and duct tape, scroll down!