This article was co-authored by wikiHow Staff. Our trained team of editors and researchers validate articles for accuracy and comprehensiveness. wikiHow's Content Management Team carefully monitors the work from our editorial staff to ensure that each article is backed by trusted research and meets our high quality standards.
There are 10 references cited in this article, which can be found at the bottom of the page.
The wikiHow Video Team also followed the article's instructions and verified that they work.
This article has been viewed 140,258 times.
Learn more...
There’s nothing quite like the taste of a good-quality chocolate bar, made just the way you want it. While some store-bought candy might satiate your sweet tooth, it might use low-grade, too-sweet chocolate that leaves you disappointed. By knowing how to make your own chocolate from cacao nibs or cocoa powder, or even how to mold pre-processed chocolate into snack-sized, customizable bars, you can have the chocolatey treat to perfectly indulge your cravings.
Ingredients
- 1/4 cup (40g) of cocoa butter
- 1/2 cup (60g) of cacao nibs
- 1/4 cup (25g) of powdered sugar
- 1/4 cup (50g) of coconut oil
- 1/4 cup (30g) of cocoa powder
- 1 1⁄2 tablespoons (22 ml) of maple syrup
- 1 1⁄2 tablespoons (22 ml) of honey
- 1⁄2 teaspoon (2.5 ml) of vanilla extract
- 10 ounces (280 g) of chocolate (dark, milk, or white)
- Toppings or flavorings
Steps
Using Cacao Nibs and Cocoa Butter
-
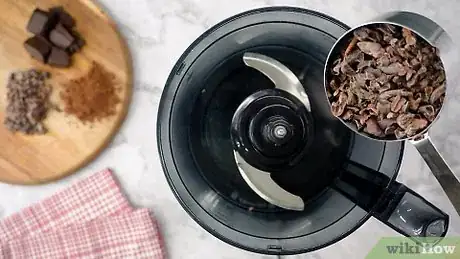
1Blend ½ cup (60g) of cacao nibs into a paste. Cacao nibs have a dense, rich, chocolate flavor, and will give you the best homemade chocolate as a result. Pour the cacao nibs into a food processor or blender and turn it to the highest setting. Continue processing the nibs until they are ground into a fine paste.[1]
- Cacao nibs can be difficult to find in some parts of the world but should be available at your local health food stores or online. If you can’t find cacao nibs, try a different method to make your own chocolate bars.
-
2Add ¼ cup (25g) of powdered sugar to the cacao. Pour the powdered sugar into the food processor or blender with the cacao paste. Turn the blender or processor to a medium speed until the two ingredients are fully mixed.[2]
- If you prefer a sweeter chocolate bar, add a little more powdered sugar. Anywhere between ¼ cup (25g) and ½ cup (50g) will keep the consistency of your bar right while changing the sweetness.
Advertisement -
3Melt ¼ cup (40g) of cocoa butter. Scoop around ¼ cup (40g) of cocoa butter into a small bowl and melt it, either in the microwave or over a double boiler. Make sure the butter is entirely melted.[3]
- Cocoa butter should be available from your local gourmet or health food store. It is also available online.
-
4Pour the melted cocoa butter into the food processor. Leave the food processor or blender running and start slowly streaming in the melted cocoa butter. Keep blending until all of the ingredients are combined and you have a smooth mixture.[4]
- The amount of cocoa butter needed will vary based on the amount of powdered sugar used in the recipe. Add it in slowly until you reach a smooth texture that will be just pourable.
-
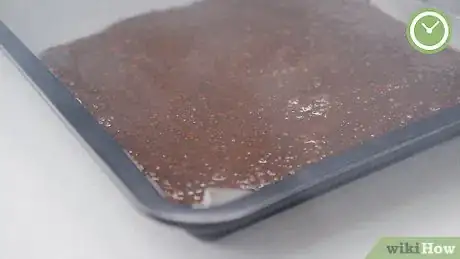
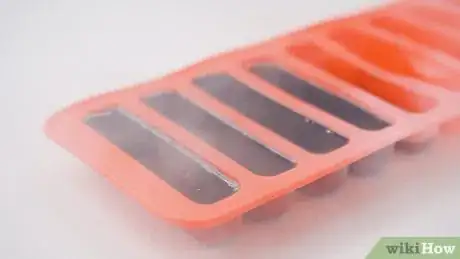
5Pour your chocolate mixture into molds or onto a baking sheet. For a traditional chocolate bar, pour your chocolate onto a parchment paper lined baking sheet and spread to all corners. If you want more interesting or varied shapes, look for silicone or chocolate molds available from homeware and cooking stores.[5]
-
6Freeze your chocolate for 3 to 4 hours or until completely firm. Carefully transfer your chocolate molds to the freezer and leave for several hours or overnight. This will freeze the cocoa butter and solidify your mixture into chocolate bars.[6]
-
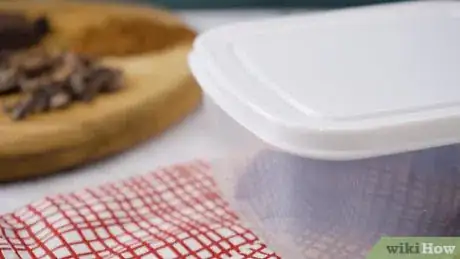
7Remove the chocolate from the molds and store for up to 3 weeks. Once the chocolate is completely solid, remove the mold from the freezer and pop the chocolates out. Transfer to a plastic bag or container and store for up to 3 weeks.[7]
- As cocoa butter has a melting point around 36 °C (97 °F), it is best to store it in the refrigerator until you are ready to eat it. This will give you a similar snap to processed chocolate.[8]
Using Cocoa Powder and Coconut Oil
-
1Melt 1/4 cup (50g) of coconut oil in a small saucepan. Measure the coconut oil into a small saucepan and transfer it to the stove. Put the saucepan over a medium heat and let the coconut oil melt, stirring occasionally.
- While almost any coconut flavor will be disguised by the chocolate, you might be able to detect a few hints of it in the finished chocolate. If you don’t have coconut oil or don’t like the taste of it, you can use the same amount of cocoa butter instead.[9]
-
2Sift 1/4 cup (30g) of cocoa powder into the coconut oil. Measure out the cocoa powder and carefully sift it into the melted coconut oil, removing any lumps as you go. Use a wooden spoon to stir the two ingredients together until fully combined.
- Use the highest quality, unsweetened cocoa powder you can find when making your own chocolate. This will be the majority of the flavor in your bars, so poor-quality cocoa powder will result in poor-quality chocolate.
- Although it won’t be quite as good as chocolate made with cacao nibs, cocoa powder is considerably easier to find. Both methods will still create delicious homemade chocolate.
-
3Stir the sweeteners and vanilla extract into the chocolate mixture. Add 1 1⁄2 tablespoons (22 ml) each of honey and maple syrup to the saucepan, before mixing in 1 teaspoon (4.9 ml) of vanilla extract. Stir the mixture thoroughly until all the ingredients are fully combined and the chocolate is homogenous.
- Run your measuring spoon or cup under hot water before using it to scoop up the honey or maple syrup. The residual heat will prevent them from sticking to the spoon and will make it much easier to get into the saucepan.
- The vanilla extract won’t add a strong vanilla flavor to your chocolate, it will only bring out the chocolatey-ness of the cocoa powder. If you have a particularly strong aversion to it, you can leave it out of the recipe.
-
4Pour the chocolate into molds. Remove the chocolate mixture from the heat and carefully pour into your selected molds. For a traditional chocolate bar shape, use a lined, square baking tray that you can cut chocolate bars out of later.
- Specialty chocolate molds should be available from your local homeware or cooking store. Find ones with cool shapes for some unique chocolate creations.
-
5Freeze the chocolate for 15 minutes or until hardened. Carefully transfer your chocolate molds or baking sheet to the freezer and leave the bars to set for at least 15 minutes. You can store the chocolate in its molds, or remove them and keep your bars in a plastic bag in the freezer for around 1 month.
Tempering and Molding Chocolate Bars
-
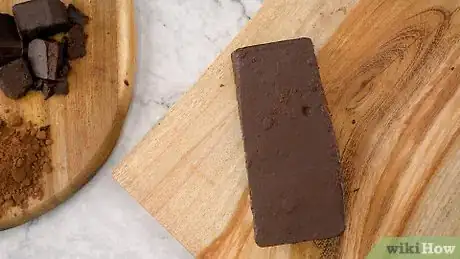
1Choose an unwaxed chocolate designed for melting. The chocolate you start with will be the base of your custom molded or flavored final bars. Use high-quality, unwaxed chocolate designed for melting and tempering to get the best results. Look around your local supermarket or specialty cooking store for the best chocolate you can find.[10]
- Tempering is a process of raising and lowering the temperature of chocolate to emulsify the cocoa solids with the cocoa butter. Tempering chocolate will give it a shinier and all around better final appearance, as well as preventing white marks from “blooming” on the chocolate.[11]
- The best type of chocolate for tempering comes in the form of “fèves”, which are pre-tempered disks of chocolate. These will be easiest to temper and should be available from specialty stores or online.
- If you don’t want to temper your chocolate, simply melt it over a low heat or in a microwave.
-
2Cut the chocolate into small pieces around 1⁄2 inch (1.3 cm) in size. By finely chopping the chocolate, it will melt much more quickly. Make sure your chocolate is cut into similar sized pieces to ensure it melts at the same speed.[12]
-
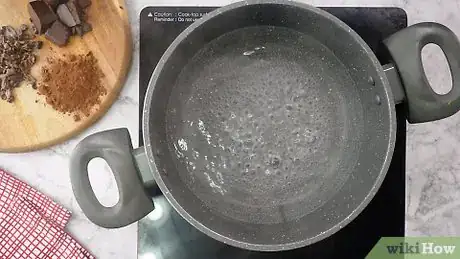
3Bring a pot of water to a simmer. Fill a small pot with around 1 inch (2.5 cm) of cold water and put it over a low heat. Wait for the water to come to a simmer, but make sure the heat isn’t too high that it could start to boil.[13]
-
4Keep 1/4 of your chocolate chilled for “seeding”. “Seeding” is a method of tempering where cold chocolate is used to lower the temperature of the already melted chocolate. Transfer ¾ of your chocolate into a dry glass or metal bowl that can sit over the top of your pot. Store the rest in your refrigerator to lower its temperature.[14]
- Make sure your chocolate does not come in contact with any water at any point in the tempering process, or else it will "seize". Seized chocolate becomes thick, grainy and unworkable for making into chocolate bars. Keep the seized chocolate to make brownies or something similar, and use new chocolate to restart the tempering process.[15]
- You don’t need to be exact with the amounts of chocolate you melt and chill. A close guess will work just fine.
-
5Place the bowl of chocolate over your pot of water. This is a double-boiler set-up that will evenly and slowly apply heat to the chocolate to begin melting it. Set the bowl over the mouth of the pan. Let the chocolate melt slowly, stirring it if needed to make sure every piece of chocolate is melted.[16]
-
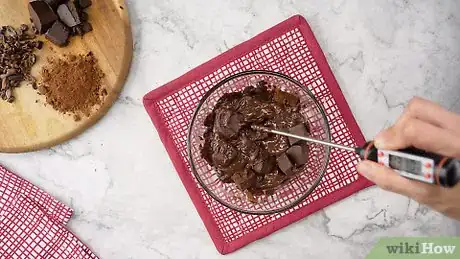
6Check the temperature of the chocolate as it melts. Getting the chocolate to the right temperature is a key part of tempering it. Check the temperature of the chocolate until it reaches the level needed for the type of chocolate you are using.[17] Here are a few guidelines for different types of chocolate:
- Dark chocolate will need to reach a temperature around 55 °C (131 °F).
- Milk chocolate and white chocolate are more sensitive, so they only need to reach 45 °C (113 °F).
-
7Remove the bowl from the heat to seed your chocolate. Once the melted chocolate has reached the right temperature, remove it from the top of the pot. Begin lowering the temperature of the melted chocolate by adding small amounts of the remaining, chilled chocolate.[18] Stir constantly with a thermometer as you do this until it reaches the right temperature:
- Dark chocolate needs to be lowered to a temperature of 28 °C (82 °F).[19]
- Milk and white chocolate need to be lowered to a temperature of 27 °C (81 °F).
-
8Put the chocolate back over the pot to raise its temperature. Keep stirring with the thermometer as you raise the temperature of the chocolate slightly higher once again.[20] Here are the temperatures for different chocolates:
- Dark chocolate needs to be brought back up to a temperature of 32 °C (90 °F).
- Milk and white chocolate need to reach a temperature of 29 °C (84 °F).
- Only use a low heat. If you raise the temperature too much over the one needed, you’ll have to raise it back up to the initial temperature and repeat the process.
-
9Pour the chocolate into a silicon mold or rimmed baking tray. This will be the shape in which your final chocolate bar is set. Silicon molds can give you fun and interesting chocolate shapes, or you can use an edged baking tray to create a slab that can be cut up into smaller bars after it sets.[21]
- Silicon molds and chocolate molds should be available from local homeware and cooking stores in a variety of shapes and sizes.
- If you notice any air bubbles in the chocolate as you transfer it, tap the tray or mold on your counter 2 or 3 times. This will pop the air bubbles and give your finished chocolate a smoother texture.
-
10Refrigerate the chocolate until it is set. Carefully transfer your tray of chocolate to the fridge, making sure not to spill any as you shift it. Leave it to chill for around 5 minutes or until the bars firm up.[22]
- If you’re using untempered chocolate, it may take longer for the bars to set up.
-
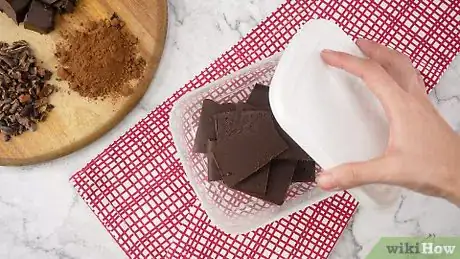
11Store the bars in a cool, dry place for up to a month. Tempered chocolate can be kept at around room temperature without melting for around a month. If you live in a warmer climate, it might be better to keep your bars in the fridge until you’re ready to eat them.[23]
- Untempered chocolate bars will need to be stored in the refrigerator in order to prevent them from melting.
Flavoring Your Chocolate Bars
-
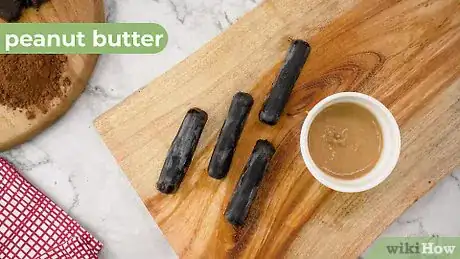
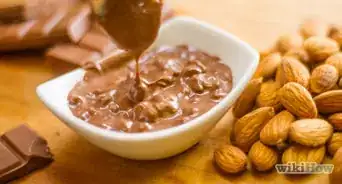
1Mix peanut butter into the melted chocolate for some subtle nuttiness. While the chocolate or chocolate mixture is still melting, stir in a few spoonfuls of peanut butter until the mixture is smooth again. This will add a delicious hint of peanut butter to your finished chocolate bars.
-
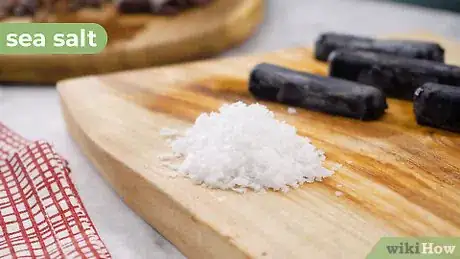
2Add some sea salt for a sweet and salty taste. Sprinkle a little finely ground sea salt over your chocolate bars immediately after pouring them into the molds. The salt will add a little more complexity to your bars, as well as enhancing the deliciously pure chocolate flavor.
-
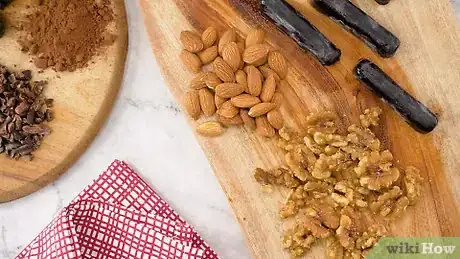
3Mix in some toasted nuts for an extra crunch. In a dry frying pan, lightly toast some peanuts, almonds, coconut, or whatever other types of nut you like. Scatter them over the bottom of your chocolate molds before pouring in your chocolate for an extra nutty crunch when biting in your finished chocolate bars.[24]
-
4Add some dried fruit to your chocolate for a tangy chew. Finely cut up a few chunks of your dried fruit of choice and place one or two pieces into each chocolate mold. This will help balance out the richness of your chocolate, as well as adding a freshness to cut through some of the sweetness.[25]
- Apricots, cherries, cranberries, or figs would all be excellent additions to your chocolate bars. Make sure not to use anything with a high water content, as this can cause your chocolate to seize and become unworkable.
Community Q&A
-
QuestionHow many hours does it take to make one?
 Community AnswerIt takes less than an hour if you use chocolate chips.
 -
QuestionHow do I make it into separate bars?
 Community AnswerYou simply cut it into the size and shape bars you want, after it's come to room temperature.
 -
QuestionHow do I add fillings to my chocolate bars?
 Joseph HendrenCommunity AnswerPour a little chocolate into the base of your mold. Choose your filling and push it into the chocolate, and then fill the mold up until the filling is covered.
Warnings
- Never let chocolate come into contact with water, as this will cause it to seize up and ruin your bars. Keep this in mind when thinking of things to add, as anything with a high water content may ruin your chocolate.⧼thumbs_response⧽
Things You’ll Need
For Chocolate from Cacao Nibs
- Cacao nibs
- Cocoa butter
- Powdered sugar
- Saucepan
- Wooden spoon
- Food processor or blender
- Chocolate mold
For Chocolate from Cocoa Powder
- Cocoa powder
- Coconut oil
- Maple syrup
- Honey
- Vanilla extract
- Saucepan
- Wooden spoon
- Chocolate mold
For Tempering and Molding Chocolate Bars
- Chocolate
- Knife
- Chopping board
- Pot
- Metal or glass bowl
- Refrigerator
- Wooden spoon
- Candy or catering thermometer
- Mold or baking tray
References
- ↑ https://nourishingjoy.com/homemade-chocolate-bars-fair-trade/
- ↑ https://nourishingjoy.com/homemade-chocolate-bars-fair-trade/
- ↑ https://nourishingjoy.com/homemade-chocolate-bars-fair-trade/
- ↑ https://nourishingjoy.com/homemade-chocolate-bars-fair-trade/
- ↑ https://nourishingjoy.com/homemade-chocolate-bars-fair-trade/
- ↑ https://nourishingjoy.com/homemade-chocolate-bars-fair-trade/
- ↑ https://nourishingjoy.com/homemade-chocolate-bars-fair-trade/
- ↑ https://hypertextbook.com/facts/2004/HarveyLei.shtml
- ↑ https://nourishingjoy.com/homemade-chocolate-bars-fair-trade/
- ↑ https://www.thekitchn.com/how-to-temper-chocolate-without-a-thermometer-cooking-lessons-from-the-kitchn-196475
- ↑ https://www.davidlebovitz.com/tempering-choco/
- ↑ https://www.davidlebovitz.com/tempering-choco/
- ↑ https://www.epicurious.com/recipes/food/views/how-to-temper-chocolate-356869
- ↑ https://youtu.be/iFFQGUqQnEA?t=34s
- ↑ https://www.thekitchn.com/how-to-temper-chocolate-without-a-thermometer-cooking-lessons-from-the-kitchn-196475
- ↑ https://youtu.be/iFFQGUqQnEA?t=45s
- ↑ https://www.bbcgoodfood.com/howto/guide/how-temper-chocolate
- ↑ https://www.thekitchn.com/how-to-temper-chocolate-without-a-thermometer-cooking-lessons-from-the-kitchn-196475
- ↑ https://www.bbcgoodfood.com/howto/guide/how-temper-chocolate
- ↑ https://youtu.be/iFFQGUqQnEA?t=1m36s
- ↑ https://www.davidlebovitz.com/how-to-make-chocolate-bars-recipe/
- ↑ https://www.davidlebovitz.com/how-to-make-chocolate-bars-recipe/
- ↑ https://www.davidlebovitz.com/how-to-make-chocolate-bars-recipe/
- ↑ https://www.davidlebovitz.com/how-to-make-chocolate-bars-recipe/
- ↑ https://www.davidlebovitz.com/how-to-make-chocolate-bars-recipe/
- ↑ https://www.davidlebovitz.com/how-to-make-chocolate-bars-recipe/
About This Article
To make a chocolate bar, start by melting ¼ cup of coconut oil in a small saucepan over medium heat. Then, sift ¼ cup of cocoa powder into the coconut oil, and stir until smooth. Next, add 1 ½ tablespoons of honey, 1 ½ tablespoons of maple syrup, and 1 teaspoon of vanilla, and mix thoroughly. After that, pour the mixture into molds, or a lined baking tray. Finally, freeze your chocolate for at least 15 minutes before eating it, or storing it for up to 1 month in the freezer. To learn how to make a chocolate bar using cacao nibs and cocoa butter, scroll down!
