This article was co-authored by Maha Mohamed. Maha Mohamed is a Custom Dessert Artist and the Owner of Sweet Treats SJ. Maha has over ten years of experience creating custom treats for special occasions. She specializes in custom cakes, cupcakes, cookies, and chocolate-covered treats.
This article has been viewed 430,141 times.
Dyeing chocolate is a useful art that lets you use melted chocolate to create more artistic and visually interesting outcomes for your candy making or chocolate coatings. So, how do you go about adding color to chocolate? If you don't use the right type of food coloring, you risk ruining the melted chocolate. While coloring chocolate isn't an easy job, if you take your time, you can finish with end results that look like the work of a pro.
Steps
-
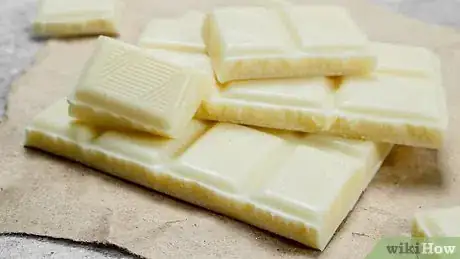
1Obtain white chocolate. Chocolate that is milk brown or dark brown will not show the true color of most dyes––you'll end up with murky black or deep brown colors instead. However, if your recipe calls for a different type of chocolate and insists that it will work, follow the recipe in preference to this general rule.
-
2Melt the chocolate. Chocolate can be melted in one of the following ways:[1]
- Use a microwave, on medium power, in 10-second increments to melt the chocolate to a smooth consistency.[2]
- Use a double boiler or a metal pot filled with water and a glass bowl to melt the chocolate over low heat.[3]
- Use a dry oven, set to 110ºF (43ºC) to melt the chocolate. It will take about an hour to melt using this way. If your oven does not go this low, use the lowest temperature setting and leave the oven door open a little bit.
Advertisement -
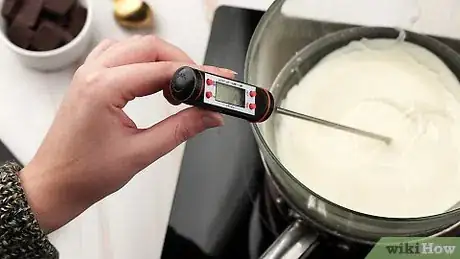
3Check the temperature of the melted chocolate using a chocolate or candy thermometer. These thermometers will provide temperatures in 1 degree increments, allowing better control than the standard candy thermometer. The ideal temperature for the chocolate will depend on the chocolate treat you're making.
-
4Move the melted chocolate from the melting vessel to a dry bowl if you want to add coloring separately. If making several different colors, divide the chocolate evenly among bowls for each color.
-
5Add a small amount of either powdered- or oil-based food coloring. If the colorant comes with instructions for creating a certain color, follow those amounts. Remember that you can always add more but not remove too much already added, so add it gradually.[4]
-
6Mix the colorant into the chocolate with a plastic spatula. Changing the color of chocolate should be done slowly, to get the color spread evenly throughout.
-
7Check the chocolate's color. If the color is not right yet, consider adding a little more color to the chocolate and mixing it again. Add the colorant a little a time to ensure you get the exact color you are looking for.
-
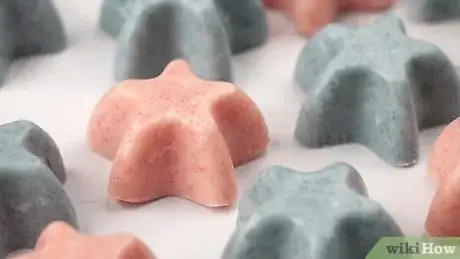
8Pour the colored chocolate into molds and store accordingly, or continue with the dessert-making process specific to your chocolate treat, such as dipping or rolling in the chocolate.[5]
Community Q&A
-
QuestionWhy will the chocolate will seize if colored with water-based food coloring?
 Community AnswerChocolate has fat (cocoa butter) in it. When then water can penetrate the ionic bonds of the lipids (fat), the chocolate separates and loses its consistency. If the chocolate gets too hot, the fat molecules will be so spread out and loose that the water can repel it in such a way that the cocoa solids appear to seize.
 -
QuestionWhat kind of food coloring should I use?
 Community AnswerFor chocolate, you'll need to add either powdered- or oil-based food coloring. You cannot use water-based food coloring because this will cause the chocolate to seize. The powdered- and oil-based kinds of food colorings will add color without ruining the texture of the chocolate.
 -
QuestionWhat primary colors can I add to white chocolate melts to get pale lavender or lilac?
 Community AnswerRed and blue (to make purple), but do not put in a lot or you'll end up with a striking purple. Experiment with a sample so you don't ruin a batch.
Warnings
- Do not use water-based food coloring, as a small amount of water in the chocolate will make it seize. Seized chocolate becomes hard and difficult to work with. In many cases, seized chocolate will be rendered useless. Take care to ensure your utensils are dry as well, to prevent water from coming in contact with the chocolate.⧼thumbs_response⧽
- Adding too much oil-based colorant can create a bitter taste in the final product. It may also change the color of your mouth and teeth when it is eaten.⧼thumbs_response⧽
- Using the wrong type of chocolate for your application can create problems as you learn how to add food coloring to melted chocolate. If the recipe calls for a certain type of chocolate, use it or look for a valid substitution. Don't grab whatever you can find, or it may cause the recipe to fail.⧼thumbs_response⧽
Things You'll Need
- Double boiler (optional)
- Pot filled with water and glass bowl (optional)
- Oven-safe bowl (optional)
- Melted chocolate
- Powdered or oil-based food coloring
- Plastic spatula
- Chocolate thermometer
- Mixing bowls
References
- ↑ https://www.tasteofhome.com/article/how-to-melt-chocolate-5-easy-ways/
- ↑ https://www.thekitchn.com/how-to-melt-chocolate-in-the-microwave-252065
- ↑ https://www.thekitchn.com/the-best-way-to-melt-chocolate-alice-medrichs-smart-easy-method-expert-tip-197405
- ↑ https://www.youtube.com/watch?v=8IZcvHJQJBk
- ↑ https://hungryhappenings.com/chocolate-making-tips/how-to-color-white-chocolate-paint-candy-molds/
- ↑ https://www.thekitchn.com/how-to-temper-chocolate-without-a-thermometer-cooking-lessons-from-the-kitchn-196475
About This Article
To dye chocolate, melt white chocolate in a microwave or double boiler until it reaches a smooth consistency. Next, transfer the melted chocolate to separate bowls depending on how many colors you plan to create. Then, add a small amount of powdered or oil-based food coloring to each bowl and stir it in with a spatula, gradually adding more until the chocolate reaches the desired hue. Finally, pour the chocolate into molds and store it accordingly, or continue with your dessert recipe. For more tips on melting white chocolate, read on!
