This article was co-authored by Shun Pittman. Shun Pittman is a Master Cosmetologist, Author, Owner, and Founder of Corps d’Elite Salon and Corps d’Elite Beauty. With over 25 years of international experience, she is dedicated to and specializes in providing luxury salon services to all hair types and textures and every skin tone and shade. Her services include hair conditioning treatments, cutting, coloring, styling, extensions, and makeup application. Shun has experience working with, coaching, training, and mentoring beauty professionals from multiple companies including L'Oréal, Wella, Matrix, Paul Mitchell, Redken, Big Sexy Hair, and Toni & Guy. She is also a host for national and local media outlets and her work has been featured in The Washingtonian, The Cheddar Network, and WJLA Good Morning Washington's Beauty and Fashion Police segments. Shun is the author of “50 Things Your Hairdresser Wants YOU to Know (and a few things we don’t...)".
This article has been viewed 896,352 times.
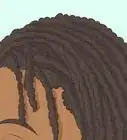
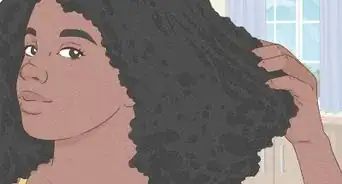
Many straight-haired people look on afros with jealousy. It may seem difficult, but it is possible to train your straight hair into a luxuriously full afro by getting a perm. You can also do it at home by braiding your hair. Perms create more of a tightly curled afro look, while the braiding method will give you a crimped wave pattern. [1] So the best way to decide which method is right for you is to decide what kind of style you want to achieve.
Steps
How to Get Started
-
1Select the style you want for your afro hair. Once you know the look you are going for, you can figure out the best way to try and achieve it. You will want to figure out if your desired style will require you to grow or trim your hair. If so, it is better to trim your hair beforehand so you have less hair to transition into your afro look.
-
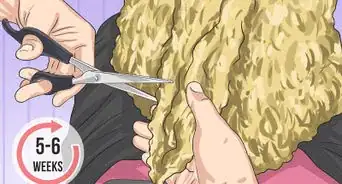
2Trim or grow your hair to the desired length. To create an afro with straight hair, it is best to start with at least 4-6" of length.[2] Your hair needs to be long enough to braid or put in rods. If your hair is longer than 12" in length, you may want to trim the hair if your goal is to achieve an afro that stands up.Advertisement
-
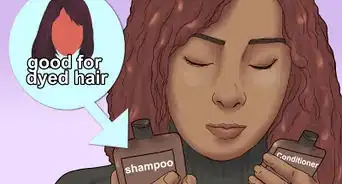
3Wash your hair with your regular shampoo. Rinse your hair thoroughly. It is important to start with clean hair that is free of natural oils. Clean hair will also make it easier to work with your hair when putting it in braids or rollers.


How to Perm
-
1Get a perm at a salon. Observe the techniques the stylists use. Watch how they put the curlers in your hair. That way, even after your perm grows out, you can temporarily get tight curls at home by wrapping your hair around small perm rods while it's wet.[3]
- If your hair is chemically treated—like it's been colored or relaxed—a perm may not be the best solution for you. The additional chemicals can damage your hair and cause it to break. However, you can still get a temporary set with perm rods.[4]
-
2Request the smallest possible curlers. Your stylist will use a series of plastic perm rods to give you a perm. Small rods are best to create the tightest afro. If the rods are too big, your perm will only achieve a wavy look instead of the afro look you are going for.
-
3Wait a few days to allow the perm to settle. Don't shampoo or comb your hair for a day or two immediately after your perm. Letting the perm settle will help the effects of the perm to last longer and keep your hair healthy.
-
4Comb out your curls with a wide-toothed pick comb to separate the curls. The goal is to loosen up the curls just enough to make it possible to backcomb.
- You can also use your fingers to gently separate the curls.
-
5Expand the curls by combing with a fine-tooth comb. You can also use a 3-row teasing brush. This will further separate the curls and give your hair a fuller afro look.[5]
- Hold a small section of hair taut with your fingers. Smaller sections will make for greater volume in your hair but will take a bit longer to do.
- Use a fine-toothed comb or 3-row teasing brush to gently comb the hair downward toward your scalp. Use just enough pressure to create some tangles, but not so much that the hair breaks.
- Repeat until the section has the desired volume.
-
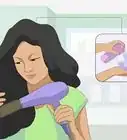
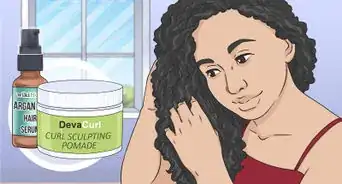
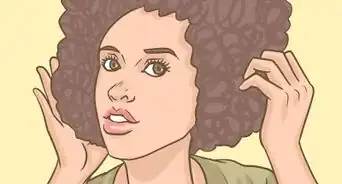
6Style your afro. Ditch your combs! Shape your afro hair with your hands and a pick comb. Only apply hairspray to help it hold if needed. Since curly hair tends to get dry, you can apply a light shine spray regularly to help keep your hair moisturized and glossy.


How to Braid
-
1Part your hair into at least 6 or 8 even sections, going from your forehead back to your neck. Use a comb to achieve a precise part. Working with hair that is slightly damp might make it easier as well. You can use hair ties or clips to hold the sections as you create them.
-
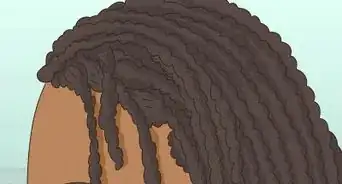
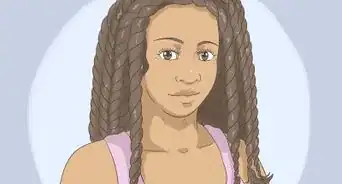
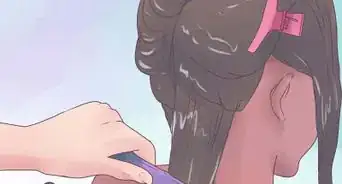
2Cornrow each section of hair. Ask for help if you have a hard time braiding your own hair. Depending on how many sections you decide to braid, this step could take several hours, so you might appreciate the help and the company.
- If your braid is thicker than a half inch, you need to section off your hair in smaller widths. A braid that is too thick will only achieve wavy hair. Make smaller sections of tighter braids to give yourself the fullest afro possible.
-
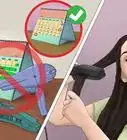
3Wet your hair again and apply styling product. A volumizing mousse or setting lotion will help to create firm, long-lasting curls.
- To simplify this step, you can make a solution of 20% setting lotion or gel and 80% water and saturate the braids with the solution.[6]
-
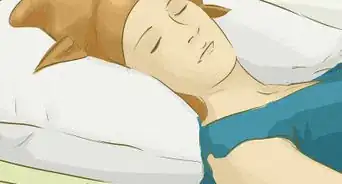
4Cover your hair with a satin scarf until dry.
- Start with wet or damp hair before bed. If you have fine hair, you may be ready to finish your afro when you get up in the morning.
- If you don't want to wait for your hair to air dry, you can use a hair dryer to dry the braids faster.
-
5Remove the braids. Make sure the braids are completely dry before taking them out. If your hair seems tangled, apply a pea-sized amount of a moisturizer like shea or coconut butter to the remaining braids to make the rest of the process easier.
-
6Tousle your hair with your fingers. If you have long hair, bend over and let the weight of your hair and gravity help the process. Your hair should appear much more crimped than before.
-
7Backcomb any areas that need more volume. If there are any areas where you feel like your afro looks a little flat, use your fine-tooth comb or 3-row teasing brush to add extra volume at the roots. Repeat until your hair has the desired fullness.
- Do not use too much pressure when backcombing. You don't want the hair to break.
-
8Set with styling product if needed. A little hairspray is all you need to hold your afro in place. You can carry a pick comb around to keep your afro detangled and looking fabulous everywhere you go.


Expert Q&A
-
QuestionHow do I do this myself with rollers at home?
 Shun PittmanShun Pittman is a Master Cosmetologist, Author, Owner, and Founder of Corps d’Elite Salon and Corps d’Elite Beauty. With over 25 years of international experience, she is dedicated to and specializes in providing luxury salon services to all hair types and textures and every skin tone and shade. Her services include hair conditioning treatments, cutting, coloring, styling, extensions, and makeup application. Shun has experience working with, coaching, training, and mentoring beauty professionals from multiple companies including L'Oréal, Wella, Matrix, Paul Mitchell, Redken, Big Sexy Hair, and Toni & Guy. She is also a host for national and local media outlets and her work has been featured in The Washingtonian, The Cheddar Network, and WJLA Good Morning Washington's Beauty and Fashion Police segments. Shun is the author of “50 Things Your Hairdresser Wants YOU to Know (and a few things we don’t...)".
Master Cosmetologist, Global Salon Educator & AuthorFirst you'll need to see your stylist for the right haircut and texture. Then, you can set your hair with small rollers, rods, or drinking straws. Shampoo your hair first and then condition it. Select a firm-hold setting lotion to apply to your hair. You may want to add a little lubrication and shine by using a lightweight oil or serum. Section the hair into small sections. Then, roll each section onto the selected tool (making certain the ends are smooth—otherwise the set will be frizzy). Once each strand of hair is secured on your tool of choice, allow the hair to dry completely (a hooded hair dryer will dry the hair the fastest). When your hair is dry, remove each tool. You’ll have a head of hair with tight curls. Use a little more serum or oil to help with the styling process, then, using your fingers or a very large tooth comb, dismantle each curl so it expands. Shape the finished look as desired. The setting will last until your next shampoo. -
QuestionHow long will the curls last on the braiding method?
 Community AnswerThis is all dependent on your type of hair; thin hair may only last a day or two, while curls in thicker hair may last several days.
 -
QuestionDo I have to cut my hair to go natural?Community AnswerYes if you had previously permed your hair. As your hair grows over time, you get "new growth", which is the hair closest to your scalp, which also has you natural hair texture. Ccut the hair that has already been permed (this is the hair that is away from your scalp) a little bit at a time until your natural textured grows back to the desired length.
Warnings
- Don't experiment with products of which you are unsure.⧼thumbs_response⧽
- Both permanent waves and backcombing can do harsh damage to your hair.⧼thumbs_response⧽
- Take extra care with wearing cornrows long-term (though overnight should be fine). If you do not have enough sebum coming out of your scalp to do it safely naturally, you need to use an oil (such as an oil or jojoba), and quite a bit, in order to be safe! If you do not, your cornrows will contract when you wet them while swimming, out in the rain, or bathing/showering. This can lead to severe skin irritation and in extremely rare cases your scalp tearing.⧼thumbs_response⧽
- If you don't have extremely curly hair, it will not come naturally.⧼thumbs_response⧽
Things You'll Need
- Pick comb
- Small curlers
- Setting lotion or volumizing mousse
- Hair ties or clips


References
- ↑ http://www.hairfinder.com/hair2/afro.htm
- ↑ http://www.ehow.co.uk/how_2272724_make-straight-hair-afro.html
- ↑ Shun Pittman. Master Cosmetologist, Global Salon Educator & Author. Expert Interview. 14 April 2021.
- ↑ Shun Pittman. Master Cosmetologist, Global Salon Educator & Author. Expert Interview. 14 April 2021.
- ↑ http://www.modernmom.com/a8706be8-3b45-11e3-8407-bc764e04a41e.html
- ↑ http://www.hairfinder.com/hair2/afro.htm
About This Article

To make your straight hair into afro hair, first wash it with your regular shampoo to remove any natural oil. While it's still damp, separate it into 6 sections and French braid each piece. Then, wet your hair again and apply a styling product, like setting gel, before covering your hair with a silk scarf. Once your hair is dry, remove the braids and tousle your hair using your fingers, which should make it look a lot more curly than before. Alternatively, if it's not curly enough for your liking, set it in position with hairspray. For tips on how to create an afro by using a perming kit, read on!