This article was co-authored by Emily Margolis. Emily Margolis is a baking entrepreneur in Baltimore, MD. With over 15 years of baking experience, she founded Baking with Chef Emily in 2018, offering private baking lessons in the D.C. area.
There are 8 references cited in this article, which can be found at the bottom of the page.
wikiHow marks an article as reader-approved once it receives enough positive feedback. In this case, 82% of readers who voted found the article helpful, earning it our reader-approved status.
This article has been viewed 226,291 times.
If your recipe calls for self-rising flour, and you only have all-purpose at home, there is no need to panic. It is quite simple to make your own self-rising flour using ingredients you likely have at home. This article will show you how to do that. It will also show you how to make a gluten-free variation for those who have allergies.
Ingredients
- 1 cup (150 grams) of all-purpose flour
- 1½ teaspoons (6 g) of baking powder
- ¼ - ½ (1.4-2.8 g) teaspoon of salt
- ¼ teaspoon (1.25 g) of baking soda (optional)
- 1 ¼ cup (170 g) of brown rice flour
- 1 ¼ cup (205 g) of white rice flour
- 1 cup (120 g) of tapioca flour
- 1 cup (165 g) of sweet/glutinous rice flour
- 2 scant teaspoons (15 g) of xanthan gum
- 6 ¾ teaspoons (31 g) of baking powder
- 1 ⅛ teaspoon (6.3 g) of salt
Steps
Making Basic Self-Rising Flour
-
1Start with 1 cup (150 g) of all-purpose flour. Sift the flour into a large mixing bowl. If your recipe calls for more flour, simply increase the proportions.
-
2Add 1½ teaspoons (6 g) of fresh baking powder. Make sure that the baking powder is fresh. If the baking powder is not fresh, your self-rising flour will not work as well.[2]Advertisement
-
3Add ¼ to ½ teaspoon (1.4-2.8 g) of salt. Take a look at your recipe. If your recipe already contains salt, about ¼ teaspoon (1.4 g) of salt added to your all-purpose flour will do. If your recipe does not contain salt, bump it up to ½ teaspoon (2.8 g) of salt.
-
4Include ¼ teaspoon (1.25 g) of baking soda if your recipe calls for buttermilk, cocoa, or yogurt. These ingredients require a little extra raising power. The baking soda (in addition to the baking powder) will give them just that.[3]
- If you are not baking with buttermilk, cocoa, or yogurt, you do not need to add the baking soda.
-
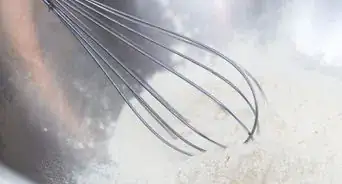
5Sift the ingredients together to make sure they are evenly combined. Use a whisk or fork to mix them together.
-
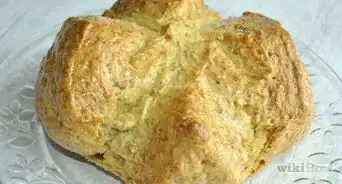
6Use the flour in your recipe. Keep in mind, however, that store-bought self-rising flour is made from a slightly different wheat. Whatever you are baking will not be quite as tender.
- You should be able to use your homemade self-rising flour for a variety of recipes calling for standard self-rising flour, including biscuits and dumplings.
-
7Store any leftover flour in an airtight container, and write the expiration date. Note the expiration date on your baking powder. This is when your self-rising flour will expire too. Copy the expiration date from your baking soda into your self-rising flour container.[4]


Making Gluten-Free Self-Rising Flour
-
1Combine the flours in a large mixing bowl. You’ll need 1 ¼ cup (170 g) of brown rice flour, 1 ¼ cup (205 g) of white rice flour, 1 cup (120 g) of tapioca flour, and 1 cup (165 g) of sweet/glutinous rice flour. Mix them together using a whisk or fork until they are evenly combined.
-
2Add the xanthan gum. You will need just a little less than 2 teaspoons (15 g).[5] Again, make sure that you mix it in well.
-
3Prepare the rising agent. In a separate bowl, combine the baking powder and the salt. You will need about 6 ¾ teaspoons (31 g) of baking powder and 1 ⅛ teaspoon (6.3 g) of salt. If you won't be using all of your gluten-free flour mix, use 1 ½ teaspoons (6 g) of baking powder and ¼ teaspoon (1.4 g) of salt for each 1 cup (120 g) of flour.[6]
-
4Sift the rising agent into the flour. Mix the two together using a whisk or fork until everything is evenly combined.
-
5Use the flour in your recipe, and store any leftover flour in an airtight container. Take note of the expiration date on your box of baking powder. This is when your self-rising flour will expire. You might want to copy this date down onto the container you will be keeping your flour in. When you are done, put the container in a cool, dark place.

Community Q&A
-
QuestionHow long I can use homemade self raising flour?
 Community AnswerSelf rising flour will typically last 3 to 4months, sometimes longer.
Warnings
- Your homemade self-rising flour will not last forever. It contains baking soda, which loses some of its raising abilities over time. The longer your flour sits, the less your cakes will rise.⧼thumbs_response⧽
- Store-bought self-rising flour is made from a softer wheat than all-purpose flour. This helps make baked goods more tender. Adding baking powder to all-purpose flour will give you similar results, but the final baked good will not be as tender.[9]⧼thumbs_response⧽


References
- ↑ http://addapinch.com/cooking/how-to-make-self-rising-flour/
- ↑ http://www.myrecipes.com/how-to/cooking-questions/self-rising-flour-substitute
- ↑ http://www.nigella.com/kitchen-queries/view/Self-Raising-Flour/3056
- ↑ http://www.artofglutenfreebaking.com/2012/06/self-rising-flour-gluten-free/
- ↑ http://www.artofglutenfreebaking.com/2009/11/the-story-behind-my-gluten-free-flour-mix/
- ↑ http://www.artofglutenfreebaking.com/2012/06/self-rising-flour-gluten-free/
- ↑ http://bakingbites.com/2007/08/what-is-self-rising-flour/
- ↑ http://nourishingjoy.com/homemade-self-rising-flour/
- ↑ http://www.epicurious.com/ingredients/substitute-flour-all-purpose-cake-self-rising-article
About This Article

To make self-rising flour, first add 1 cup (120 g) of all-purpose flour to a mixing bowl. Then, add 1 ½ teaspoon (6 g) of baking powder and ¼ teaspoon (1.25 g) of salt. Whisk the ingredients together for 1 minute. If you need more self-rising flour, just use 1 ½ teaspoon (6 g) of baking powder and ¼ teaspoon (1.25 g) of salt for every 1 cup (120 g) of all-purpose flour you’re using. To learn more from our Baker co-author, like how to make gluten-free flour, keep reading the article!