This article was co-authored by wikiHow Staff. Our trained team of editors and researchers validate articles for accuracy and comprehensiveness. wikiHow's Content Management Team carefully monitors the work from our editorial staff to ensure that each article is backed by trusted research and meets our high quality standards.
There are 16 references cited in this article, which can be found at the bottom of the page.
The wikiHow Video Team also followed the article's instructions and verified that they work.
This article has been viewed 40,262 times.
Learn more...
Mints are a delicious treat. They are sweet, cool, and refreshing. There are lots of different ways of making mints, from hard peppermint candies to the soft, crumbly mints often found at weddings and graduation parties. They are easy to make and even more delicious to eat! Not only do they make a great treat for parties, but they also make wonderful gifts!
Ingredients
- 3½ cups (790grams) sugar
- 1 cup (240 milliliters) light corn syrup
- 1 cup (240 milliliters) water
- ¼ to ½ teaspoon peppermint oil
- 1 teaspoon food coloring (optional)
Makes 32 candies
- ½ cup (115 grams) salted butter, softened
- 16 ounces (453 grams) confectioners’ sugar, plus extra for dusting
- 2 tablespoons (30 milliliters) heavy cream or milk
- 1 teaspoon (7.5 milliliters) mint extract
- 7 to 12 drops food coloring (optional)
Makes 4 to 5 dozen candies
- 3 ounces (85 grams) cream cheese, softened
- 1 tablespoon (15 grams) butter, softened
- 3 cups (375 grams) confectioners' sugar
- 2 drops peppermint oil
- Gel food coloring (optional)
- Granulated or confectioners' sugar, for dusting
Makes 4 to 5 dozen candies
Steps
Making Hard Mint Candy
-
1Grease a large baking sheet and set it aside. You can grease the baking sheet using cooking spray or some cooking oil (such as canola or vegetable).
-
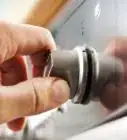
2Clip a candy thermometer to the side of a saucepan. You can get one at any cooking supply store or online. Some arts and crafts stores may also sell them in their baking department. If you absolutely cannot get one, don't worry; you will still be able to make hard mint candies.Advertisement
-
3Stir together the sugar, light corn syrup, and water over low heat. Add the sugar, light corn syrup, and water to the saucepan and turn the heat to low. Keep stirring until the sugar dissolves.[4]
- Make sure that you are using light corn syrup and not dark. It will show up nice and clear, which is important if you wish to color your candy.
-
4Turn the heat up to medium-high and let the mixture reach the hard-crack stage, between 300°F and 310°F (150°C and 155°C).[5] Do not stir the mixture during this time.[6] Also, keep an eye on your candy thermometer. The temperature will rise slowly at first, but then it will jump very quickly to the necessary temperature.[7]
-
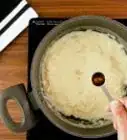
5Take the pot off the burner and stir in the peppermint oil. At this point, you can also stir in the food coloring. Blue or green make great colors for mint candy!
-
6Pour the mixture onto the baking sheet. If you need to, use a rubber or silicone spatula to help spread the mixture across the baking sheet. You don't have to spread it from edge to edge or be perfectly neat, but you want the sheet to be somewhat thin.
-
7Cut the candy into small squares or rectangles using a sharp knife or pizza cutter. Aim to make the squares about 1 inch (2.54 centimeters) big. You might also find it easier to lightly score the lines first, then cut them using a pizza cutter.[10]
-
8Let the candy harden before removing it from the tray. If you need to, separate the squares or rectangles using a knife or your fingers.[11]
-
9Store the candy in an airtight container. This is very important. If the container is not airtight, moisture will get into the candy and make it sticky.


Making Buttermints
-
1Line two large baking sheets with parchment paper and set them aside. If you don't have any parchment paper, you can use wax paper or even plastic wrap. You will be setting the finished mint onto this to dry.
- Plan ahead: avoid making these if it is humid. The moisture will make the mints stickier than usual.[12]
-
2Beat the butter until it is creamy. Cut the softened butter into smaller cubes and place it into a large bowl. Beat the butter using an electric mixer until it is soft any creamy. If you don't have an electric mixer, you can also use a food processor.
-
3Mix in the sugar, heavy cream, and mint extract using a low-speed setting. Don't worry if the mixture doesn't form a dough-like texture yet. Hold off on adding the food coloring just yet; you will be kneading it into the mixture later.
-
4Lightly dust your work surface with confectioners' sugar. This will prevent the dough from sticking to it. Be sure to have the box or bag of confectioners' sugar on hand; you will likely need more of it.
-
5Turn the sugar mixture onto the dusted surface and knead it until it is smooth and silky. At this point, you can also add some food coloring. You can use either gel or liquid, but many people find that gel works better. Simply add 1 to 2 drops of food coloring and knead it into the dough until it is evenly mixed in.[13]
-
6Roll out a small amount of the dough into a thin rope. Lightly dust your work surface with more confectioners' sugar. Take about 2 tablespoons worth of the dough, and roll it into a ½-inch (1.27 centimeters) thick rope.
- Keep the rest of the dough you aren't working with covered with a damp towel. This will prevent it from drying out too soon.
-
7Cut the rope into smaller pieces. Each piece should be between ½ and ¾-inch (1.27 and 1.91 centimeters) long.[14]
-
8Place the cut mints onto the baking sheet. Use a spatula to transfer them. The mints will be very soft at this point, and if you use your fingers, you might squish them.
-
9Keep rolling and cutting the dough until you have nothing left. Remember to keep the dough you aren't rolling and cutting under a damp towel, or it will harden and dry out too fast.
-
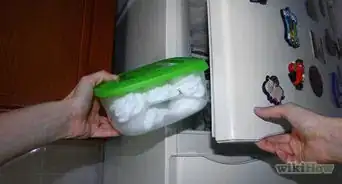
10Let the mints dry for 1 to 2 days, then store them in the fridge in an airtight container.[15] It might also be a good idea to store them in between layers of parchment paper. This will prevent the mints from sticking to each other.[16]
- Because these mints are made of butter, they will soften up again at room temperature. It is important to keep them cool.


Making Cream Cheese Mints
-
1Beat the cream cheese, butter, and peppermint oil together in a large bowl. You can do this using an electric mixer or even a spatula. Make sure that everything is evenly combined.
-
2Mix in the confectioners' sugar. Keep beating until the mixture turns dough-like. It will feel hard and dry at first, but it will soften after about 1 to 2 minutes. If it is still too hard, add in 1 tablespoon of milk and mix again.[17]
-
3Turn the dough onto a work surface dusted with confectioners' sugar and knead it until it is smooth. At this point, you can also add in some food coloring. You can use liquid or gel good coloring, but you might find more success with gel. You don't need much; only a few drops should be plenty. Keep kneading the dough until all the ingredients come together, and the dough is silky-smooth.
-
4Roll the dough into small balls. The balls should be small—roughly the size of marbles. You will only need about ½ teaspoon to make each mint.[18]
-
5Roll the balls in sugar. Fill a shallow dish with granulated or confectioners' sugar. Gently roll the balls one by one in the sugar before placing them back onto the wax paper.[19]
-
6Flatten each ball slightly or push it into a mint mold. You can do this with your fingertip, the back of a spoon, a fork, etc. Don't flatten the balls so much that they are flat like a pancake. If you are using a mint mold, simply push the ball into the mold, smooth down the back, and pop it out.[20]
-
7Transfer the mints to a sheet of wax paper or parchment paper and let them dry for a few hours. If you are in a hurry, you can also leave them to harden in the fridge or freezer; this will only take about 2 hours.[21]
-
8Store the mints in the fridge in an airtight container. These mints are based on cream cheese, so they will go bad if they are left out at room temperature for too long. You might also want to place a sheet of parchment paper between each layer of mint candy; this will prevent the candies from sticking together.


Community Q&A
-
QuestionWhy won't my cream cheese mints get hard?
 AnonymousSuperWriterCommunity AnswerMaybe you forgot to put the cream cheese into the refrigerator overnight. If you didn't do that, and the cream cheese still is not hard, freeze until it becomes solid.
 -
QuestionCould I pour the mix into silicone holders for the hard mint one?
 Community AnswerYes, as long as you can still cut it to the size you want the mints to be in.
Warnings
- If it is warm in your home, keep the buttermints and cream cheese mints in the fridge or they will melt.⧼thumbs_response⧽
- Be careful when dealing with hot elements.⧼thumbs_response⧽
Things You'll Need
Hard Mint Candy
- Candy thermometer
- Saucepan
- Large baking sheet
- Sharp knife or pizza cutter
- Airtight container for storing
Buttermints
- 1 to 2 large baking sheets
- Electric mixer
- Smooth working surface
- Wax paper or parchment paper
Cream Cheese Mints
- Electric mixer
- Smooth working surface
- Wax paper or parchment paper

References
- ↑ http://www.tasteofhome.com/recipes/christmas-hard-candy
- ↑ http://www.womansday.com/food-recipes/food-drinks/recipes/a11147/butter-mint-pillows-recipe-122510/
- ↑ http://allrecipes.com/recipe/9441/cream-cheese-mints/
- ↑ http://asouthernfairytale.com/2013/11/02/how-to-make-cinnamon-candy/
- ↑ http://www.recipetips.com/kitchen-tips/t--1459/how-to-test-stages-of-sugar.asp
- ↑ http://asouthernfairytale.com/2013/11/02/how-to-make-cinnamon-candy/
- ↑ http://momofftrack.com/2015/12/how-to-make-hard-candy/
- ↑ http://www.offthemeathook.com/2011/11/22/top-tip-tuesday-getting-accurate-candy-temperatures-without-a-thermometer/
- ↑ https://www.exploratorium.edu/cooking/candy/sugar-stages.html
- ↑ http://www.tasteofhome.com/recipes/cinnamon-hard-candy
- ↑ http://www.tasteofhome.com/recipes/cinnamon-hard-candy
- ↑ http://sweets.seriouseats.com/2012/12/bake-the-book-buttermints.html
- ↑ http://www.seriouseats.com/recipes/2012/12/buttermints-candy-recipe.html
- ↑ http://www.womansday.com/food-recipes/food-drinks/recipes/a11147/butter-mint-pillows-recipe-122510/
- ↑ http://www.womansday.com/food-recipes/food-drinks/recipes/a11147/butter-mint-pillows-recipe-122510/
- ↑ https://neverendingyarn.wordpress.com/2008/11/21/butter-mints/
- ↑ http://www.southernplate.com/2014/12/cream-cheese-mints.html
- ↑ http://pintsizedbaker.com/cream-cheese-mint-roses/
- ↑ http://www.skiptomylou.org/how-to-make-cream-cheese-mints/
- ↑ http://pintsizedbaker.com/cream-cheese-mint-roses/
- ↑ http://tatertotsandjello.com/2014/12/happy-holidays-cream-cheese-mints.html
- ↑ http://momofftrack.com/2015/12/how-to-make-hard-candy/
- ↑ http://pintsizedbaker.com/cream-cheese-mint-roses/
- ↑ http://www.womansday.com/food-recipes/food-drinks/recipes/a11147/butter-mint-pillows-recipe-122510/
About This Article